



Install and Set Up AffiliatePress
Installing and activating the AffiliatePress WordPress affiliate plugin only takes a few minutes.
Whether you’re installing AffiliatePress for the first time or updating an existing installation, this guide explains every step of the process.
We’ll show you how to install the Lite or Pro version, activate your license, update the plugin safely, install addons and complete the setup so your affiliate program is ready to launch.
Before You Begin
If you’re installing AffiliatePress for the first time, make sure your website meets the basic requirements listed below for a smooth installation and setup process:
- A WordPress website with administrator access.
- WordPress 5.3 or later (tested up to WordPress 7.0)
- PHP 7.0 or later.
- An active AffiliatePress Pro license if you’re installing the Pro version.
- The downloaded AffiliatePress plugin ZIP file from the AffiliatePress official site.
- Latest supported WooCommerce or the plugin of your choice installed.
If everything above is set, you’re ready to install AffiliatePress. Just follow the steps below.
How to Install the AffiliatePress Plugin
AffiliatePress comes with a Lite Version and three pro versions. Thus here’s how to install the plugin as per the version you’re using.
Install AffiliatePress Lite
AffiliatePress Lite is the free version of the plugin and is available directly from the AffiliatePress website.
If all above requirements are met, simply follow the steps below to install AffiliatePress Lite:
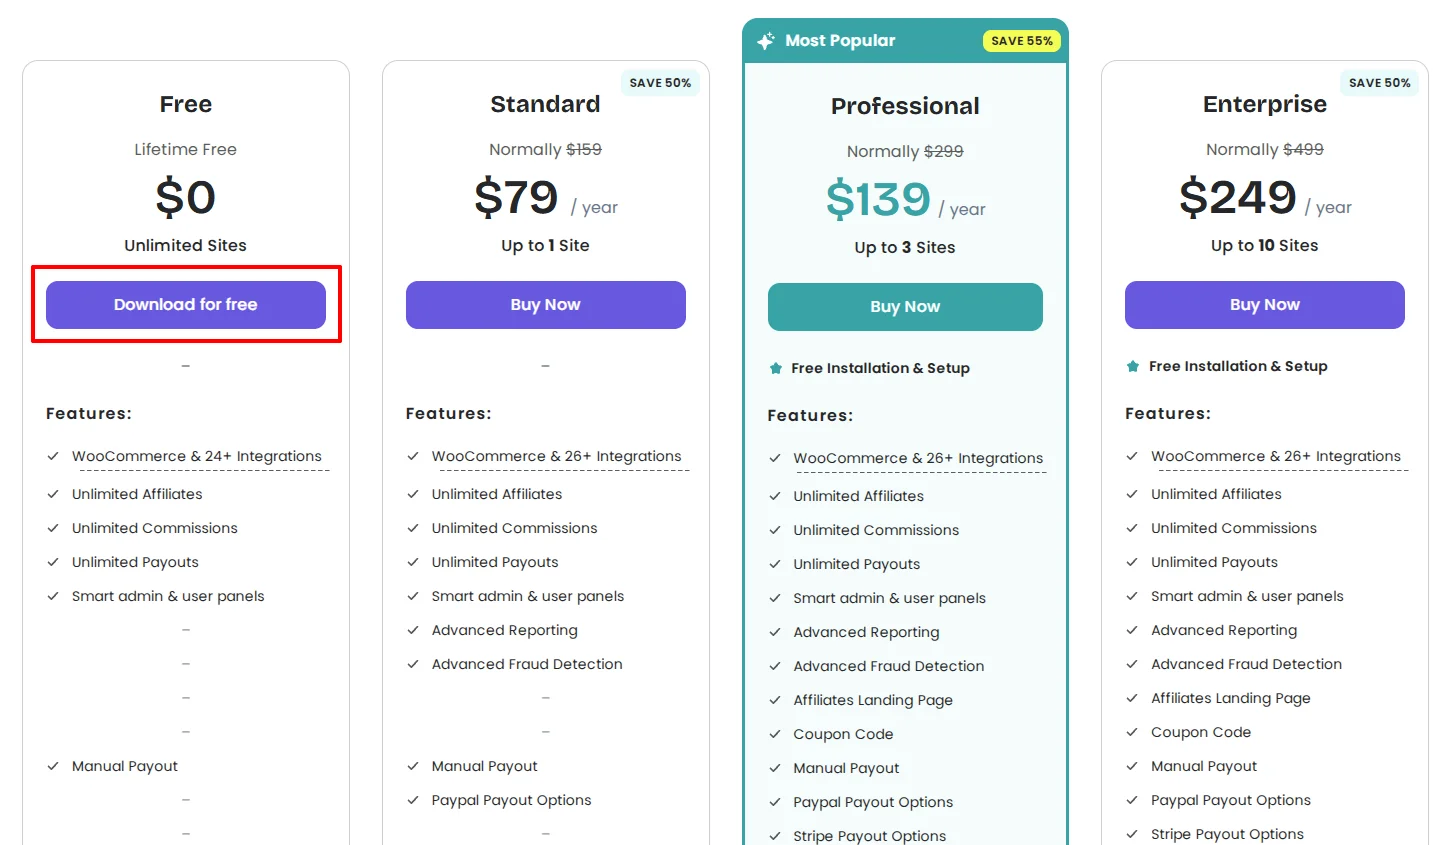
- Firstly, visit the AffiliatePress website and click on the “Download For Free” button to download the latest version of AffiliatePress Lite ZIP file.
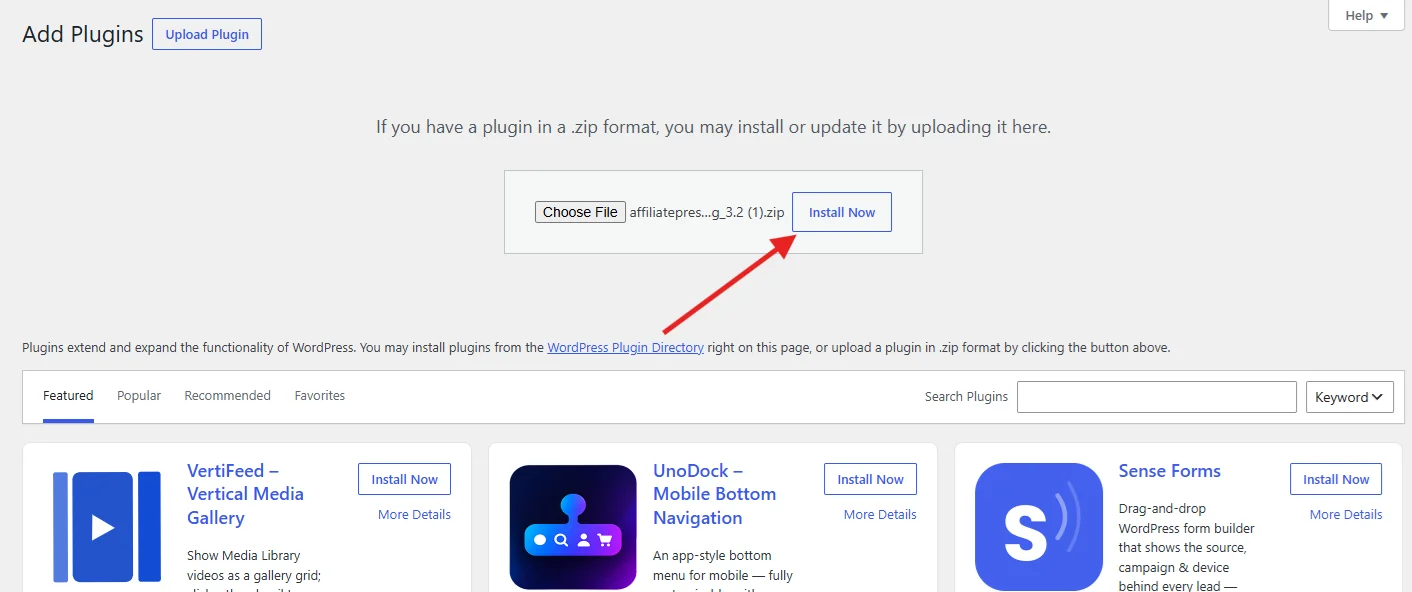
- Next log in to your WordPress Dashboard, and go to Plugins → Add New → Upload Plugin.
- Then, click Choose File and select the downloaded AffiliatePress Lite ZIP file
- Now hit the Install Now.
- After the installation is complete, click on the Activate Plugin.
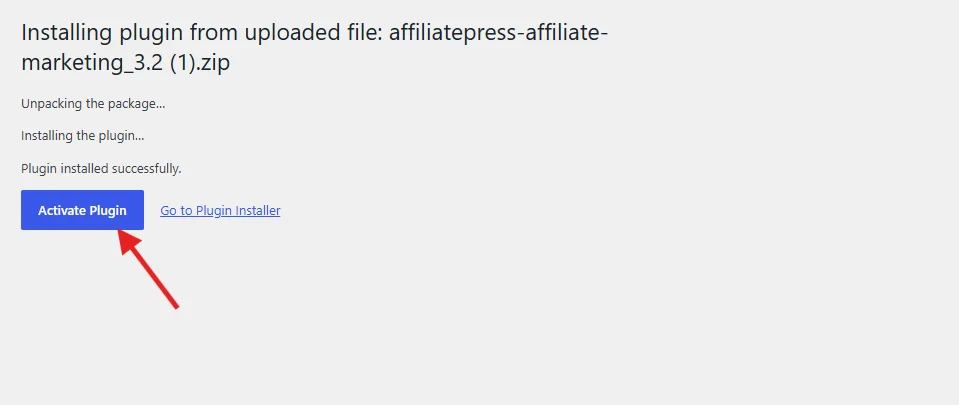
Now, AffiliatePress Lite will appear in your WordPress dashboard and is ready to use.
Install AffiliatePress Pro
AffiliatePress Pro can be downloaded from your AffiliatePress account after purchasing a license.
- First of all, log in to your AffiliatePress account.
- Once logged in, open My Account → My Downloads. Here you’ll see all of your available downloads, including the core AffiliatePress Pro plugin.
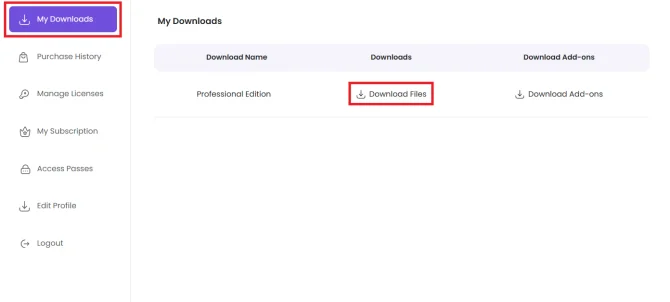
- So, look for the Core AffiliatePress pro version and click on Download Files to download the latest AffiliatePress Pro ZIP file.
That’s it. Now that you have the Zip file of the AffiliatePress pro version, head back to your WordPress dashboard and install it the same way you did with the AffiliatePress Lite Zip file.
- Log in to your WordPress Dashboard (If you haven’t already).
- Go to the Plugins → Add New → Upload Plugin.
- Simply upload the downloaded zip file of the pro version.
- Then, click on the Install Now, followed by Activate Plugin.
After activation, the AffiliatePress menu will appear in your WordPress dashboard.
From there, its smart setup wizard will guide you to configure settings, create affiliates and manage your affiliate program.
How To Activate the AffiliatePress License
After you install and activate the AffiliatePress Pro plugin at your WordPress dashboard, you’ll need to get your license key and activate it.
Step 1: Copy Your License Key
- Firstly, log in to your AffiliatePress account.
- Go to My Account → Manage License.
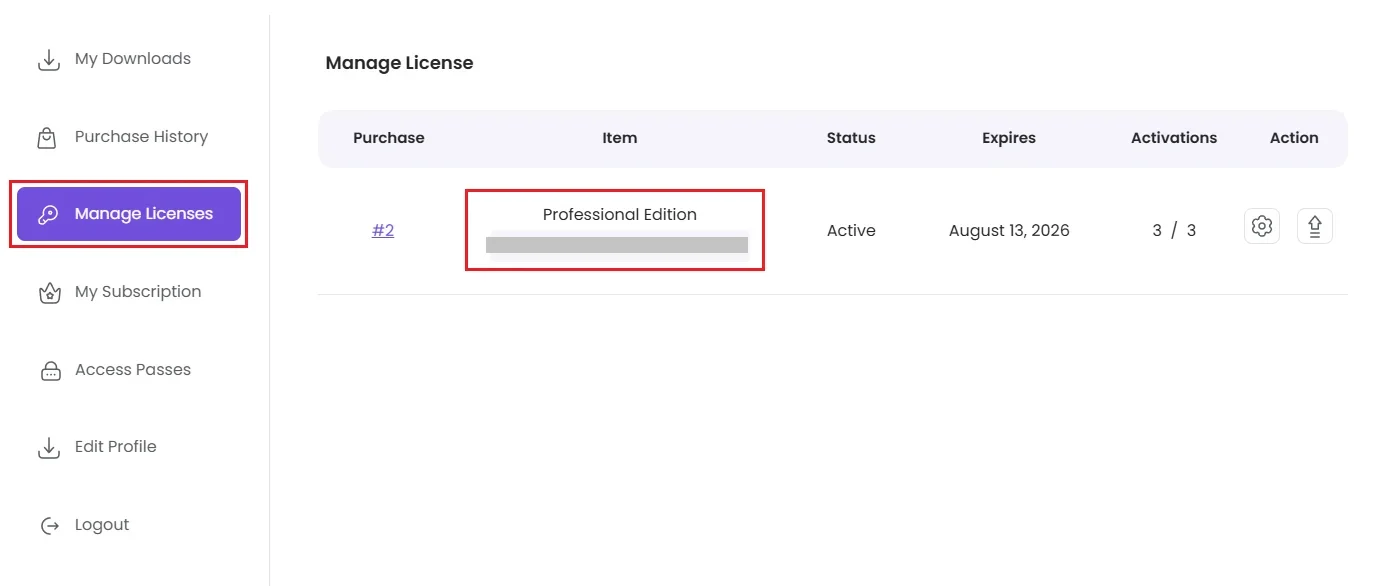
- From here, copy the license key for your AffiliatePress Pro purchase.
Step 2: Activate the License in WordPress
- Head back to your WordPress Dashboard
- Go to the AffiliatePress → Settings → License.
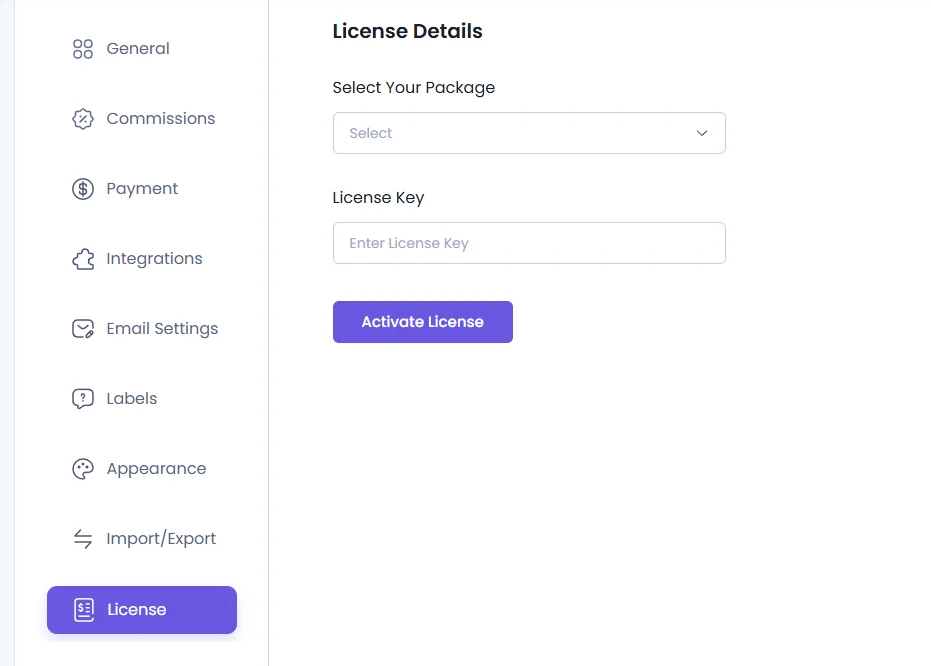
- Here, Select Your Package from the dropdown list:
- Standard
- Professional
- Enterprise
- Paste your license key into the License Key field.
- Click on the Activate License.
If your license has been successfully activated, you will see a popup message letting you know your license activated successfully. If not, you’ll see a notice letting you know your license is invalid.
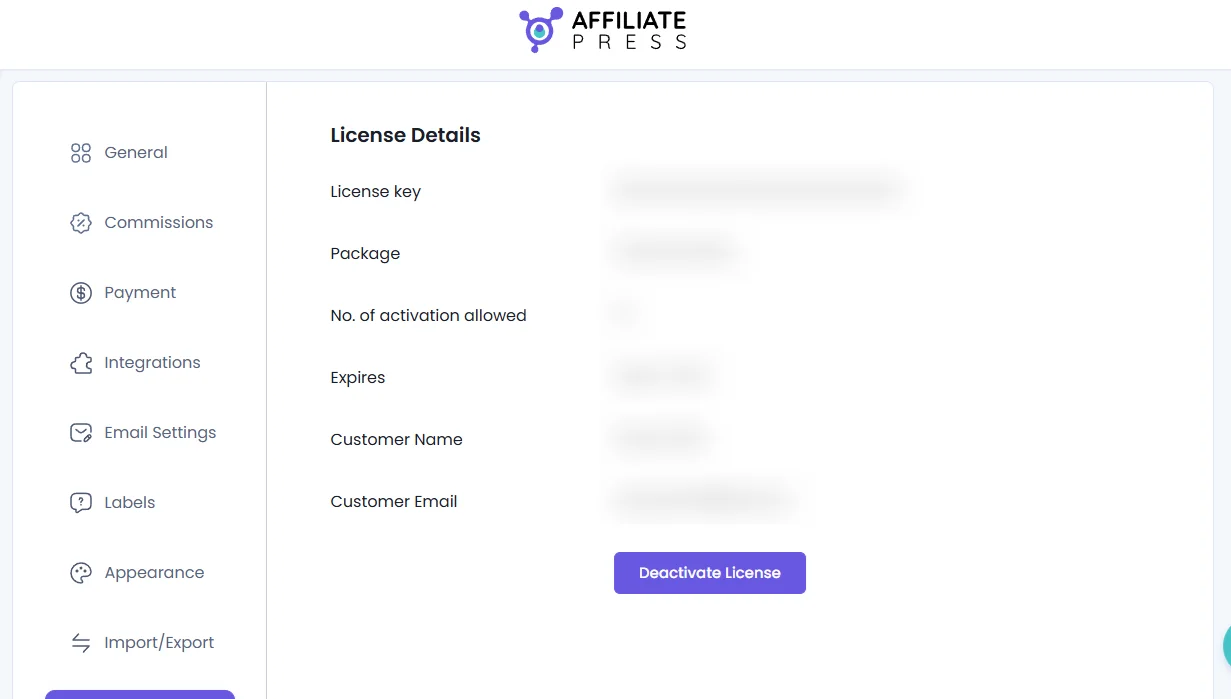
After your license is activated successfully, you’ll see all your license details and can get automatic updates directly from your WordPress dashboard.
How to Update AffiliatePress
AffiliatePress can be updated in three ways:
- Auto Update.
- Manual Update Using WordPress Installer.
- Manual Update Using WordPress FTP.
Important: Before updating AffiliatePress, we recommend creating a complete backup of your WordPress website. This implies both automatic updates and manual updates. Read more about WordPress backups here.
Method 1: Automatic Update from WordPress Dashboard
AffiliatePress can be updated automatically from your WordPress admin panel when an update is available.
- First, log in to your WordPress Dashboard.
- In there, go to the Plugins → Installed Plugins.
- Find AffiliatePress Pro in the plugin list. If an update is available, click the Update Now link, and wait for WordPress to complete the update.
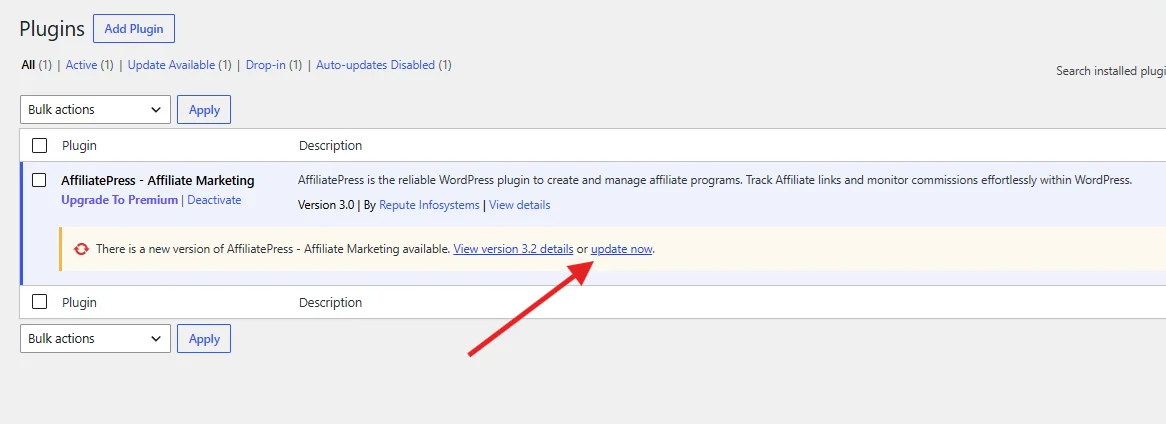
After AffiliatePress is updated, it will be running the latest version while keeping your existing settings and data intact.
Method 2: Manual Update Using ZIP
If you like to update the plugin manually, AffiliatePress can also be updated manually.
- Log in to your AffiliatePress account and manually download the latest AffiliatePress Pro ZIP file.
- Inside your WordPress Dashboard, go to Plugins → Add New → Upload Plugin.
- Now upload the latest plugin ZIP file and click Install Now.
Since an older version of AffiliatePress already exists, a confirmation message will appear. Simply click on “Replace current with uploaded” to proceed with the update.
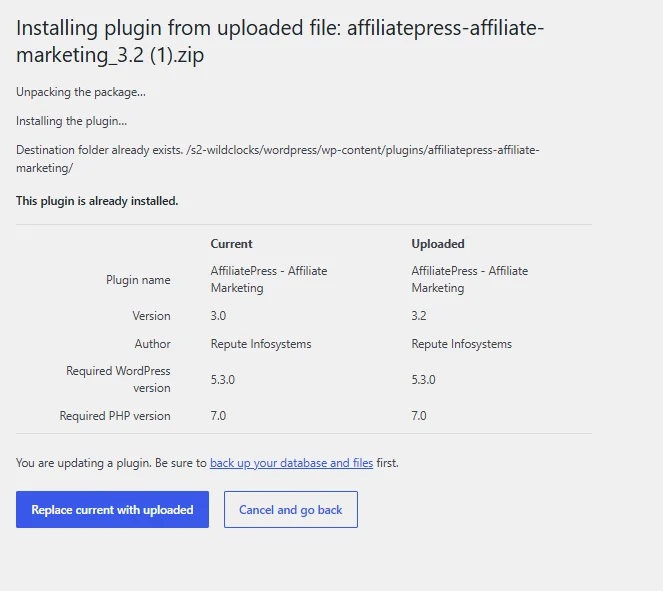
After installation, AffiliatePress will now be updated to the latest version.
Method 3: Manual Update via FTP
Updating via FTP is recommended only for advanced or tech-savvy WordPress users. Or in case, when the WordPress uploader isn’t available.
- Download the latest AffiliatePress Pro ZIP file from your AffiliatePress account.
- Extract the ZIP file on your computer.
- Upload the new plugin source code /affiliatepress-affiliate-marketing-pro/ directory to the /wp-content/plugins/ directory of your site.
- Now refresh your WordPress Dashboard to confirm the update was successful.
Congrats! Your AffiliatePress plugin is now updated to the latest version.
How to Install and Activate AffiliatePress Addons
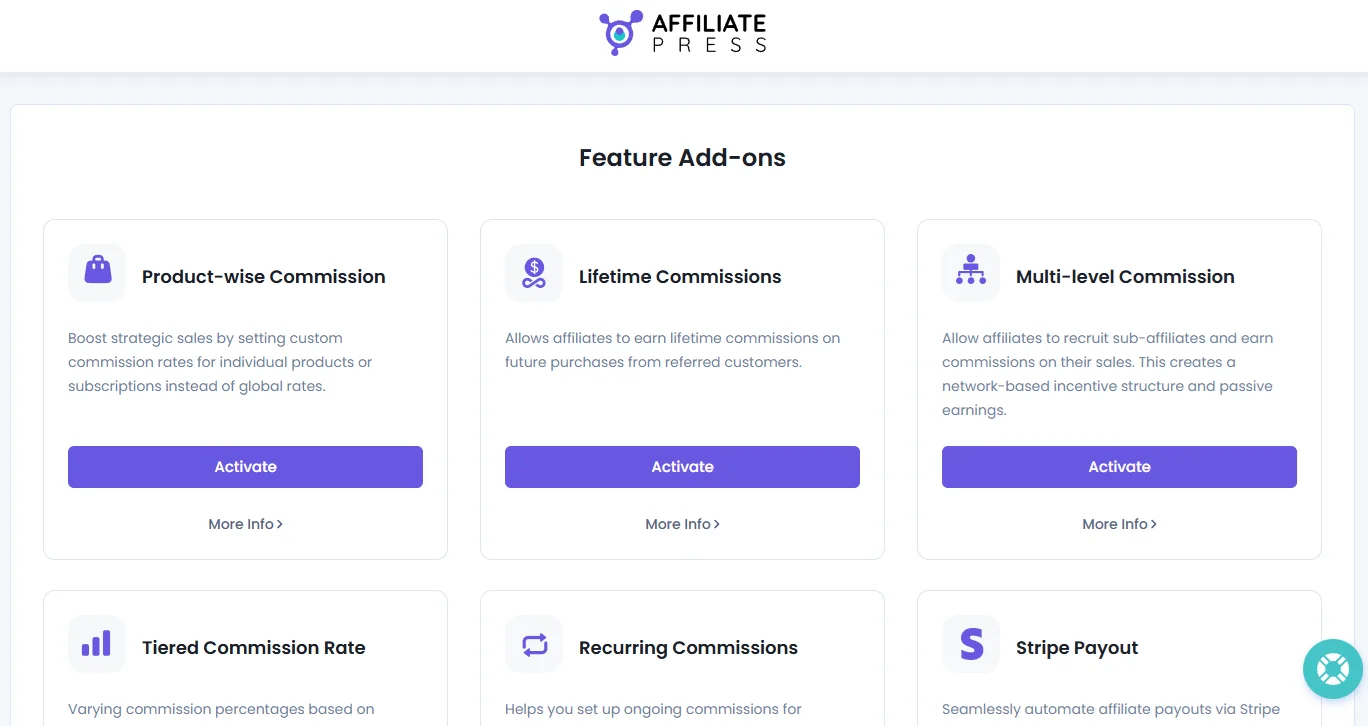
If you activate AffiliatePress Pro, you’ll get access to 22+ Feature Add-Ons– all available inside the AffiliatePress Add-ons page.
AffiliatePress addons can be installed individually based on your needs to keep your user interface clean and lightweight.
- In your AffiliatePress account, go to the Access Passes.
- Click on the “Download Now” button of any addon or integration you want.
- Head back to your WordPress dashboard → Plugins → Add New → Upload Plugin.
- Upload the zip files of addons, then click on “Install Now“, followed by Activate.
After activating AffiliatePress addons in WordPress, go to the AffiliatePress → Add-Ons page. Next, look for the addon you want, and Activate it.
Next Steps
Now that AffiliatePress is installed and activated, you can continue with: