



AffiliatePress Payouts
The AffiliatePress Payouts page gives you a complete overview of every payout that has been generated by your affiliate. From here, you can see payout details, track payment progress, search for specific payouts, filter the payout list, edit existing payouts or delete payouts that are no longer required.
This guide explains how payouts work, how affiliates become eligible for payment, and how to generate, review and manage payouts in AffiliatePress.
Understanding How Affiliate Payouts Work
AffiliatePress Payouts allow you to generate and manage affiliate payouts based on approved commissions. Before processing payments, you can preview eligible affiliates, review payout amounts and pay affiliates using Stripe, PayPal or Manual payment methods.
Before generating a payout, AffiliatePress checks each affiliate against your commission rules such as the minimum payout amount and minimum completed orders.
Note: You can configure AffiliatePress payment methods from Payment Settings.
How the Payout Process Works
Affiliate Referral
↓
Commission Generated
↓
Commission Approved
↓
Eligibility Check
↓
Generate Payout
↓
Review Preview
↓
Process Payment
↓
Mark as Paid
View and Manage Payouts
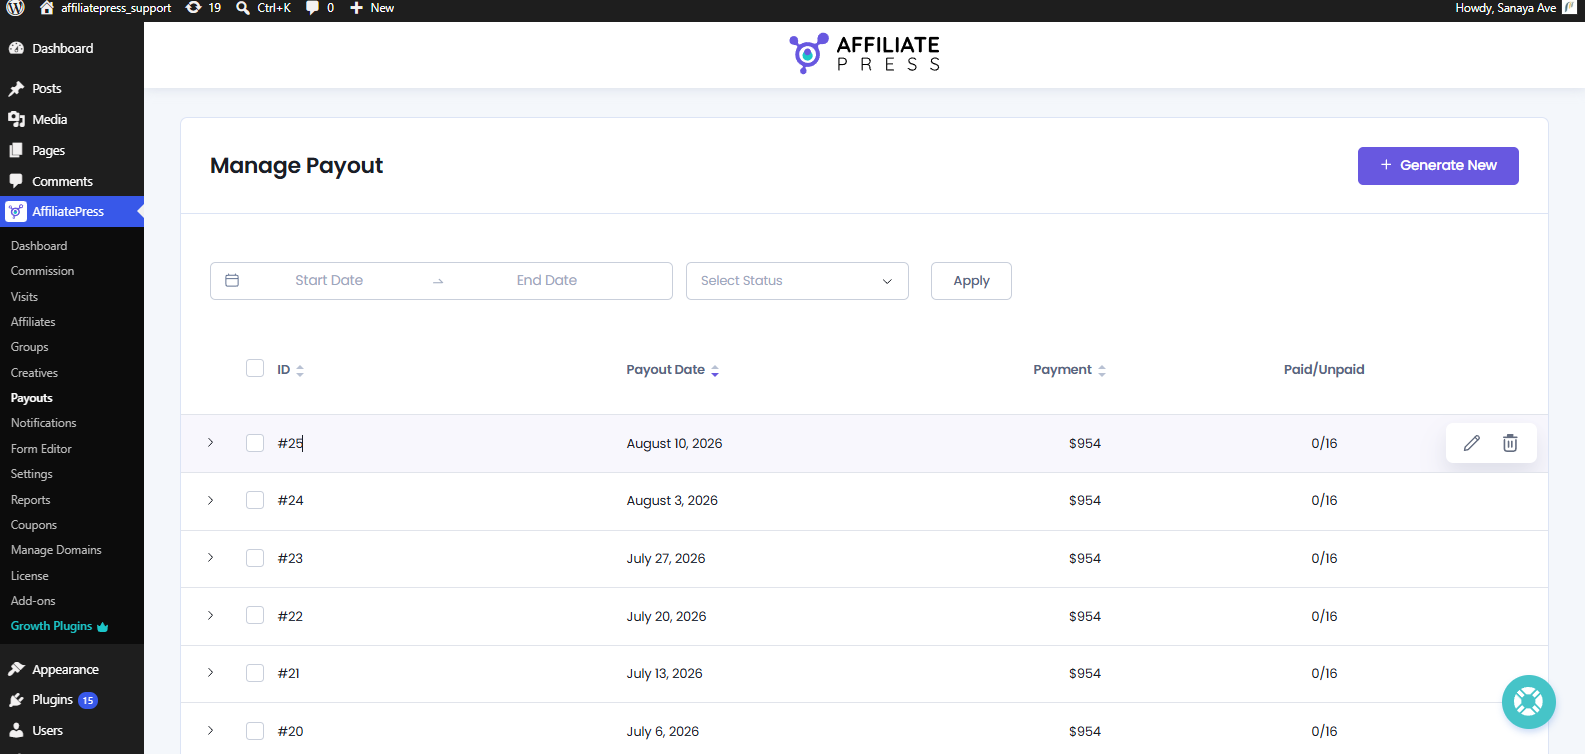
You can view and manage affiliate payouts from WordPress → AffiliatePress → Payouts.
Understanding the Payout List
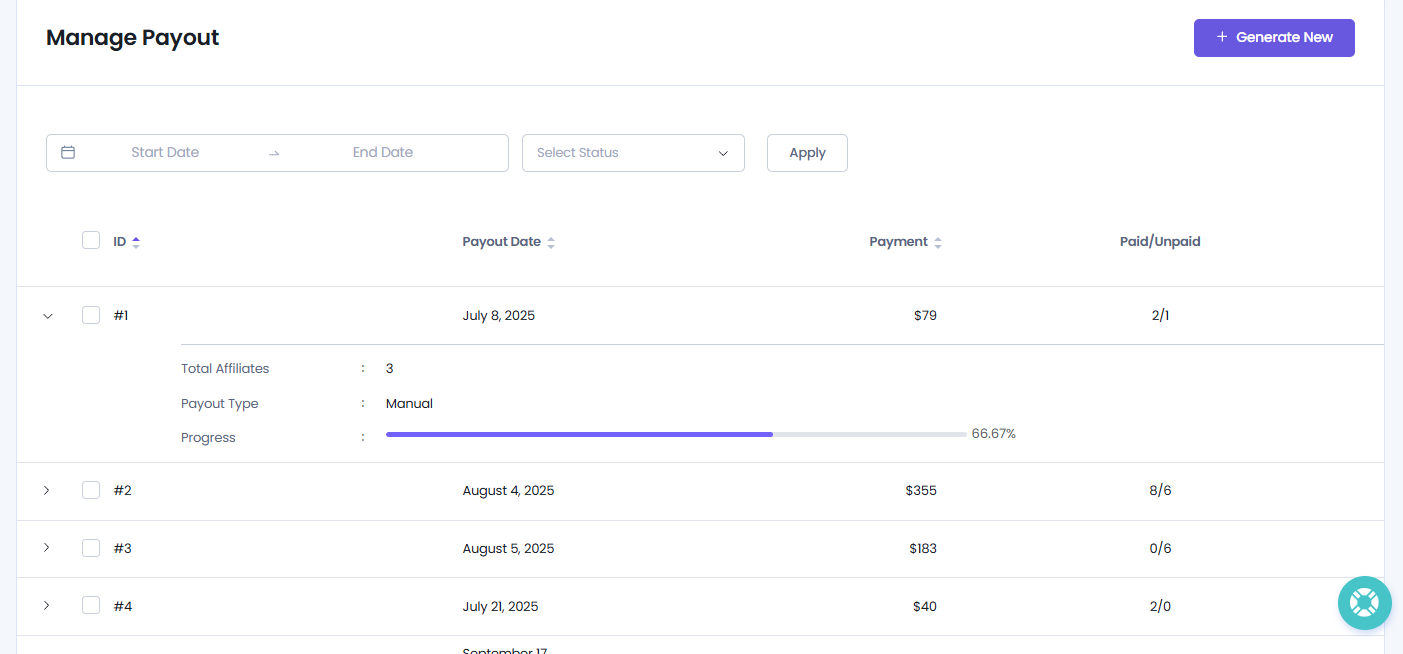
The Manage Payout List shows you all generated payouts. You can see all important payouts details at a glance from here, such as:
- ID: ID generated by AffiliatePress.
- Payout Date: The date when the payout was generated.
- Payment: The total payout amount included in that payout record of the day.
- Paid/Unpaid: Shows how many affiliate payments have been marked as Paid and Unpaid from the total payout.
If you click on a specific payout record, you’ll also be able to see:
- Total Affiliates: Number of total affiliates who generated sales that day.
- Payout Type: Manual/Automatic.
- Progress: Progress bar showing the progress of payout being paid.
Hover over any payout row to access additional actions such as Edit or Delete.
Filter the Payout List
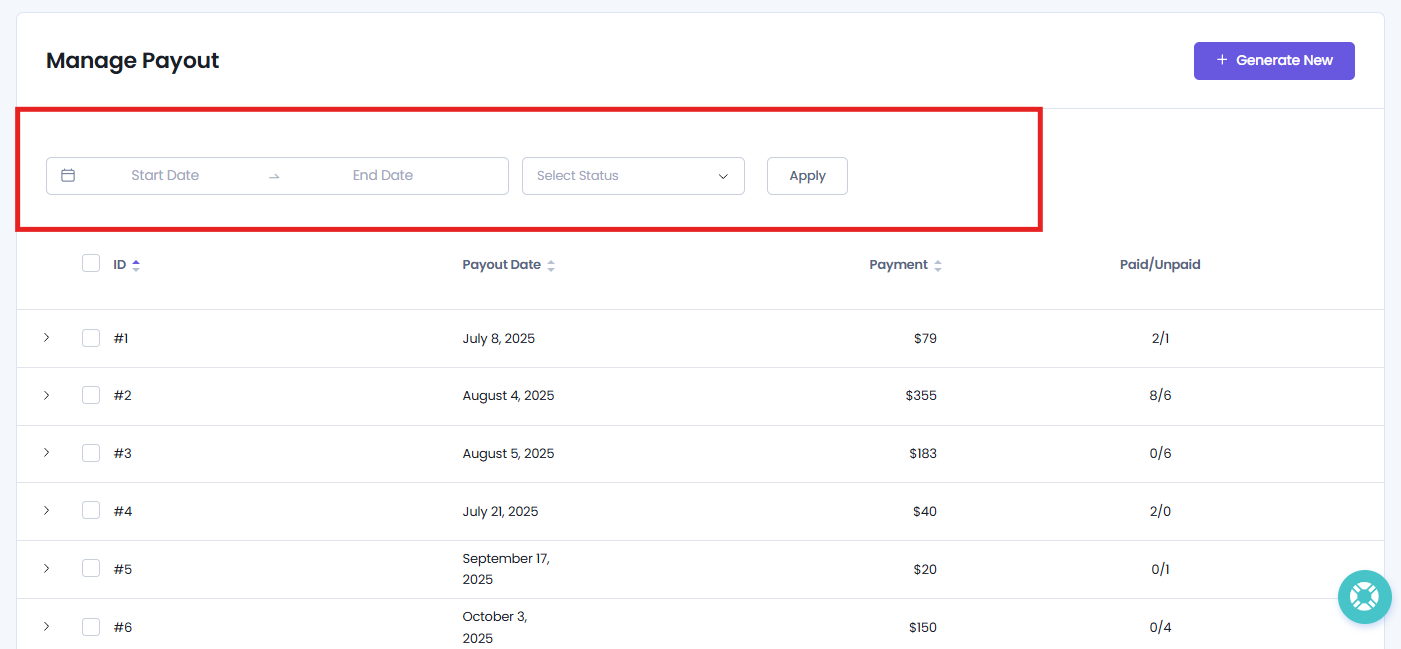
If you have multiple payouts, you can easily find the one you’re looking for using the available filters at the top of the page.
You can filter payouts by:
- Date range: Select a date range, from Start Date to End Date in the calendar.
- Status: Choose the payment status – Automatic or Manual, from the dropdown list.
After selecting the desired date range or payment status, simply hit Apply and the payment list will be updated with the matching records.
Also, you can use the Per Page option at the bottom of the table to change the number of payouts showing on each page.
Before You Generate a Payout
Before generating a payout, make sure your affiliate program is configured correctly and eligible commissions are available.
Here you’ll only see commissions that meet your commission’s rules.
Approved Commissions
Only approved commissions will be added in this payout list. Pending, rejected or already paid commissions will not be considered during payout generation.
Payment Minimum Amount
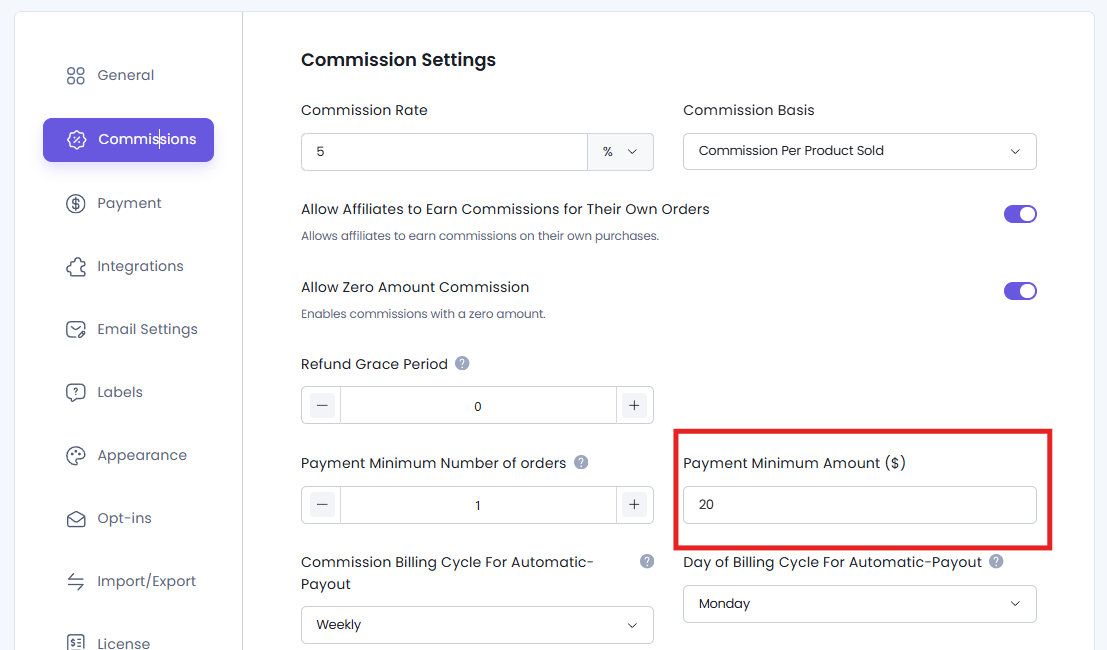
Affiliates must meet the minimum payout amount configured in your commission settings before they become eligible for payment.
You can configure this from the WordPress Dashboard → AffiliatePress → Settings → Commissions.
Minimum Completed Orders
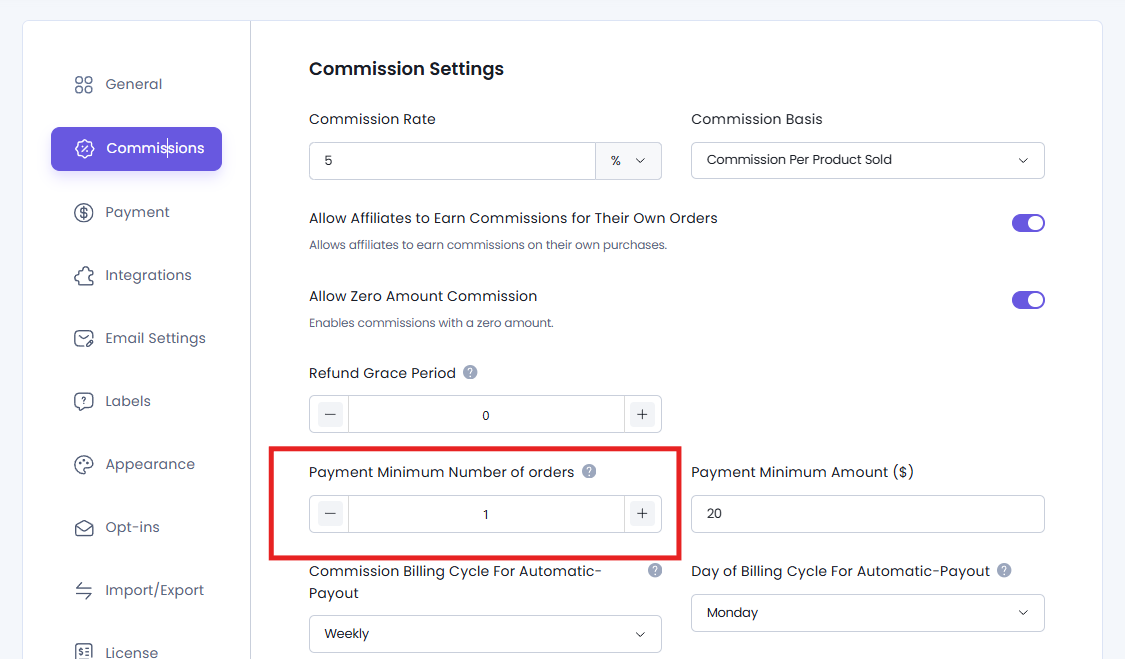
If you’ve configured a minimum completed orders requirement, affiliates must reach this threshold before they can be included in a payout.
You can configure this from Commissions Settings as well.
Refund Grace Period
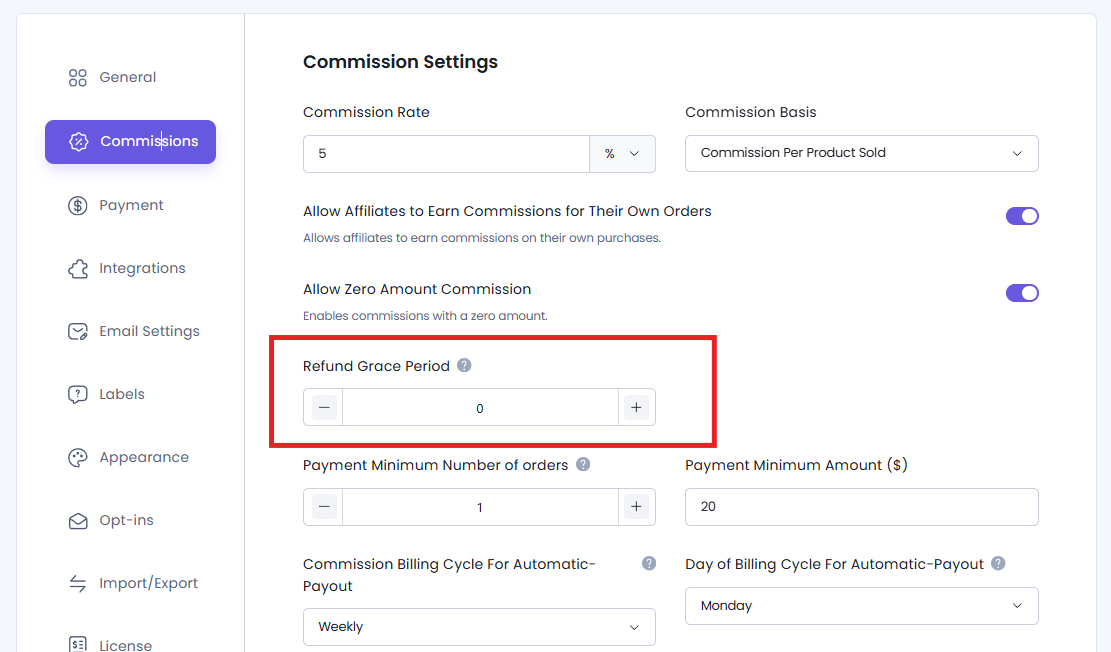
The Refund Grace Period helps prevent commissions from being paid before your store’s refund window has expired.
For example if you’ve set a 5 day refund grace period, only commissions older than five days will be eligible for payout. More recent commissions will automatically be included in a future payout once they become eligible.
You can configure this from Commissions Settings as well.
Payment Method
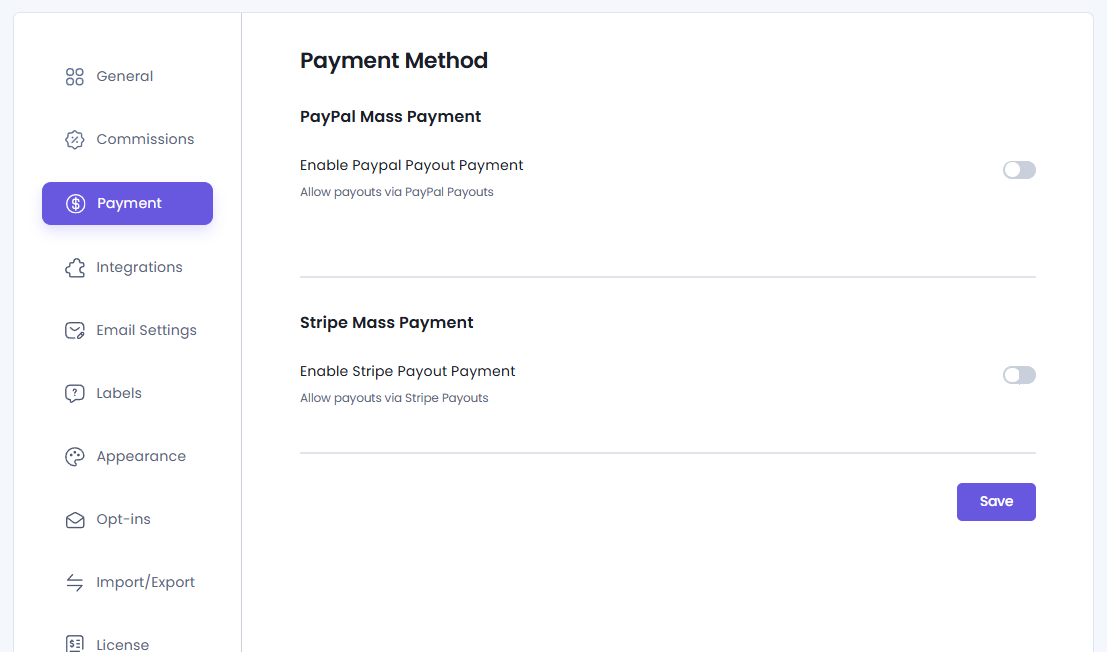
Before generating a payout, make sure you’ve set at least one payment method in AffiliatePress:
- PayPal Mass Payment
- Stripe Mass Payment
You can configure payment methods from the WordPress Dashboard → AffiliatePress → Settings → Payment.
Tip: If an affiliate doesn’t appear in the payout preview, check whether they have approved commissions and meet the minimum payout amount, minimum order and refund grace period needs.
How to Generate a New Payout
Step 1. Click Generate New
After your affiliates have eligible commissions, you can easily generate a new payout.
Just click the “Generate New” button on the top right corner of Payouts page.
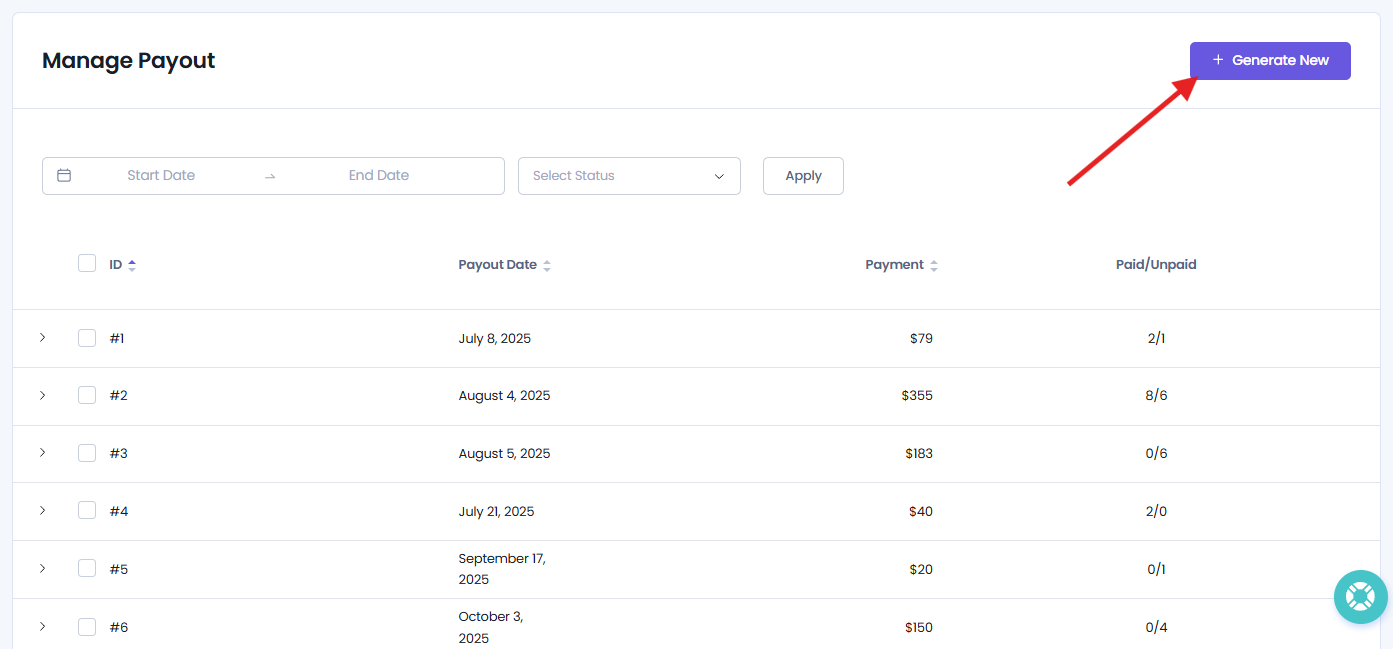
After clicking on the Generate New, the Generate Payout panel slides in from the right side of the screen.
Step 2: Review the Payout Details
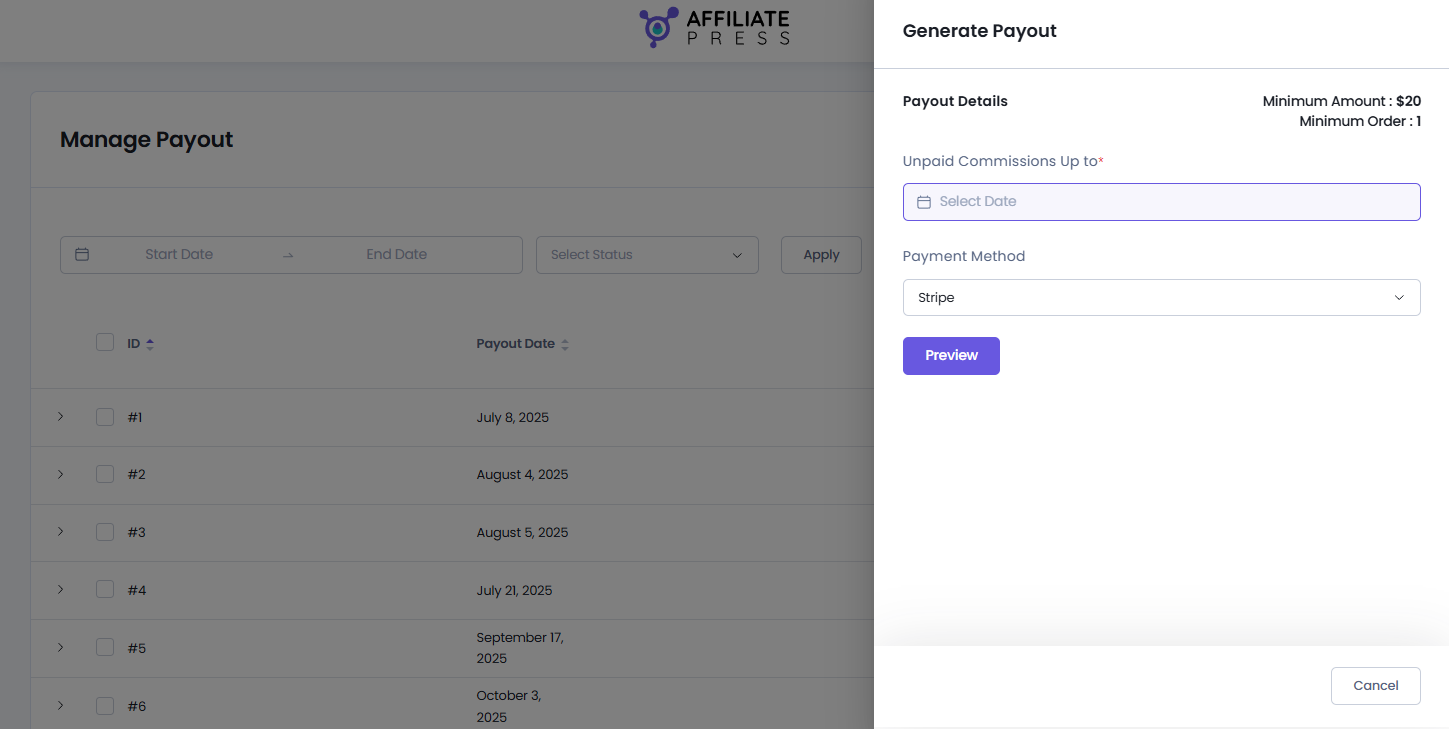
The Generate Payout panel shows the current payout settings:
- Minimum Amount: The minimum commission amount required before an affiliate becomes eligible for payout.
- Minimum Order: The minimum number of completed orders required before an affiliate becomes eligible.
These values are pulled automatically from your Commission Settings and cannot be edited here.
Step 3: Configure Payout Preview
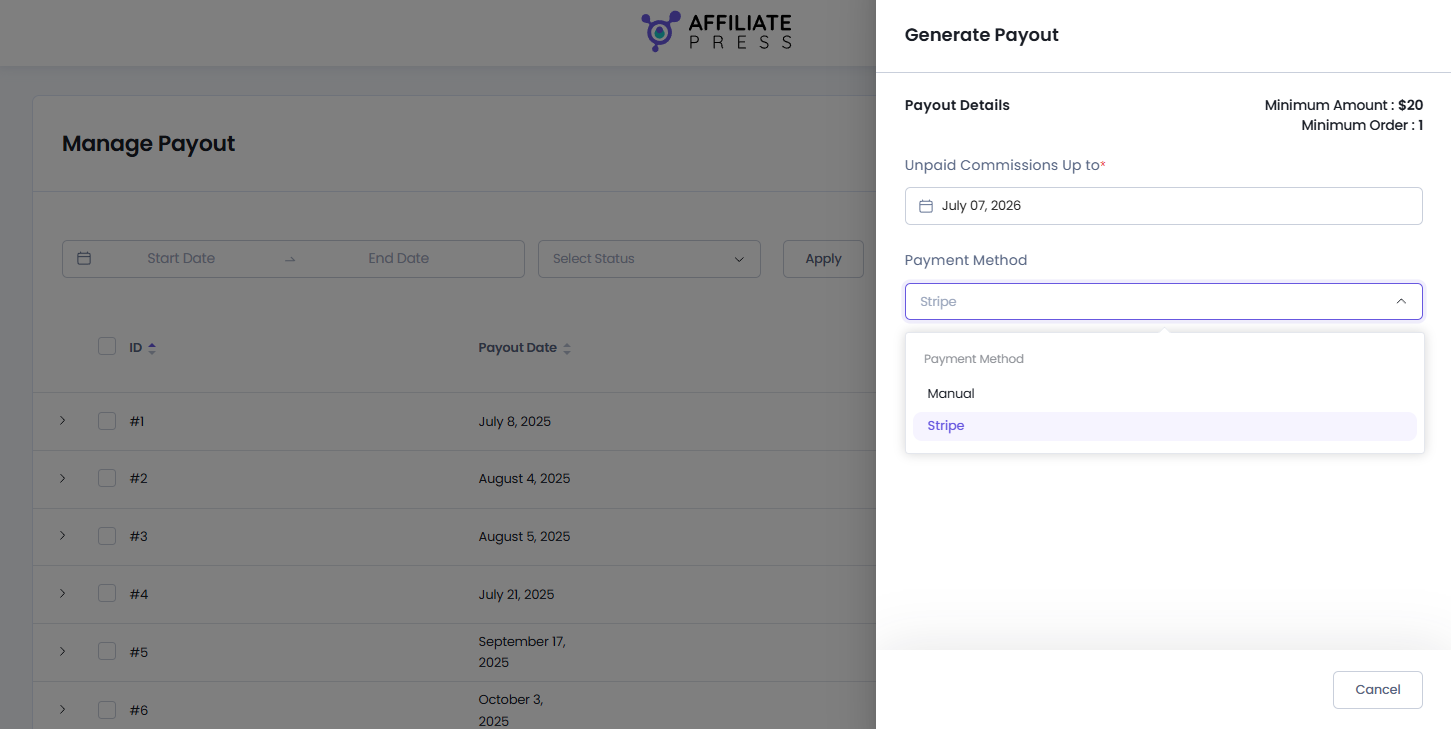
Next, configure the following options:
- Unpaid Commissions Up To: Choose the cutoff date from the date picker calendar. All approved unpaid commissions on or before this date will be considered for the payout.
- Payment Method: Choose the payment method to use for this payout such as:
- PayPal – Manual/Automatic.
- Stripe
Note: Any Payout with Automatic payment method will not be shown under these options.
After selecting the payout details criteria, click on the Preview button.
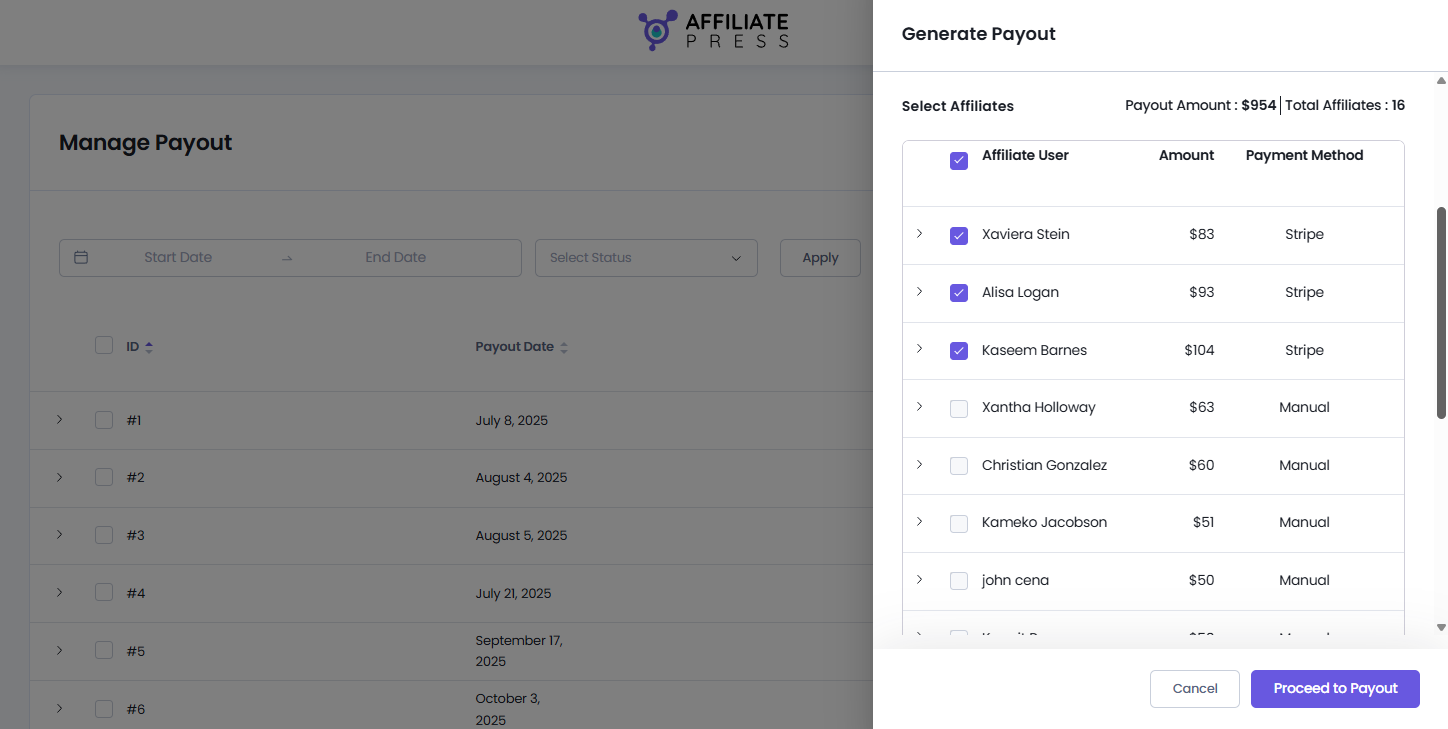
This will show you all the approved, unpaid commissions till the date you selected, and based on the payment method.
- Payout Amount: Shows the total commission amount unpaid till the date from your side.
- Total Affiliates: Shows the total number of affiliates
- Set Payout as Paid: Enable it to change the status of commission as “Paid“. This option is available only when you select the Manual payment method. Enable it if you’ve already paid the affiliate manually and want AffiliatePress to mark the associated commissions as Paid.
Note: This checkbox is not displayed when using PayPal or Stripe, as those payment methods handle payment processing automatically.
Below, inside the table, you’ll see details of each affiliate contributing to that total payout amount:
- Affiliate username
- Payout amount
- Selected payment method
Make sure to review all information carefully before continuing.
Step 4: Process the Payout
Once you’ve confirmed the payout details, select the affiliates whose commission you want to pay, then click on the “Proceed to Payout“.
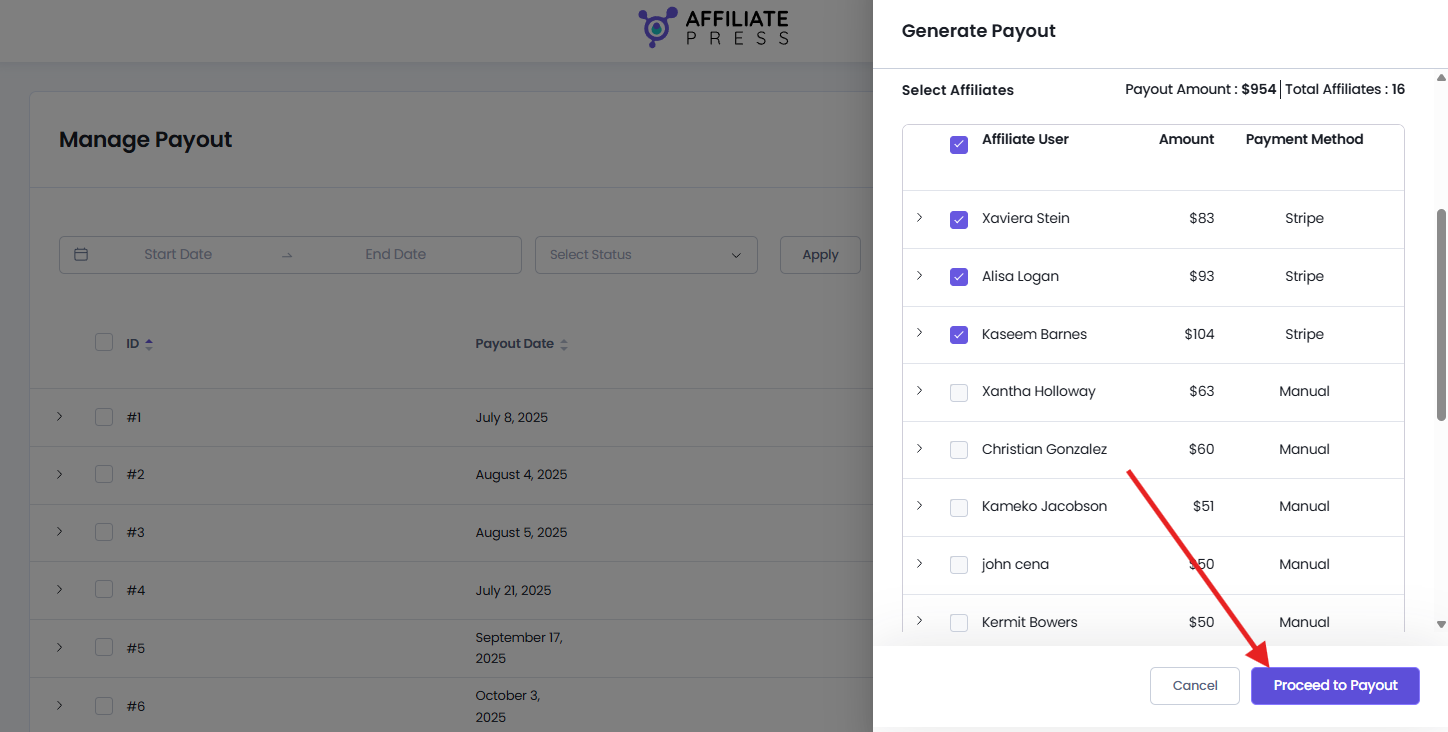
After the proceed to payout is Completed, you also get an option to Export Payment Data into an .csv file.
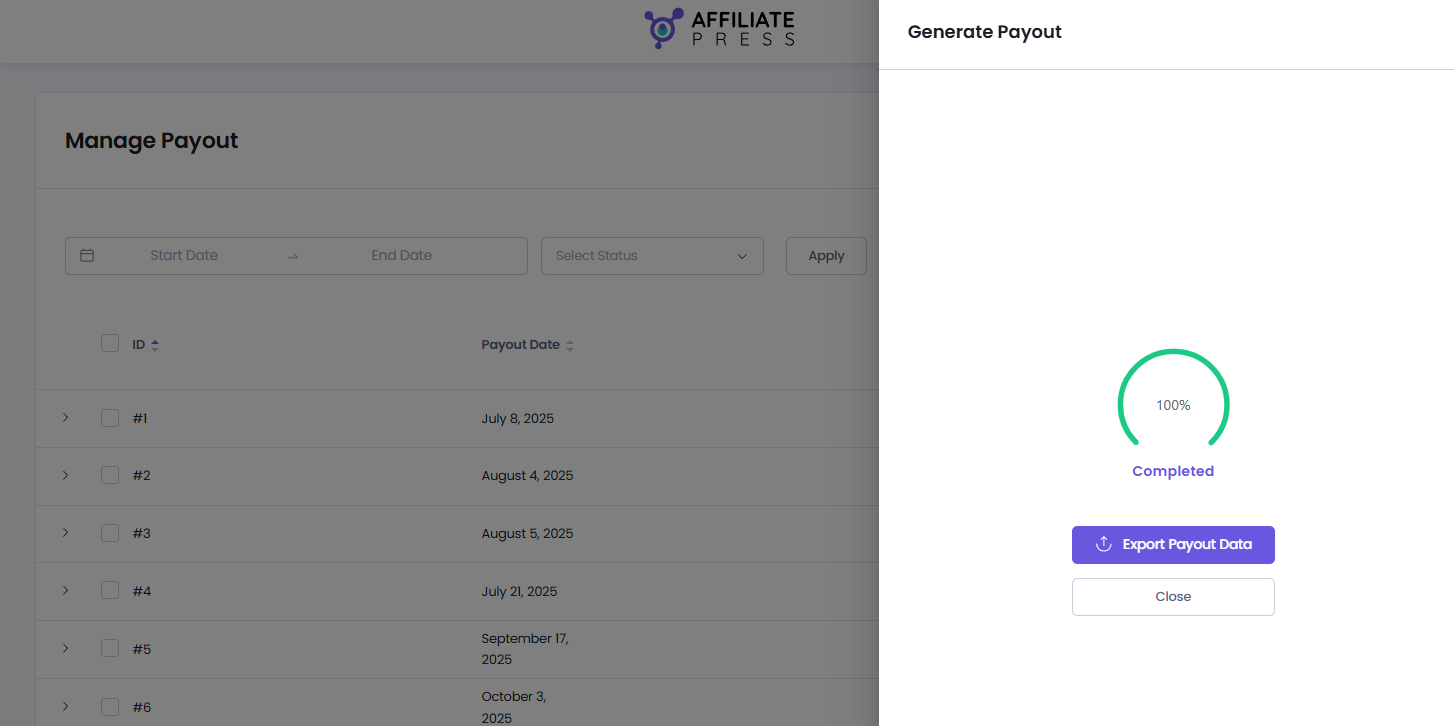
The system then automatically processes the payout via your configured payment gateway, and adds it to the Manage Payout list. You can then review or edit the payout from the same page.
Edit an Existing Payout
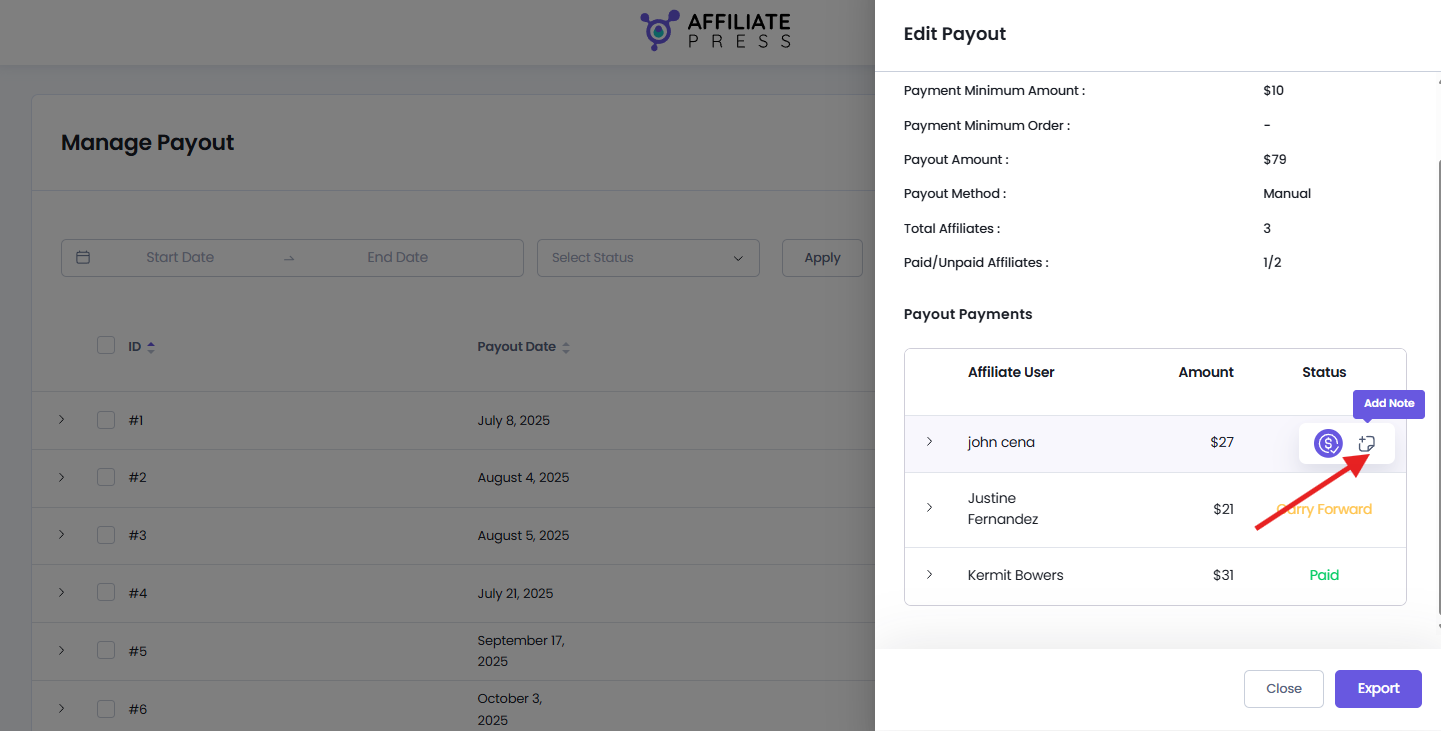
After generating a payout, you can review its details, update affiliate payment statuses and add payment notes.
To edit a payout, hover over the payout record in the Payouts page you want to edit. Now, click the Edit icon.
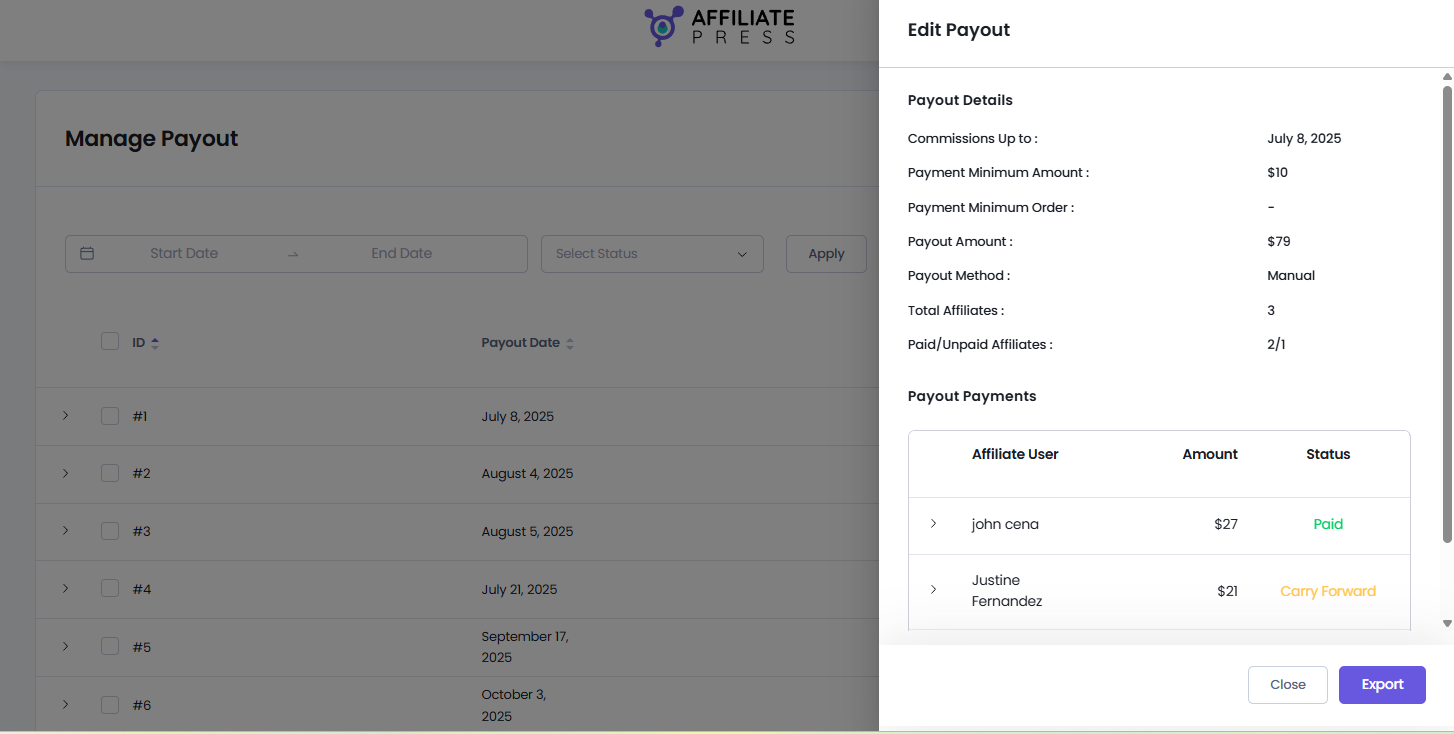
This will open the Edit Payout panel showing all payout details.
- Commissions Up To: The commission date this payment record was created.
- Payment Minimum Amount: The minimum commission amount needed for payout eligibility.
- Payment Minimum Order: The minimum number of completed orders needed before an affiliate becomes eligible for payment.
- Payout Amount: The total payout amount to pay affiliates.
- Payout Method: The payment method used for the payout.
- Total Affiliates: The total number of affiliates in the mass payout.
- Paid / Unpaid Affiliates: The number of paid and unpaid affiliate payments in the record.
After these, scroll down and you’ll find the Payout Payments table which lists every affiliate included alongside their details in the mass payout record.
- Affiliate User: Affiliate’s name
- Payment Amount: Unpaid/Paid commission amount
- Payment Status: Here are all the payment status available:
| Status | Description |
| Paid | The affiliate has been paid successfully. |
| Unpaid | The payment has not yet been completed. |
| Carry Forward | Moves the payment to a future payout cycle so you never miss any payouts. |
| Pending | The payment is awaiting processing. |
| Failed | The payment could not be completed due to a payment gateway or processing issue. |
Click on each affiliate, and you’ll also be able to see their:
- Username
- Pay ID
- Commissions
- Visitors
- Payment Method
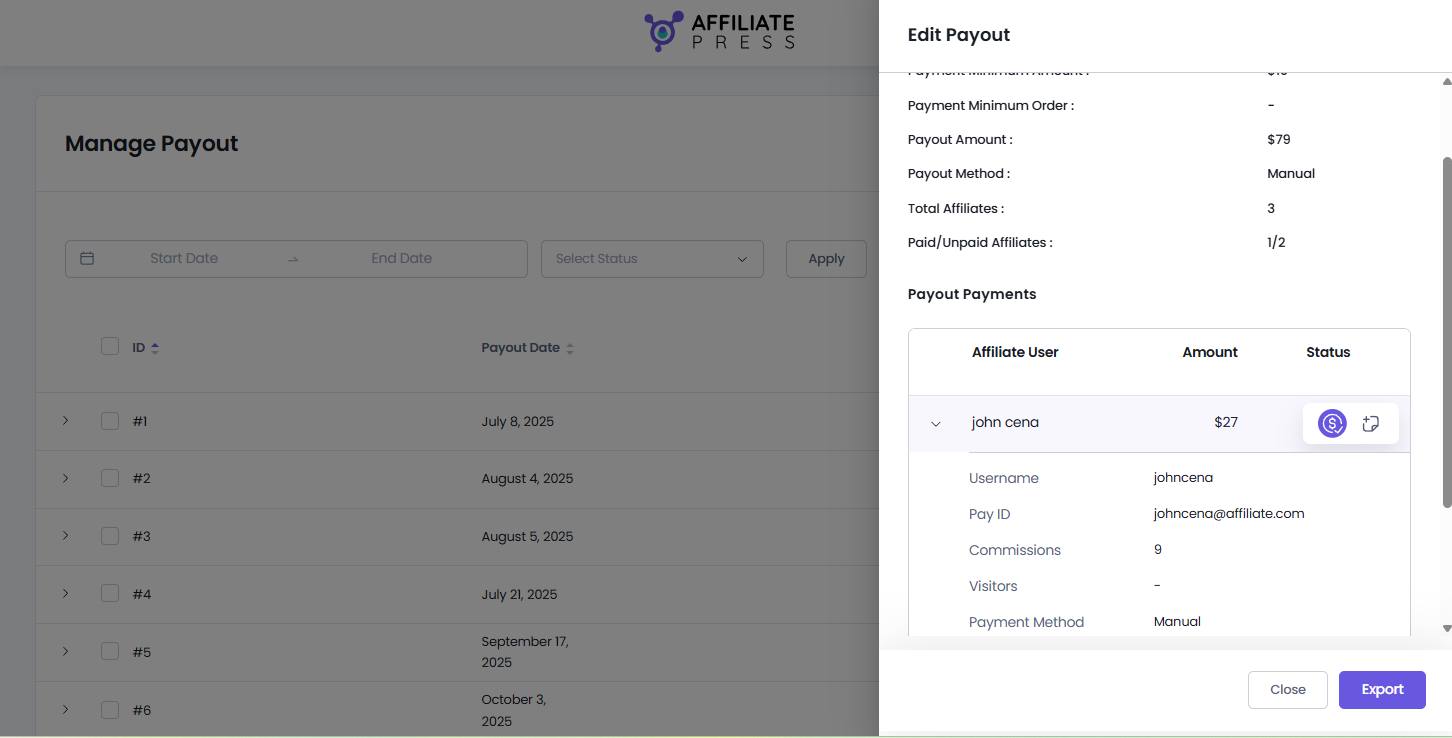
Moreover, you can also edit an affiliate’s payment status from here. Simply hover over the affiliate’s user record inside the Edit Payout panel.
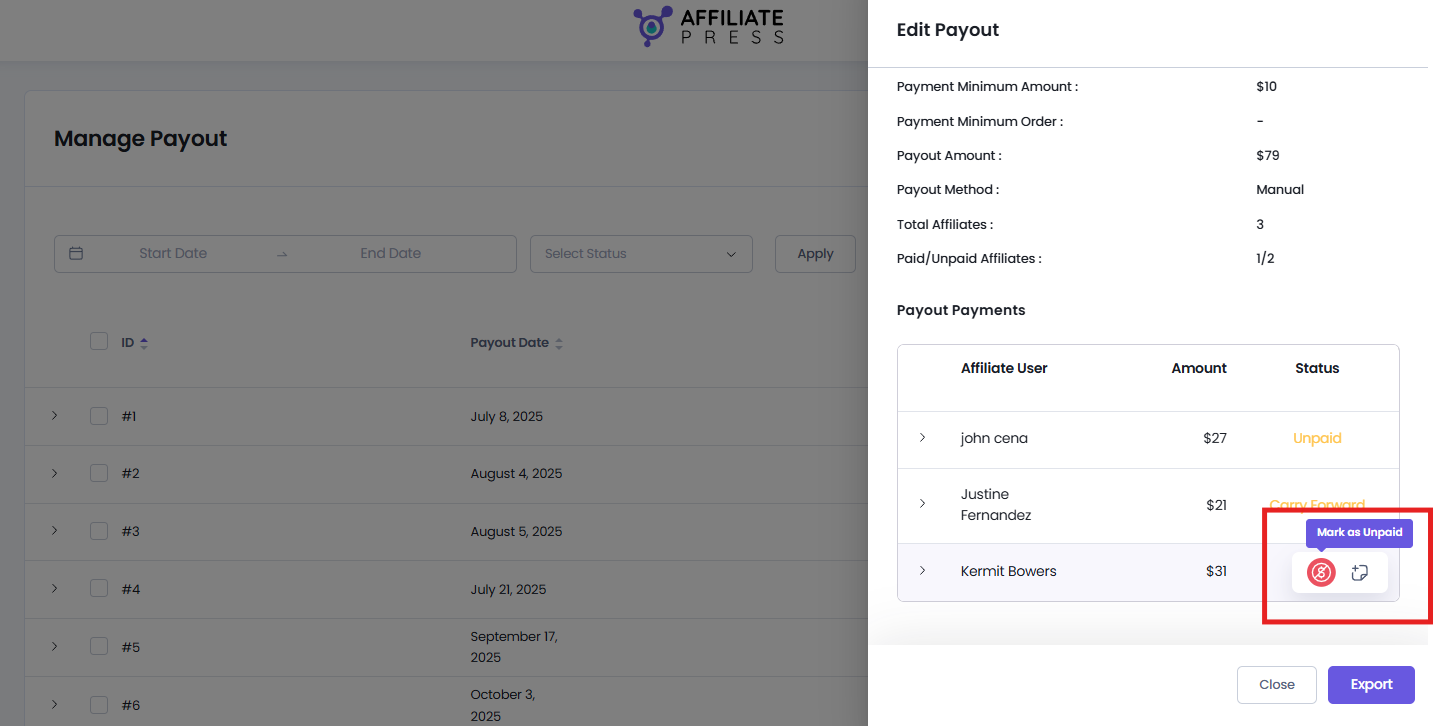
If the affiliate’s Payment Status is “Unpaid“. You can mark it as paid with the “Mark as Paid” option.
If the affiliate’s Payment Status is “Paid“. You can mark it as unpaid with the “Mark as Unpaid” option.
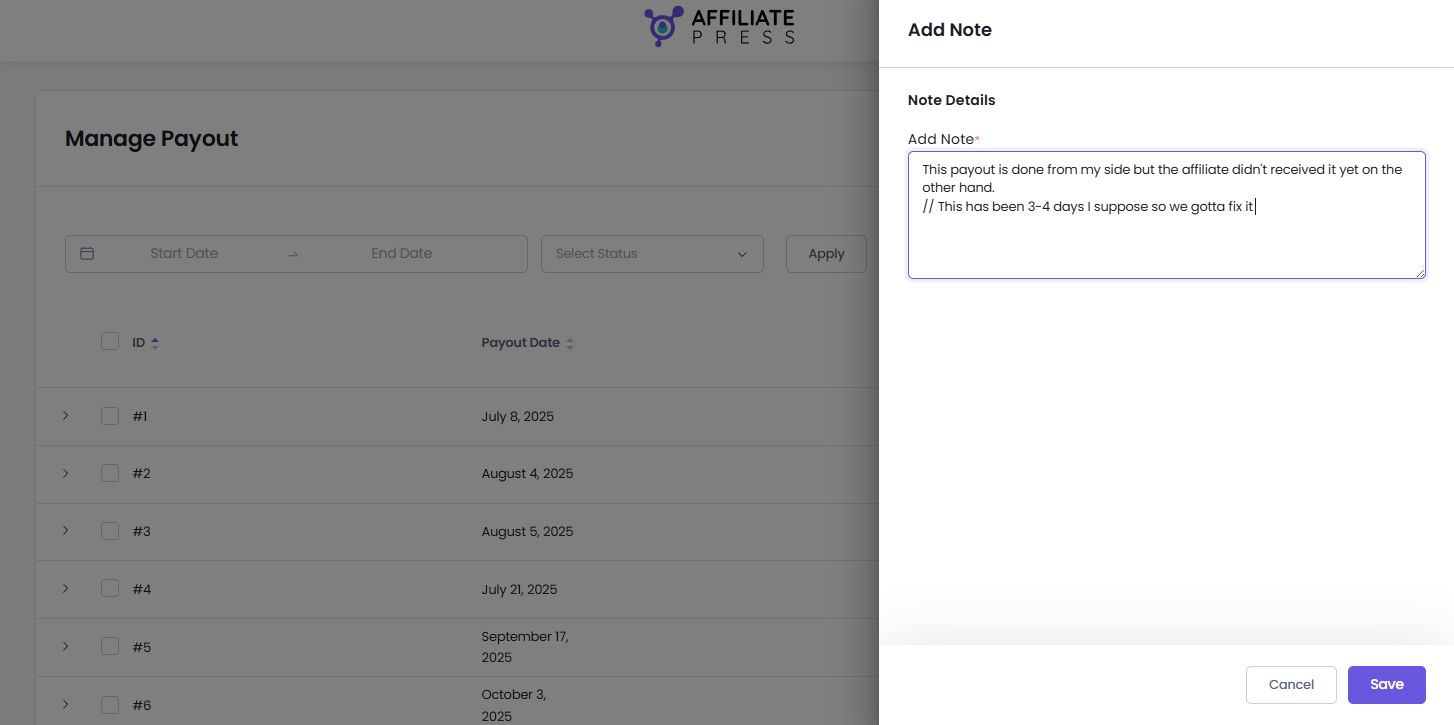
Just the same way, you can also click Add Note to open the Add Note panel.
Now write additional information related to the payment such as payment references, gateway errors or any of your internal notes.
Delete Payouts
Note: Deleting a payout record permanently removes it from AffiliatePress.
AffiliatePress allows you to delete a payment record in two ways:
1. Delete Individual Payout
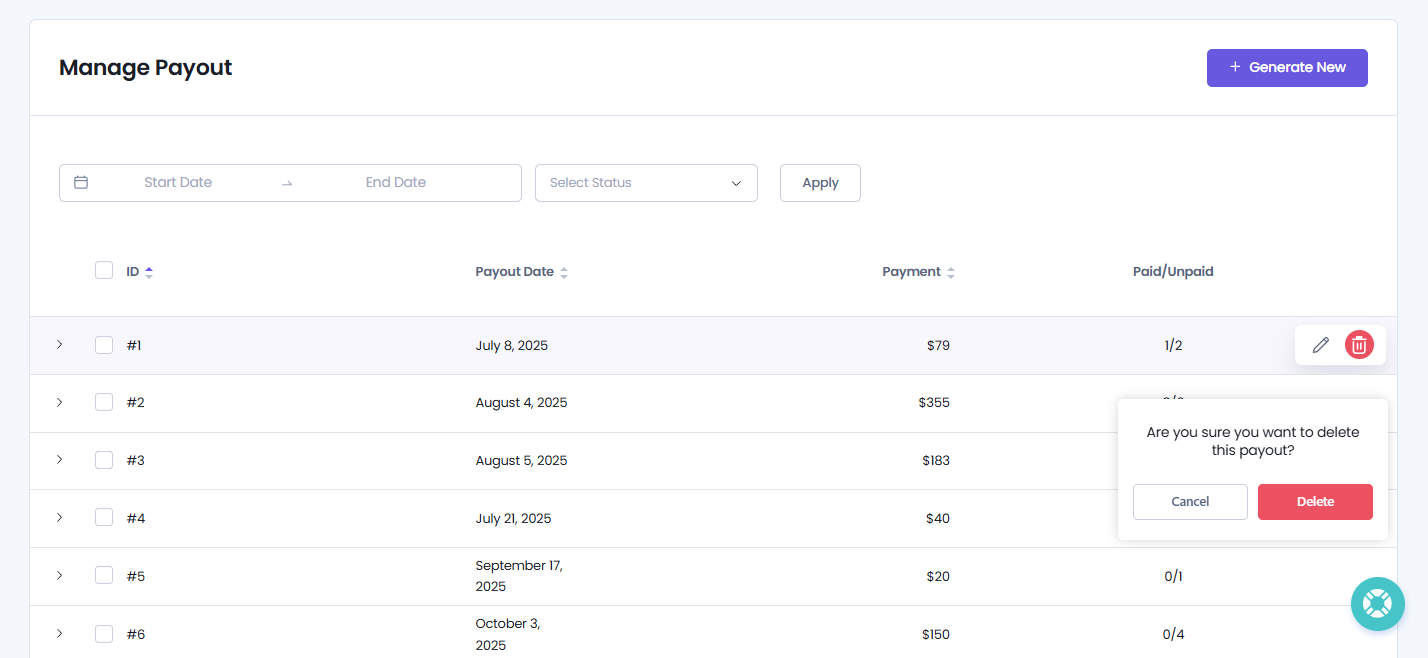
To delete an individual payout, hover over the payout record you want to remove, and click on the Delete icon from the action bar.
When the confirmation dialog appears asking you to confirm whether you are sure you want to delete this payout, click Delete to permanently remove the payout.
2. Delete Multiple Payouts
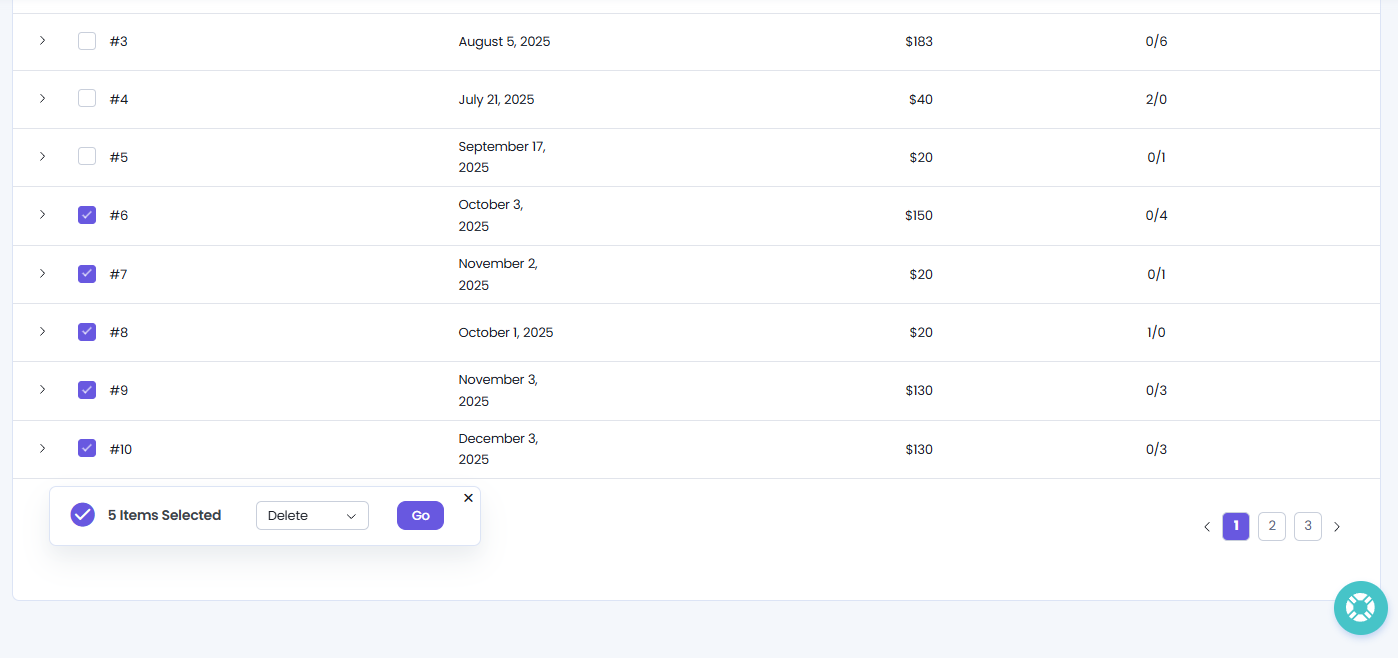
For deleting multiple payouts, simply tick on the checkbox next to every payout record you want to delete.
The dialog box with the options will display at the footer when you check at least one payout record which you want to delete.
Once you are sure you want to delete the selected payout records, click the Delete option from the Bulk Action and hit the “Go” button.
This will delete the selected payout records.