



Import / Export Settings
The Import / Export Settings in AffiliatePress allow you to export affiliate data, commission records, payouts and plugin settings. Plus, you can also import affiliate records, commission data and settings using CSV or JSON files.

You can manage these options from AffiliatePress → Settings → Import/Export.
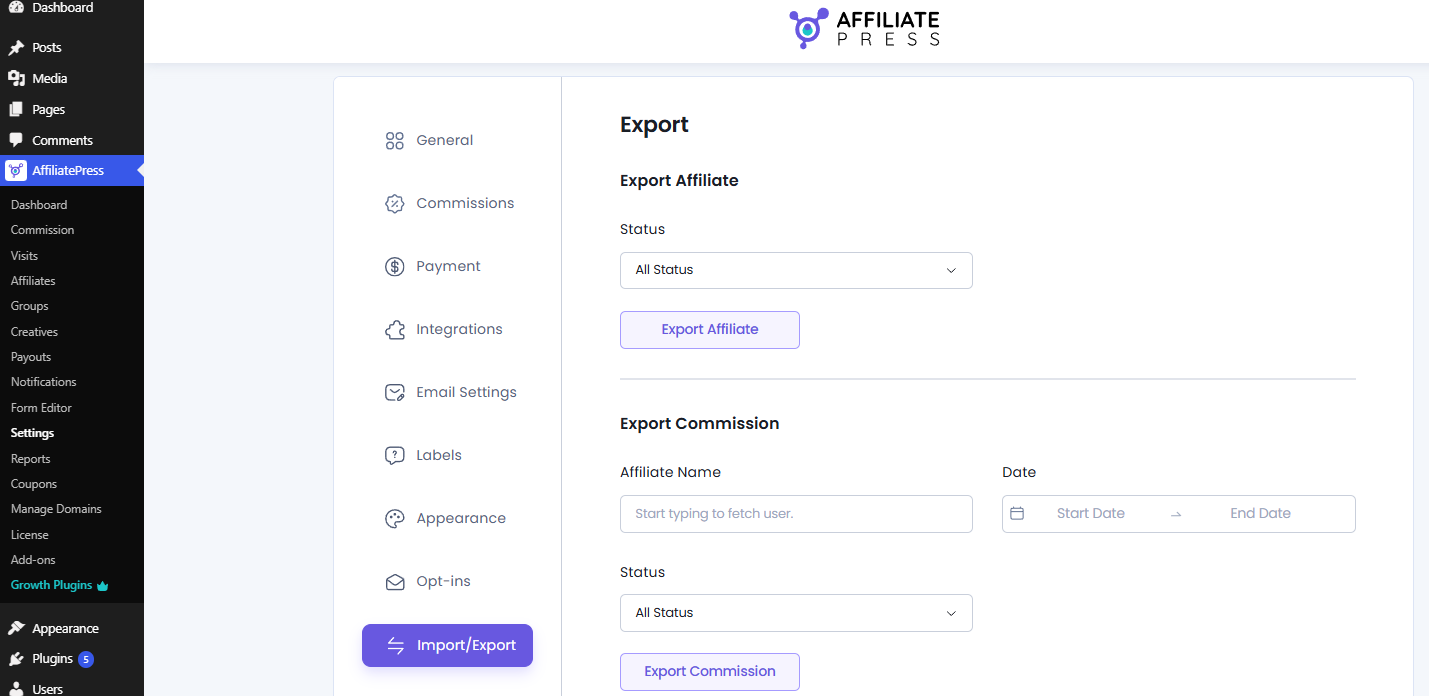
Export Data
The Export section lets you download AffiliatePress data as CSV files or export your plugin settings as a JSON file.
Export Affiliate
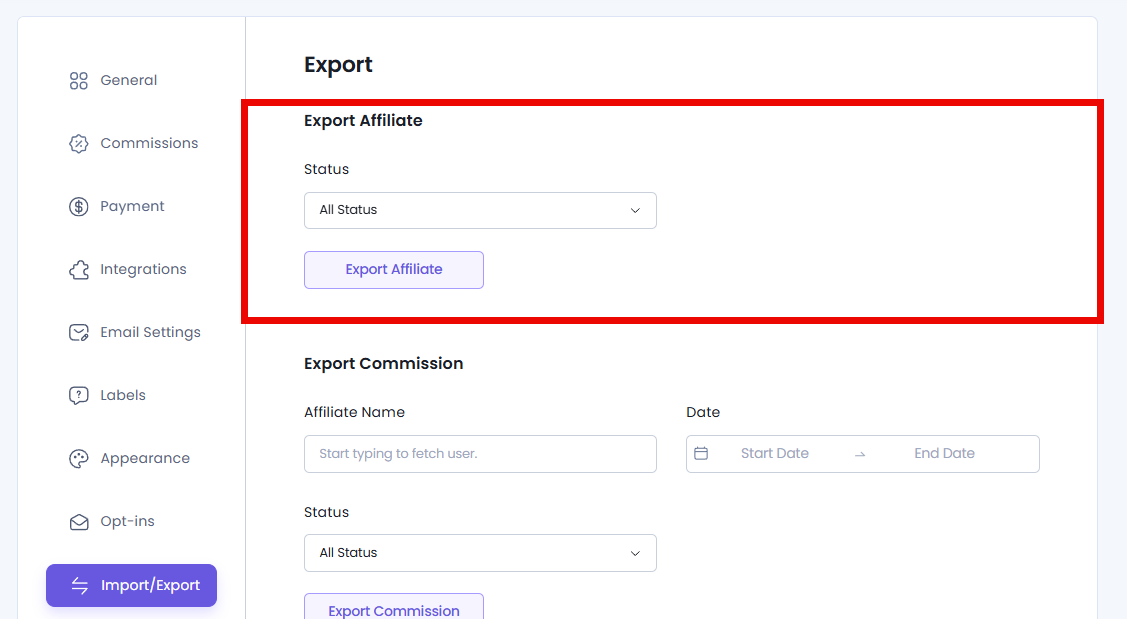
You can export all affiliate’s data based on their status. Simple select which status affiliate’s records you want to export from the dropdown:
- All Status
- Approved
- Pending
- Rejected
After selecting, hit the Export Affiliate to download the CSV file.
Affiliate Exported Data List
The .csv file includes all affiliate data including affiliate ID, user email, name, payout email, group ID, website, commissions, and all data from your custom fields.
| Affiliate ID | User Email |
| First Name | Last Name |
| Payout Email | Username |
| Website | Paid Earnings |
| Unpaid Earnings | Commissions |
| Visits | Status (Approved, Pending, Rejected, Paid) |
| Date Registered | Group ID |
| Enable Affiliate Rate | Affiliate Rate |
| Affiliate Rate Type | Custom Fields Data (custom fields added through the Form Editor) |
Export Commission
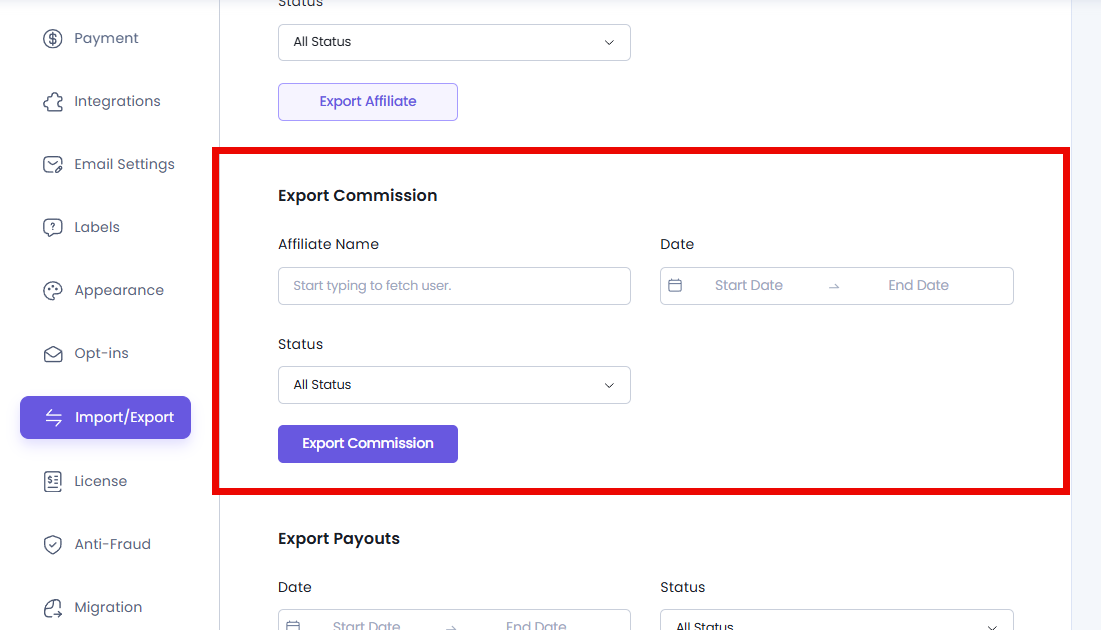
You can easily export commission data from AffiliatePress based on affiliate, date range, and commission status. You can filter commissions using:
- Affiliate Name: Start typing and select the specific affiliate whose commission records data you want to export.
- Date Range Picker: Pick a start and end date from the calendar.
- Status: Export commissions based on their current status (All Status, Approved, Pending, Rejected, Paid)
Remember it’s not compulsory to add all filters. After applying filters, click Export Commission to download the commission CSV file.
Commission Exported Data List
Here’s the list of data you can export.
| Commission ID | Affiliate ID |
| Visit ID | Commission Amount |
| Commission Reference Amount | Commission Currency |
| Commission Reference ID | Commission Source |
| Description | Commission Status |
| Commission Type | Affiliate User Email |
| Affiliate Payout Email | Affiliate Username |
| Affiliate Display Name | Date |
Export Payouts
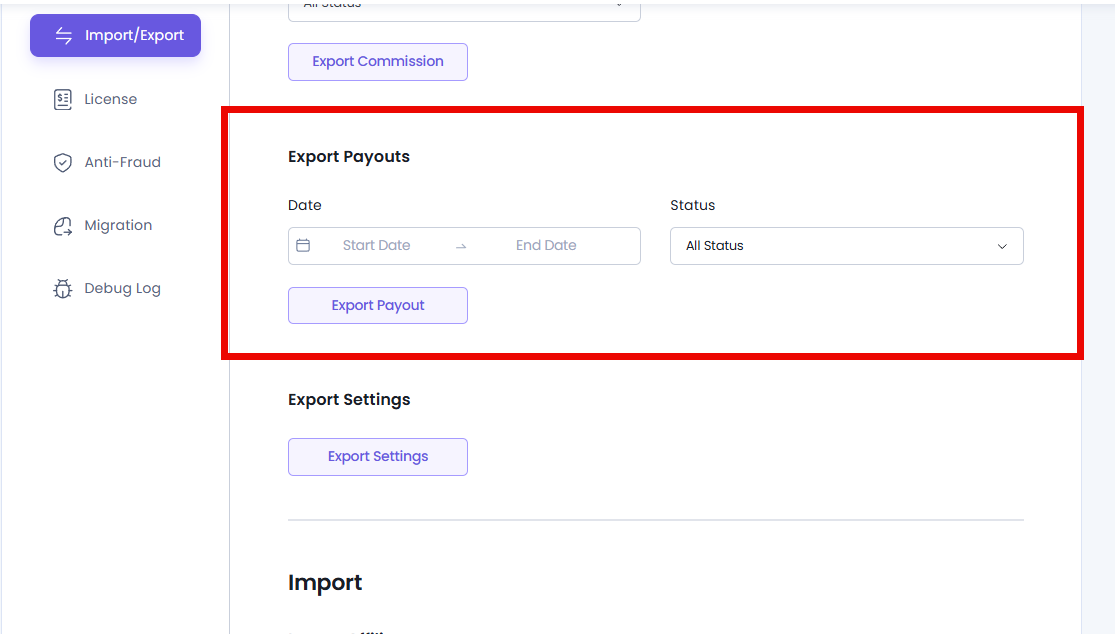
To export affiliate payout history for reporting, accounting or record keeping, you can use the available filters:
- Date Range Picker: Select the starting and ending date.
- Status: Filter payouts based on their current payout status.(All Status, Unpaid, Pending, Failed, Paid, Carry Forward)
At last, the Export Payouts button lets you download the payout CSV file.
Payout Exported Data List
Here’s the payout data list you can export:
| Affiliate Name | Affiliate Username |
| Payment ID | Payout ID |
| Payout Affiliate ID | Affiliate User Email |
| Payment Email | Payment Amount |
| Payment Currency | Payment Method |
| Payment Status | Total Commission |
| Total Visit | Conversion Rate |
| Payout Created Date | PayPal Payout Email |
| Payment Transaction ID | Payment Transaction Status |
Export Settings
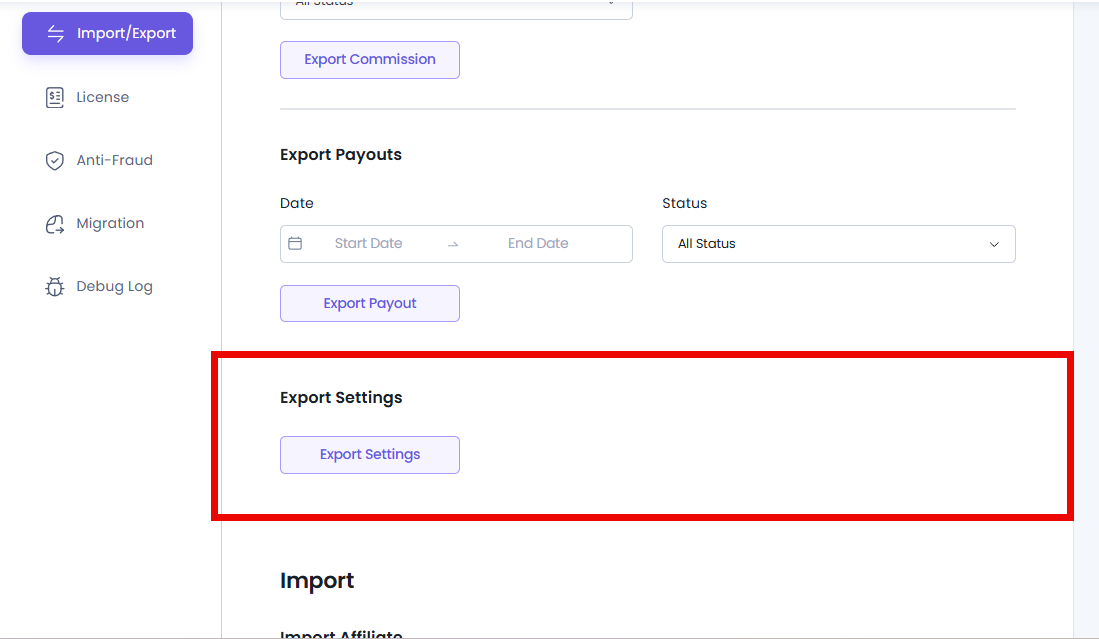
Want to export your current AffiliatePress configuration as a JSON file, then simply hit the Export Settings button.
Exporting your AffiliatePress settings is useful when:
- Creating a backup of your settings.
- Moving AffiliatePress settings to another website.
- Restoring a previous configuration.
Import Data
The Import section lets you upload existing AffiliatePress data using CSV files or restore plugin settings using a JSON file.
Import Affiliate
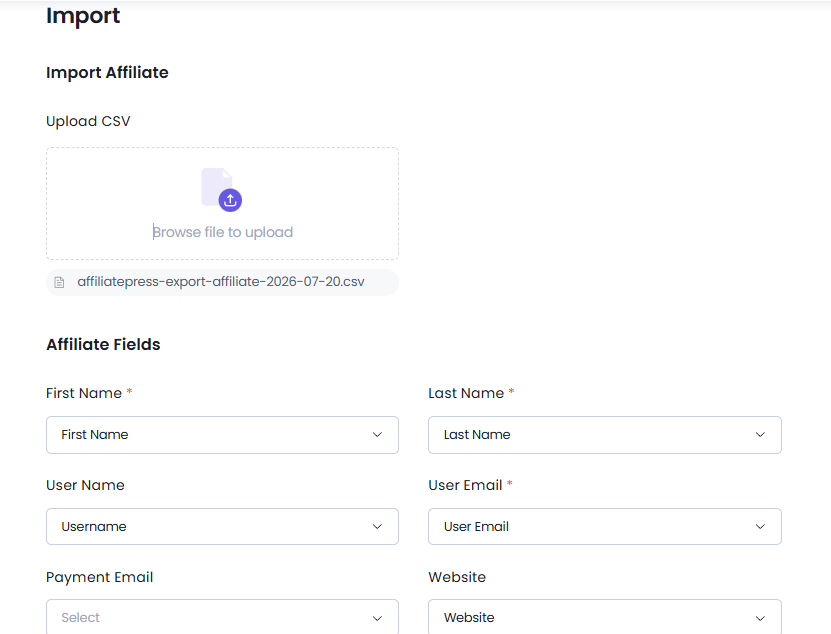
The Import Affiliate option lets you add multiple affiliate records at once using a CSV file.
To import affiliate data:
- Click the Browse file to upload file field under upload csv section.
- Now pick your affiliate CSV file.
- After the file is uploaded, you can map CSV fields with AffiliatePress fields.
- Lastly, click the Import Affiliate to complete the import.
Mapping Fields
When importing affiliate records via CSV, you will need to map each column in your file to the corresponding system fields.
Here’s a quick breakdown of each available field and its purpose:
| Field | Description |
| First Name | The affiliate’s first name |
| Last Name | The affiliate’s last name |
| Username | The username the affiliate will log in with |
| User Email | Unique identifier; must be a valid email |
| Payment Email | Email used for payment gateways (e.g., PayPal) |
| Website | Affiliate’s personal or business site |
| Promotion Method | How they plan to promote your products |
| Affiliate Status | Initial status: Pending, Approved, or Rejected |
| Affiliate Custom Fields | Custom fields are added through the Form Editor. |
After successfully importing data, you’ll get a successful popup at the top-right corner of the Import / Export panel.
Import Commission
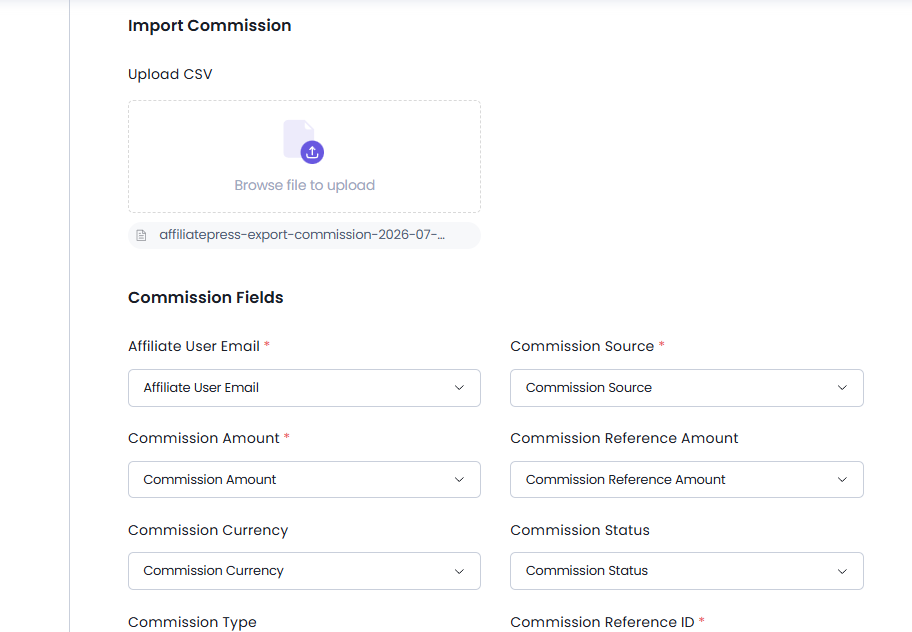
The same process of importing affiliates applies to importing commissions as well. To import existing commission records using a CSV file:
- Click Browse file to upload your commissions records csv file.
- Select your commission CSV file.
- Now match CSV columns with Commission fields.
- Hit the Import Commission button
Mapping Fields
When importing commission records via CSV, you will need to map each column in your file to the corresponding system fields. Thus here’s a clear breakdown of each available field and its purpose:
| Field | Description |
| Affiliate User Email | Email of the affiliate to whom the commission belongs. Must match existing users. |
| Commission Source | The origin or type of the commission (e.g., Product Sale, Form Submission). |
| Commission Amount | Total amount of the commission being recorded. |
| Commission Reference Amount | The original amount on which the commission was calculated (e.g., product price). |
| Commission Currency | Currency code (e.g., USD, EUR) for the commission amount. |
| Commission Status | Current status of the commission: Approved, Pending, Rejected. |
| Commission Type | Defines the nature of the commission (e.g. fixed, Percentage). |
| Commission Reference ID | Optional reference ID (e.g., Order ID, Transaction ID) for tracking. |
| Description | Short note or explanation of the commission (e.g., sale info, campaign). |
After importing commission records, you’ll get a success message mentioning the number of commissions successfully imported.
Import Setting
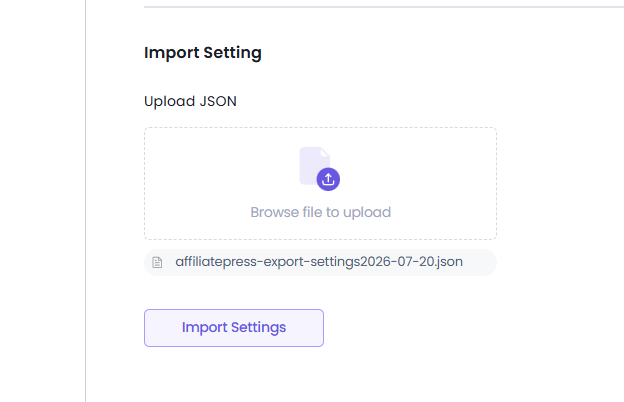
From here you can import and restore your AffiliatePress configuration using the JSON file you’ve generated/exported before.
To import settings:
1. Click Browse file to upload.
2.Select your AffiliatePress JSON settings file.
3. After the JSON file is uploaded, click on Import Settings.
4. You’ll see a Warning popup confirming if you want to restore the settings in the JSON file.
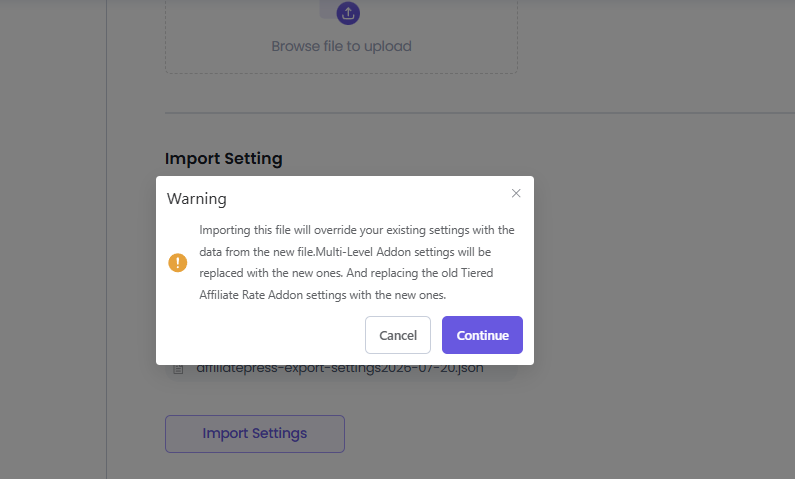
5. Click on Continue for restoring the settings stored in the file.
Note: Importing this file will override your existing settings with the data from the new file.
This option is useful when migrating settings between websites.
Things to Ensure Before Importing Data
Before you importing import any CSV or JSON files, please make sure to:
- Create a website backup.
- Make sure your file follows the needed format.
- Avoid importing duplicate records.
- Verify that required fields are included.