



Stripe Payout Addon
Want to pay your affiliates automatically via Stripe? The Stripe Payout Addon lets you send affiliate commissions directly to your affiliates’ Stripe accounts.
Configure once, and your affiliates can securely connect their Stripe accounts, while you manage and process payouts from the AffiliatePress dashboard.
In this guide, we’ll show you how to install and set up Stripe Payment Addon in AffiliatePress.

Install and Activate the Stripe Payout Addon
Before we get started, be sure to install and activate AffiliatePress on your WordPress site.
After you’ve got AffiliatePress installed and your license is activated, you’ll also easily be able to install and activate the Stripe Payment addon.
Configure Stripe Payment Gateway
After activating Stripe Payment Addon, you can click on “Configure” which will redirect you to the Settings → Payments panel inside AffiliatePress.
Here you have to set up a Stripe account from your (admin’s) side and verify the account.
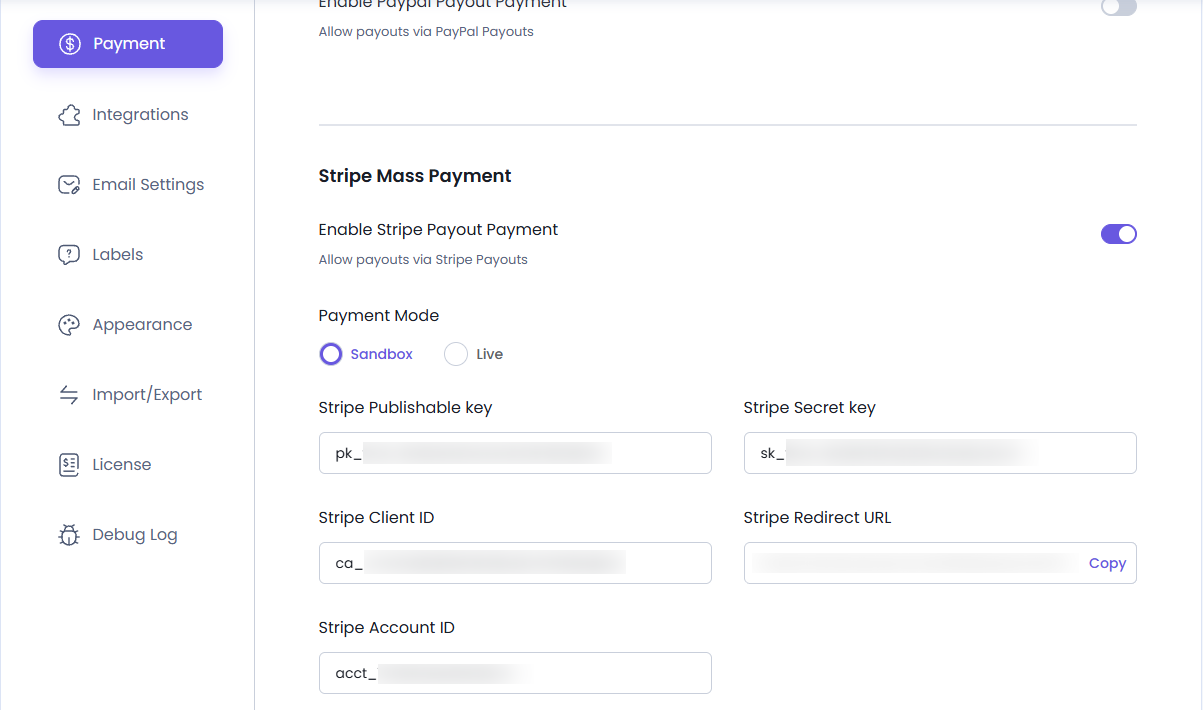
Under the Stripe Mass Payment section, for enabling Stripe Payout Payment, toggle on the Enable Stripe Payout Payment. This allows you to pay eligible commissions to your affiliates via Stripe payouts.
Payment Mode
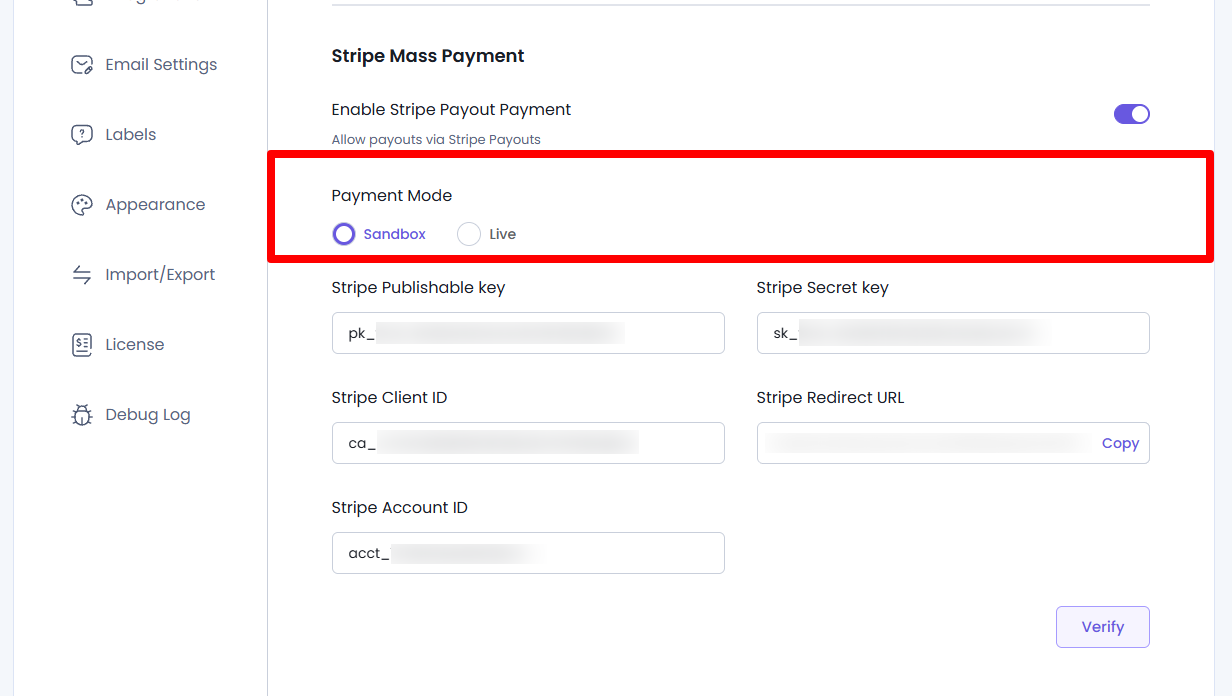
Choose the payment mode for your Stripe connection.
Sandbox
You can test your Stripe integration without processing real payouts. This uses Stripe test API keys. It’s recommended when you test the addon.
Live
Use Live mode to process real affiliate payouts via your Stripe account. Before switching to Live mode, make sure to enter your live Stripe API credentials and verify your Stripe account.
Later, you’ll see the following options:
- Stripe Publishable key
- Stripe Secret key
- Stripe Client ID
- Stripe Redirect URL
- Stripe Account ID
Follow the below steps to retrieve each of the above Ids and keys for connecting your Stripe Account with AffiliatePress from admin’s side.
Stripe Publishable Key & Secret Key
In order to get the Stripe Publishable key and Stripe Secret Key, follow the steps below:
1. Login to your Stripe Account.
2. Go to the Developers.
3. At the menu select API Keys option.
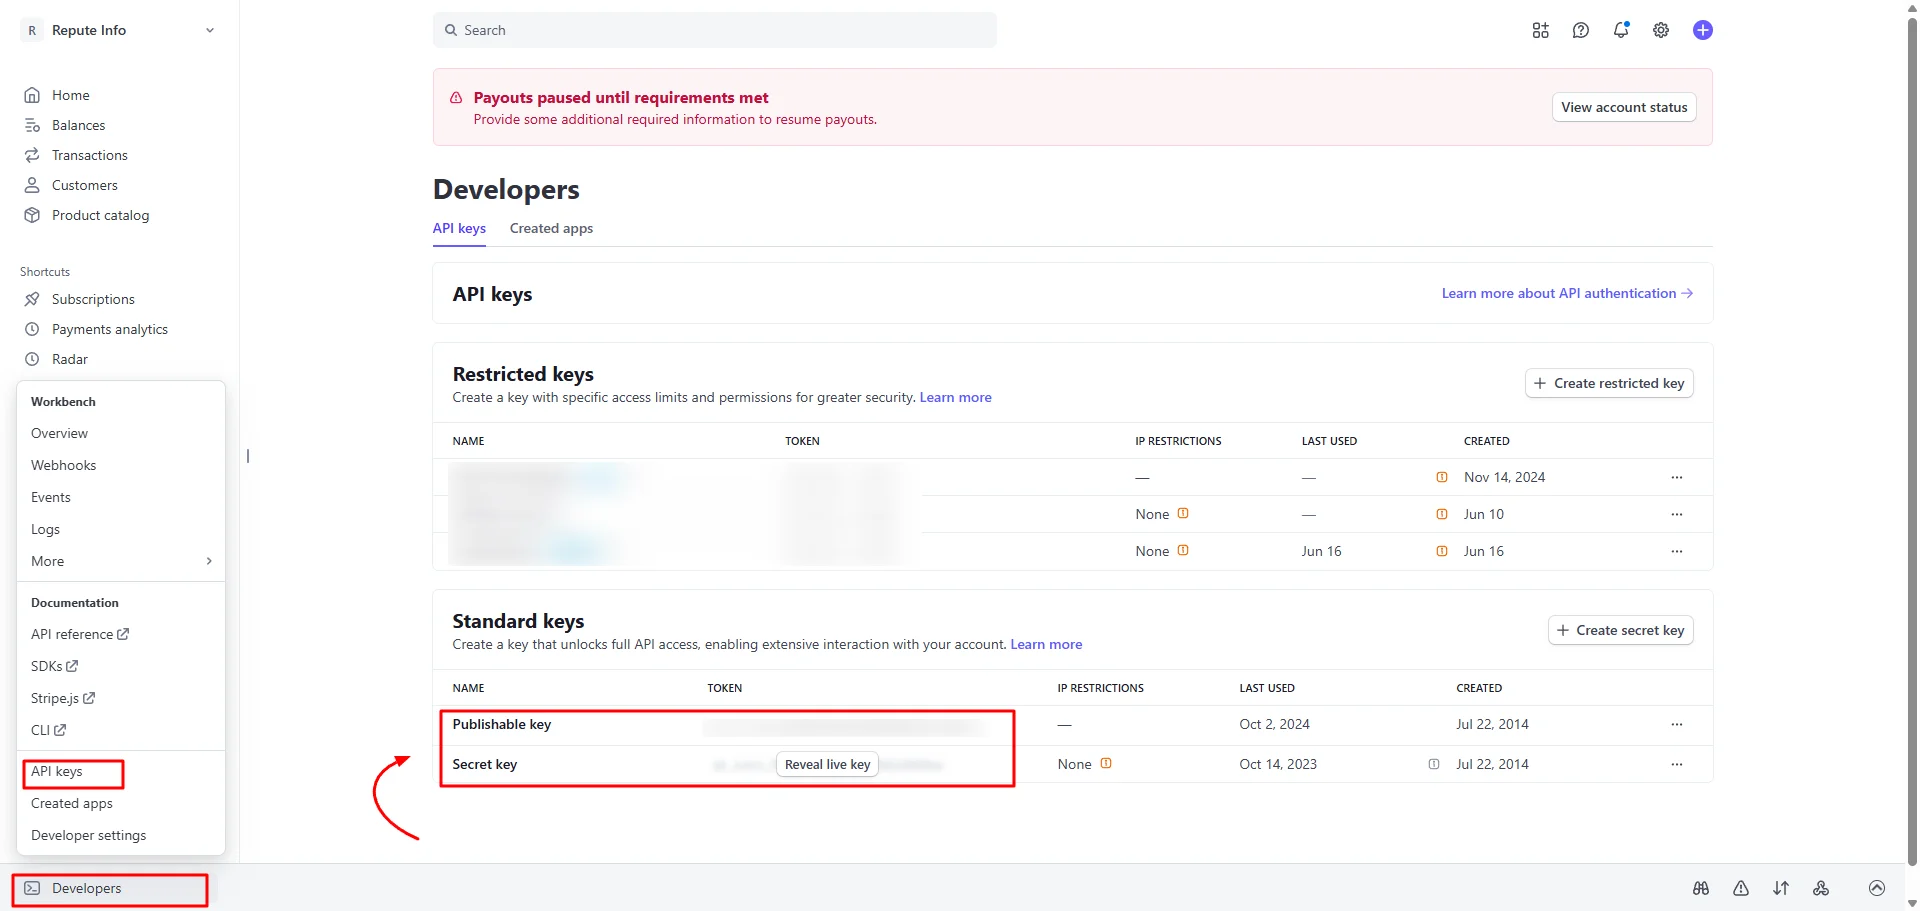
4. After that at the Standard Keys section once can get both publishable and secret keys.
Stripe Client ID
To get the Client ID, you can:
1. Go to the Settings inside your Stripe Account.
2. Click on the Connect Tab.
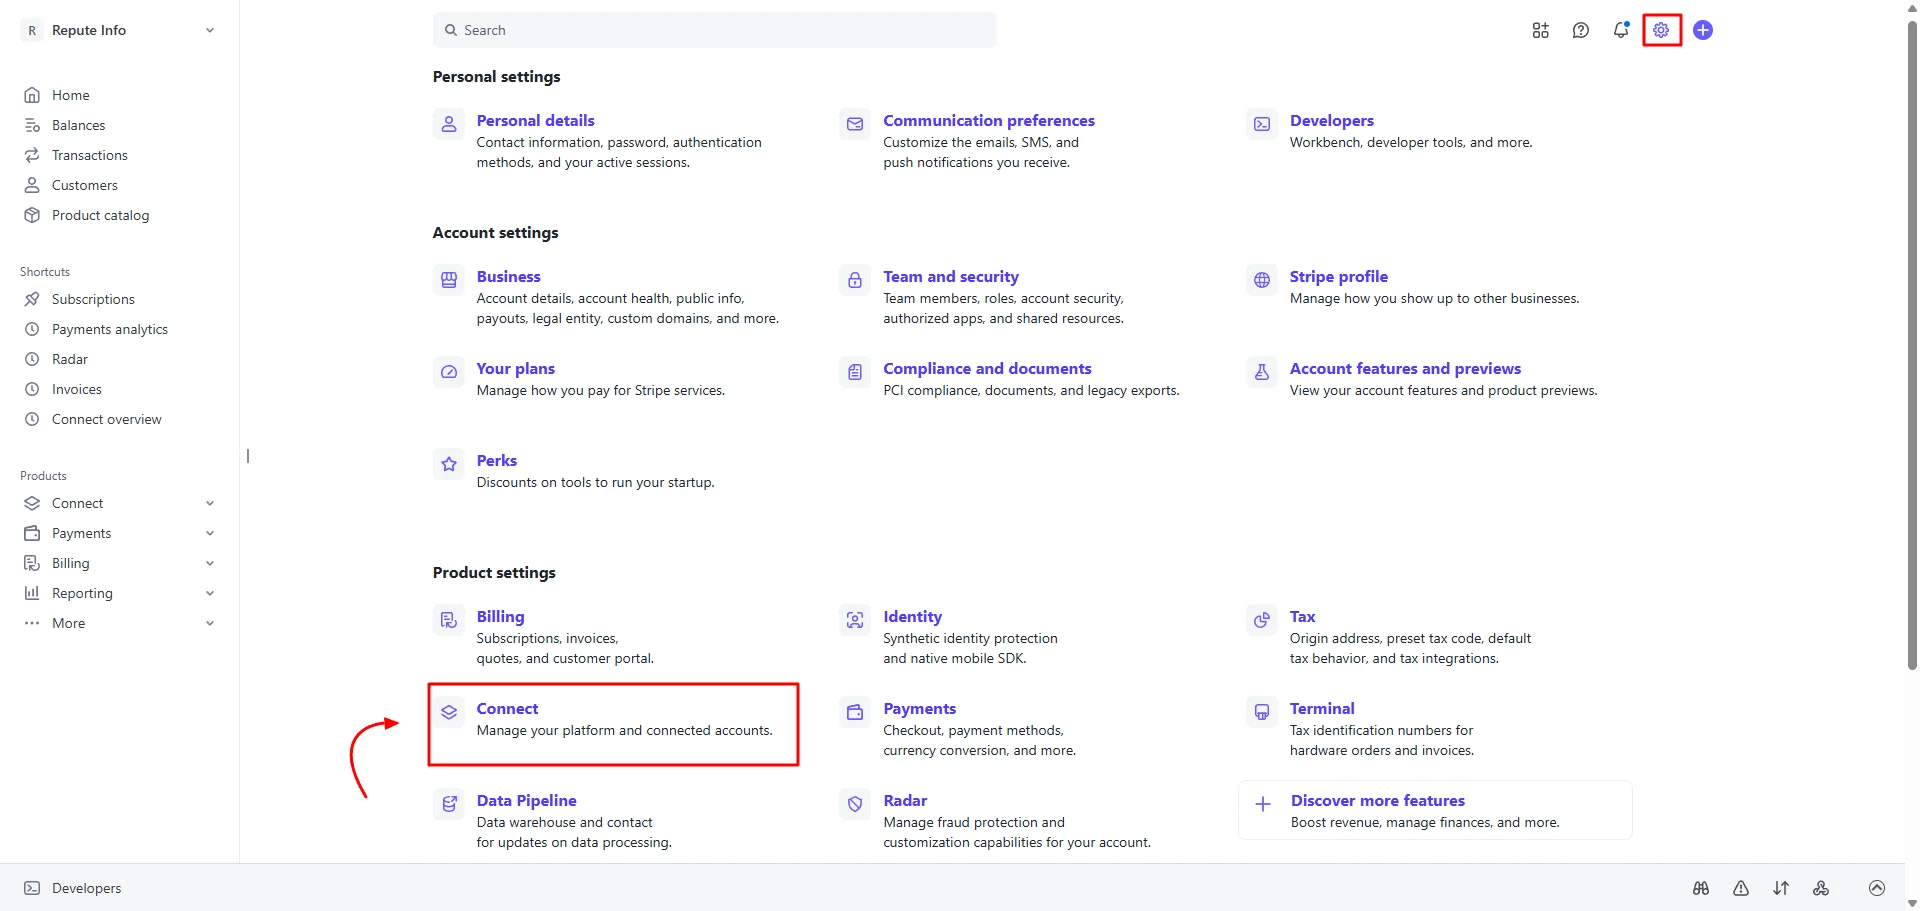
3. At this tab select the Onboarding Options.
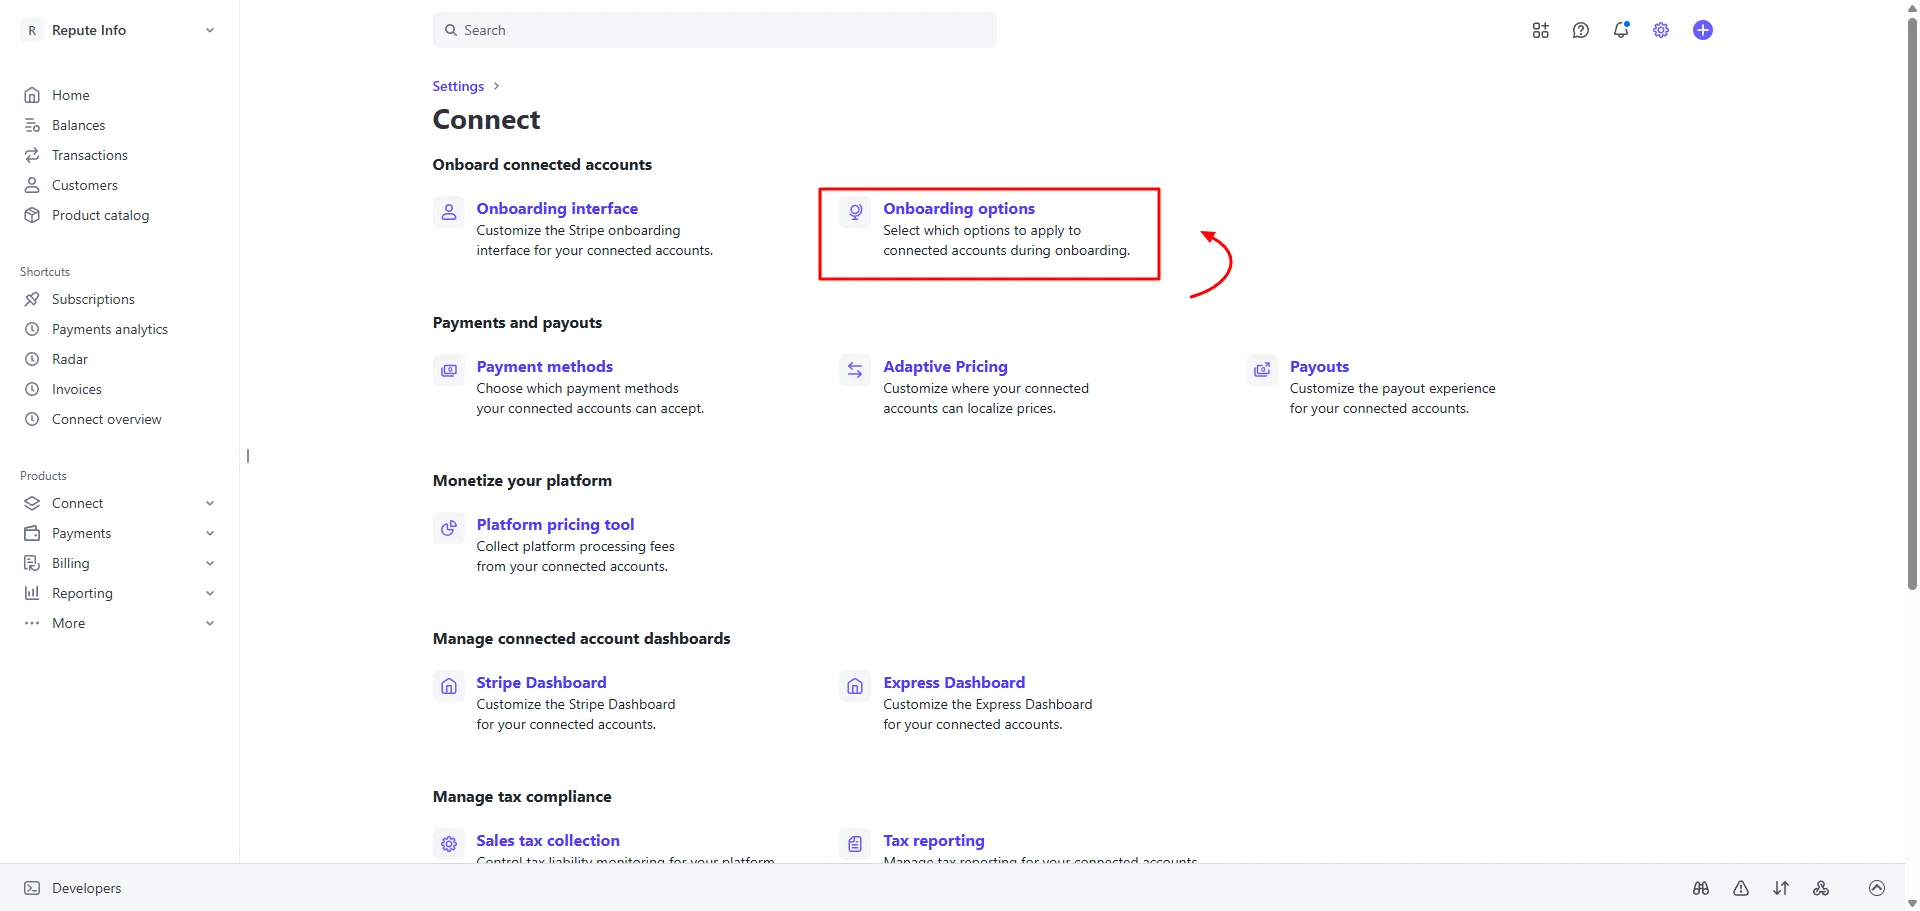
4. When this page is selected click on the OAuth tab and get the Client ID.
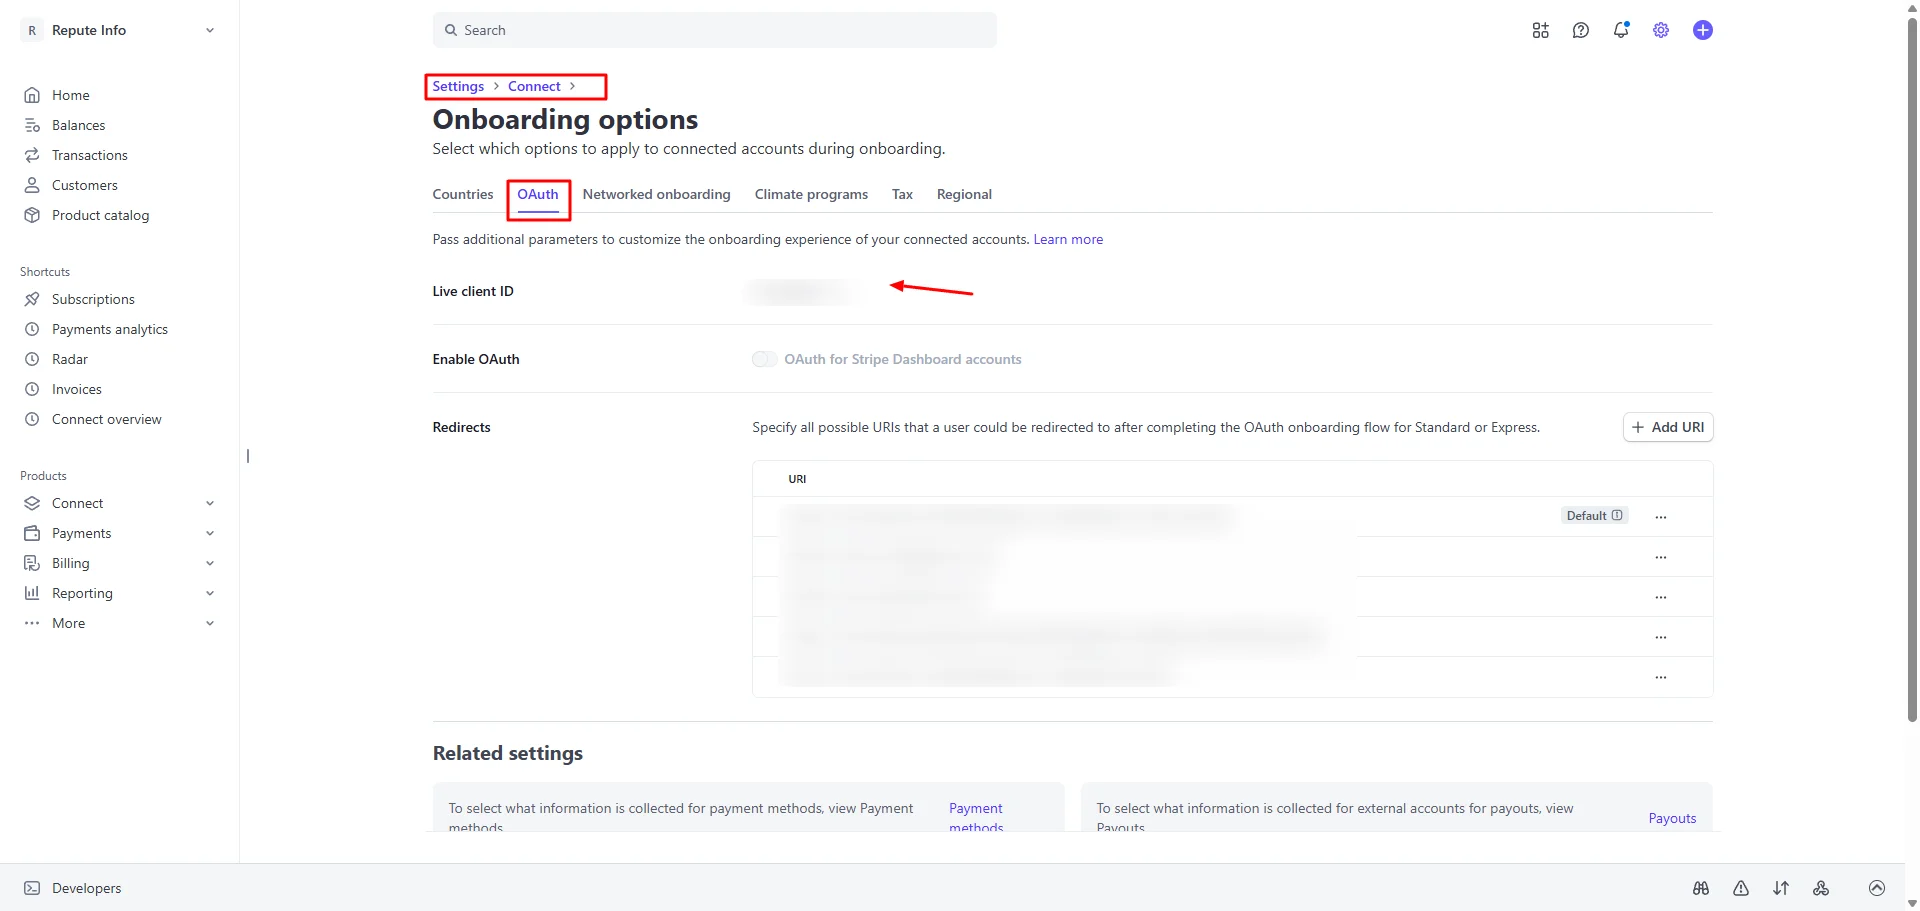
Stripe Redirect URL
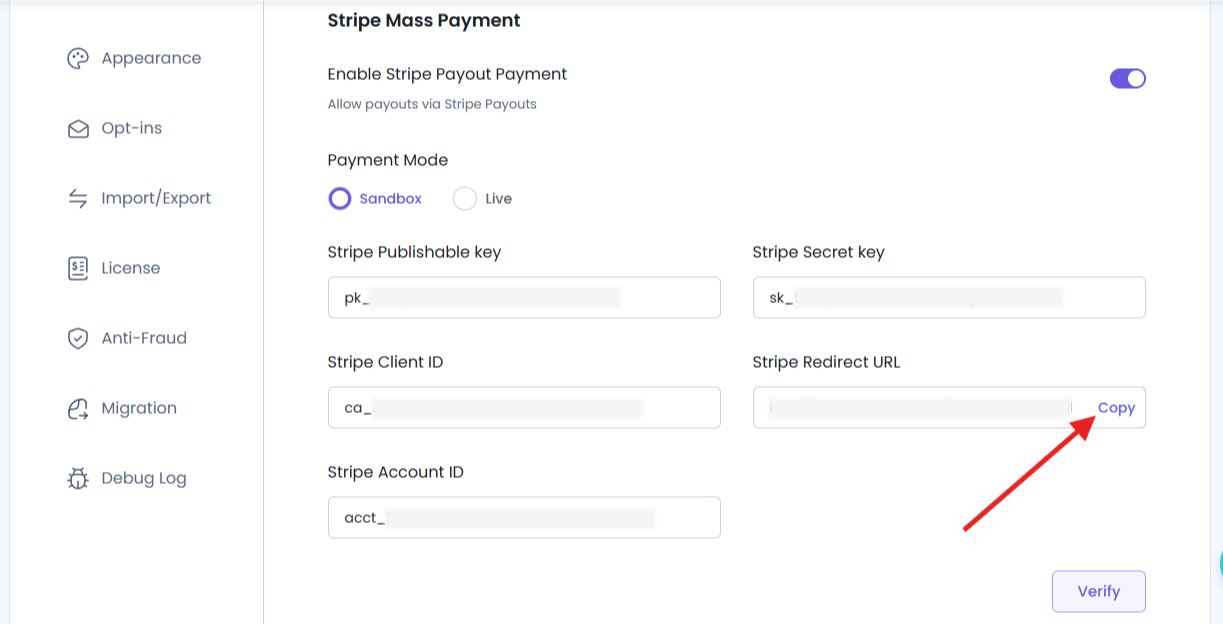
First of all, this time you need to head back to WordPress → AffiliatePress → Settings → Payments.
Now copy the Stripe Redirect URL under the Stripe Mass Payout
That’s all!
Back to login inside your Stripe Account, go to the Settings ⇾ Connect ⇾ Onboarding Options page at the OAuth tab at the Redirects.
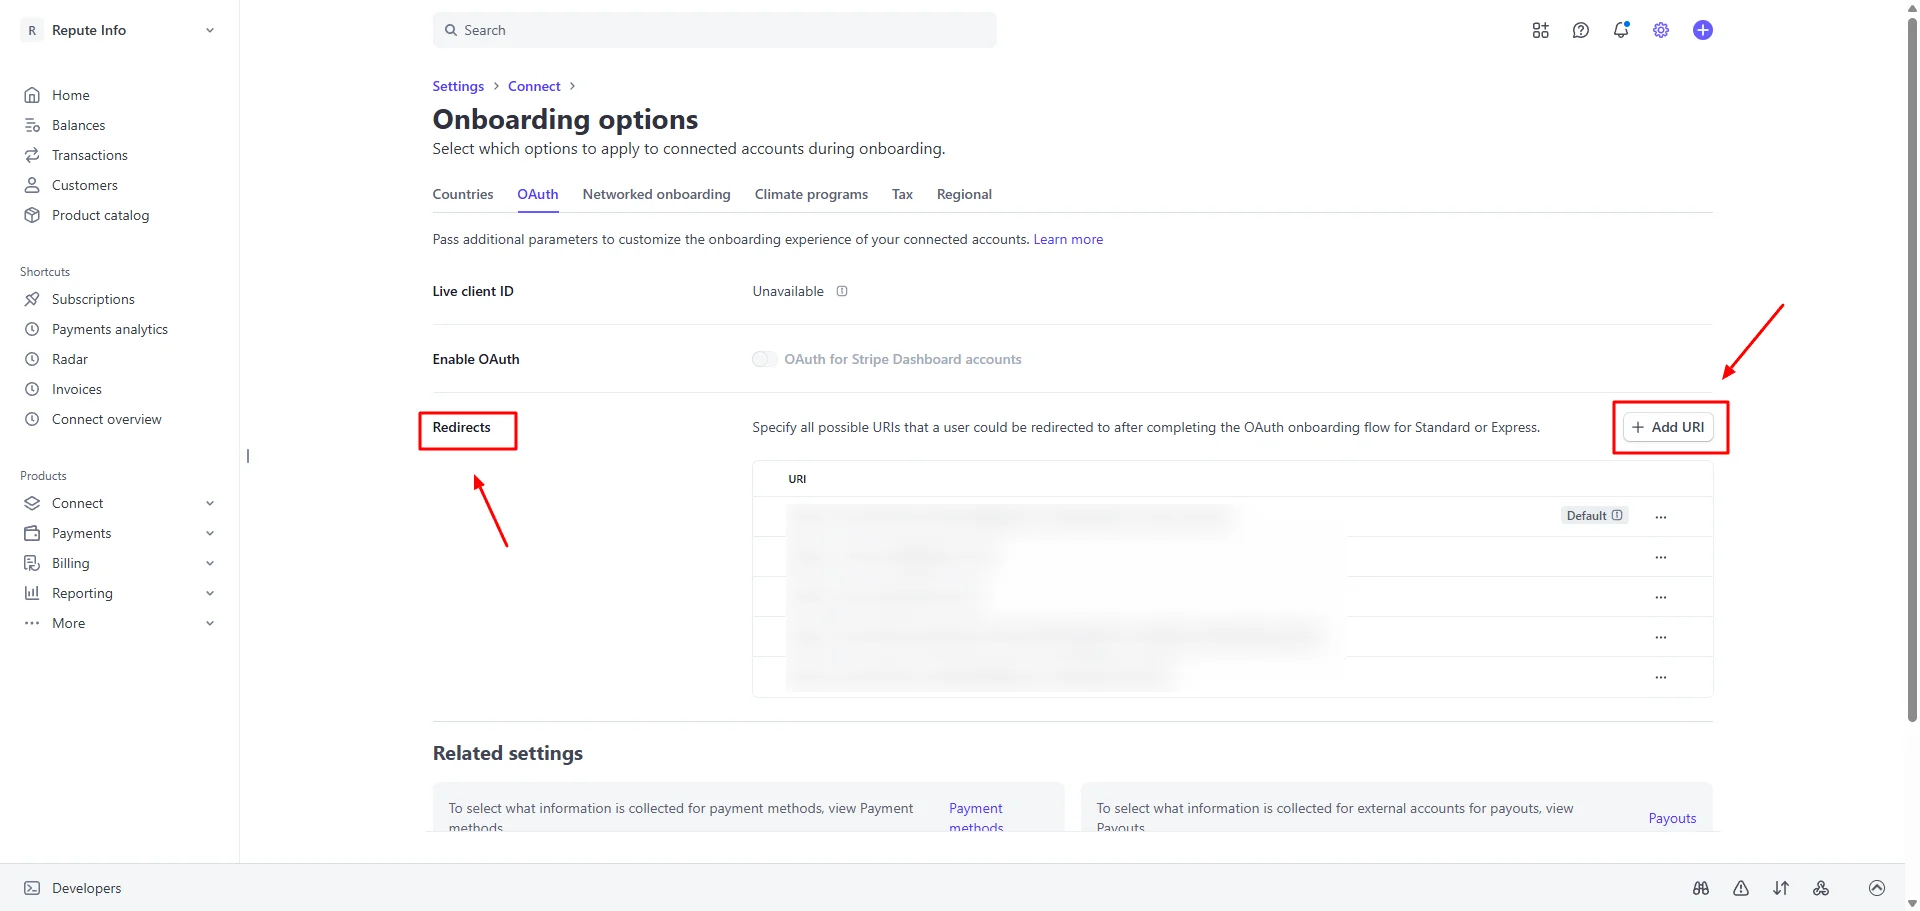
Then, add the URL which you copied from AffiliatePress Settings.
Stripe Account ID
Stripe Account ID can be accessed from:
1. Go to the Stripe Account Settings → Business page
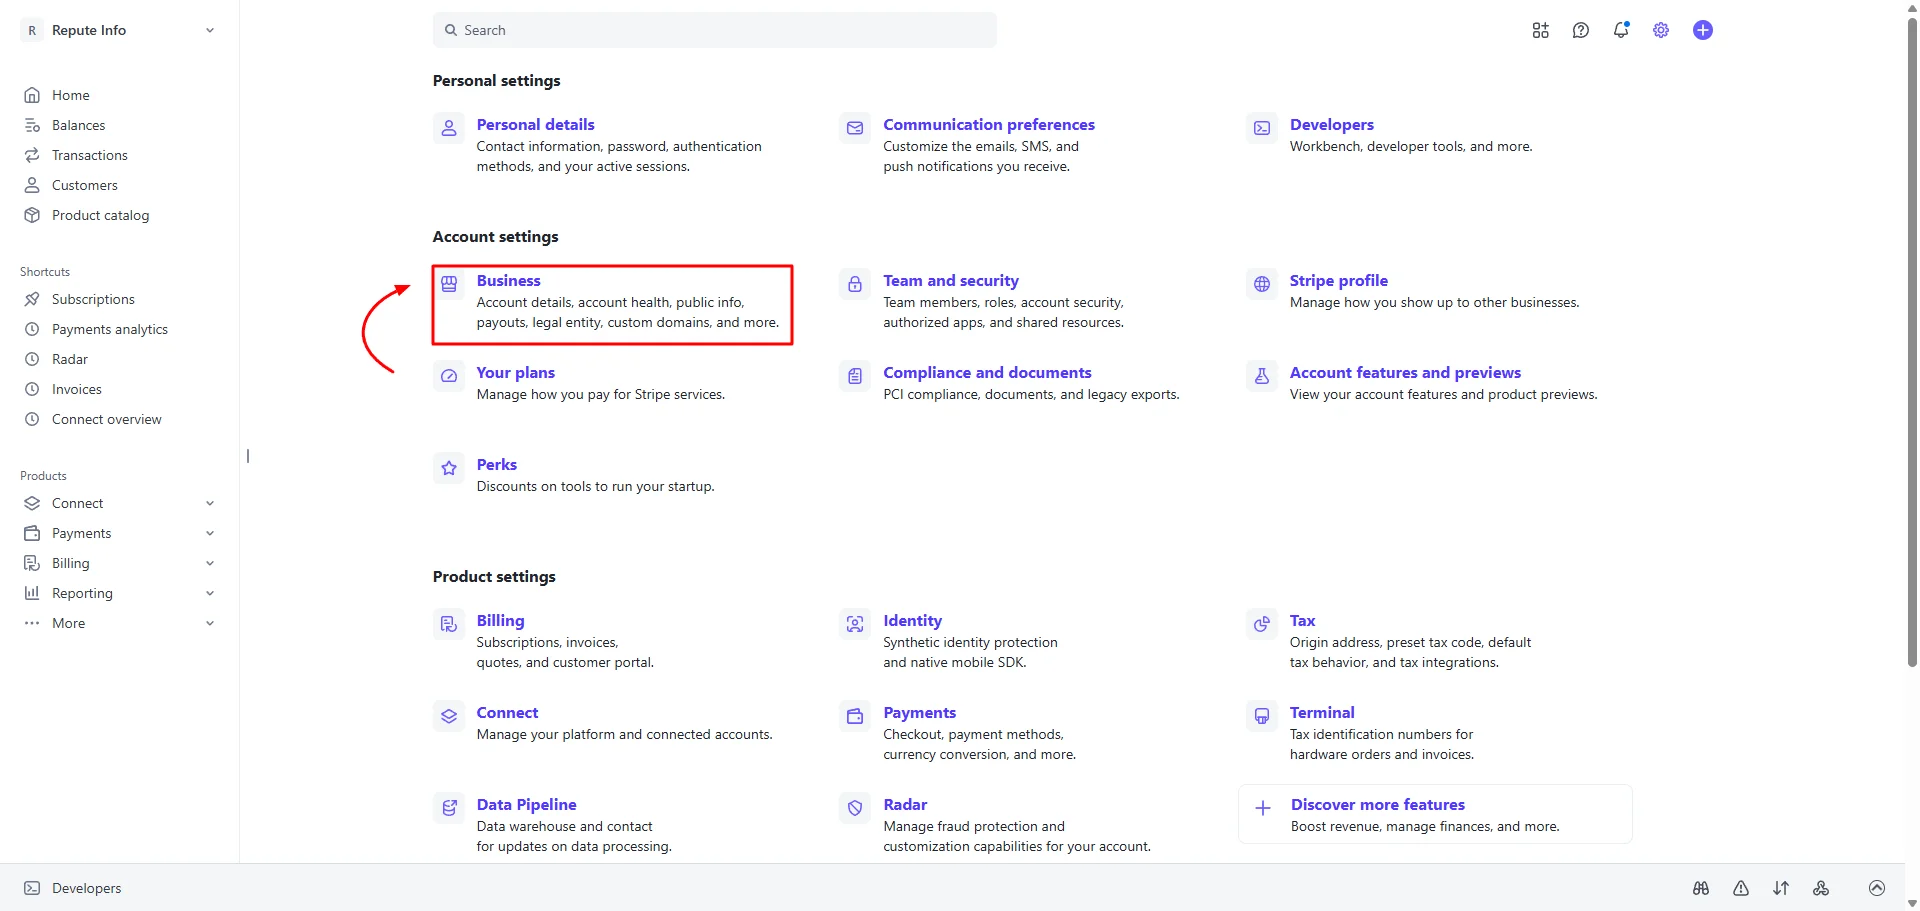
2. Inside the Business page, go to the Account Details tab.
3. Here you can see the Account ID, so just copy it
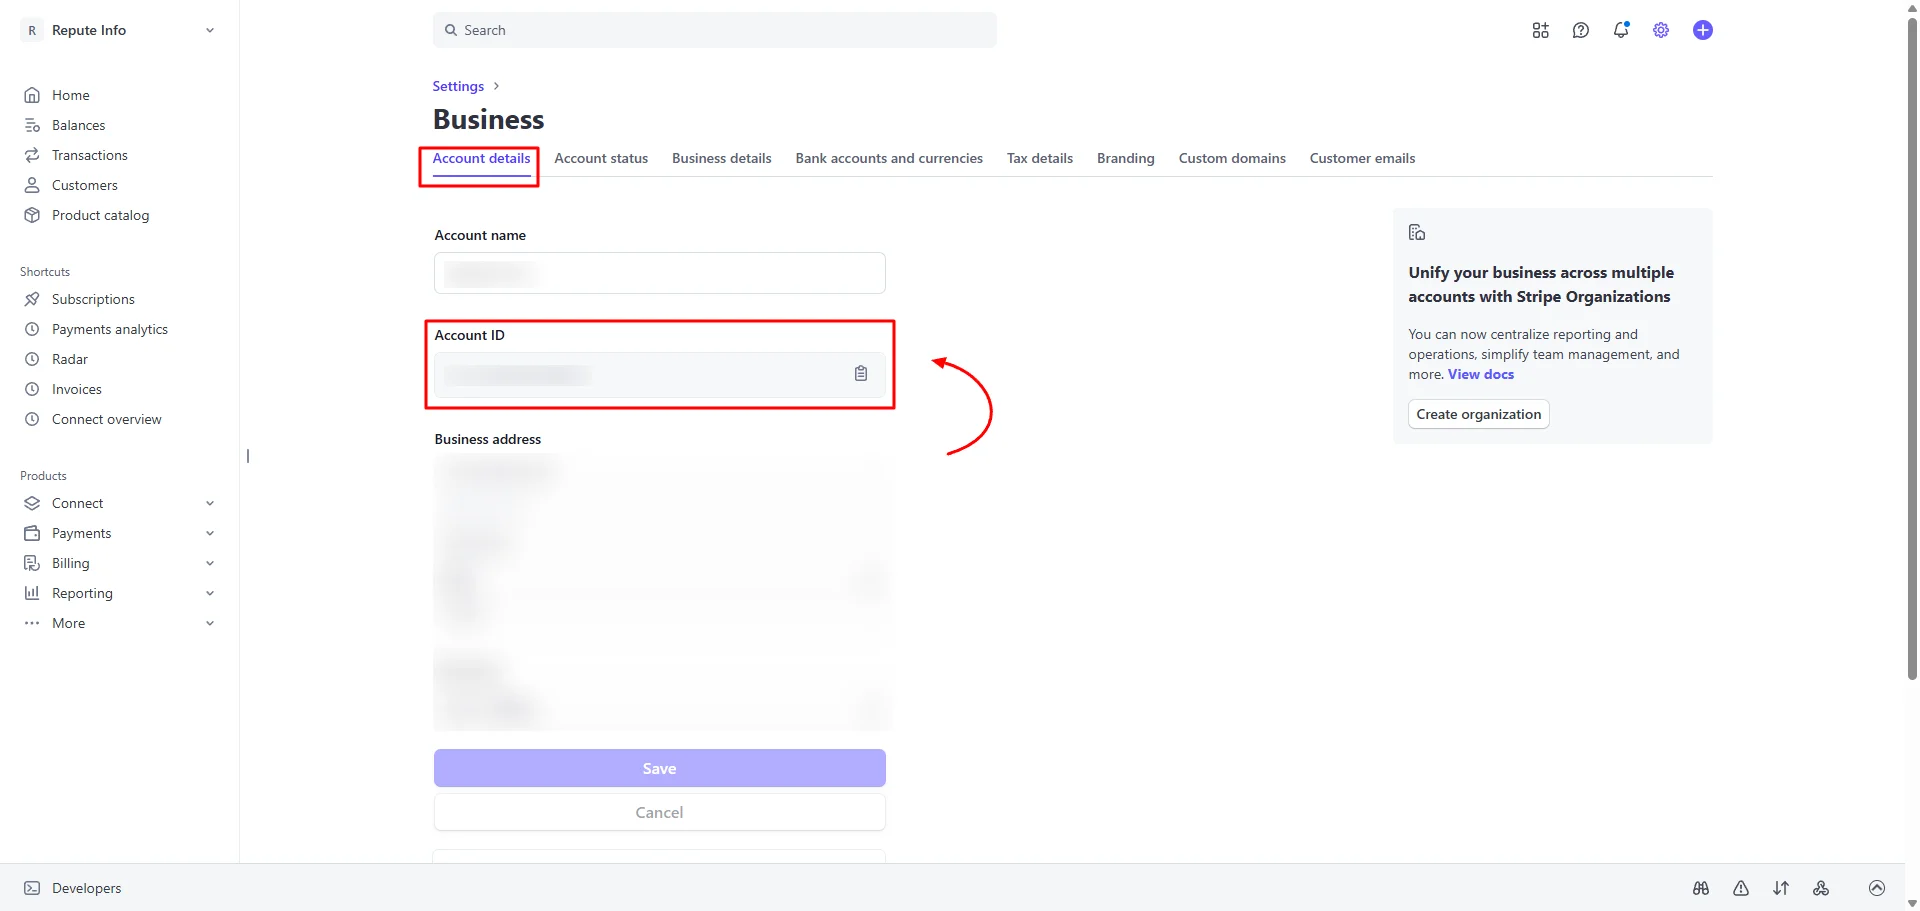
That’s all! You have finally managed to retrieve all IDs and Keys from Stripe Account. Once you get all of them, simply paste each one on their respective field, and hit that “Verify“.
If your connection is successful, you’ll see a quick popup on the top-right side of the AffiliatePress Payments panel. If not connected, we recommend you to check your all details once again.
Connect a Stripe Account as an Affiliate
Once you successfully connect the site’s Stripe account, affiliates can connect their own Stripe accounts directly from the Affiliate Panel.
For connecting Stripe account as an affiliate, read further, and the follow the steps below:
1. First, log in to your Affiliate Account.
2. Click the Edit Profile icon.
3. Scroll down to the Payment Details section, and select Stripe.
4. Click Connect with Stripe.
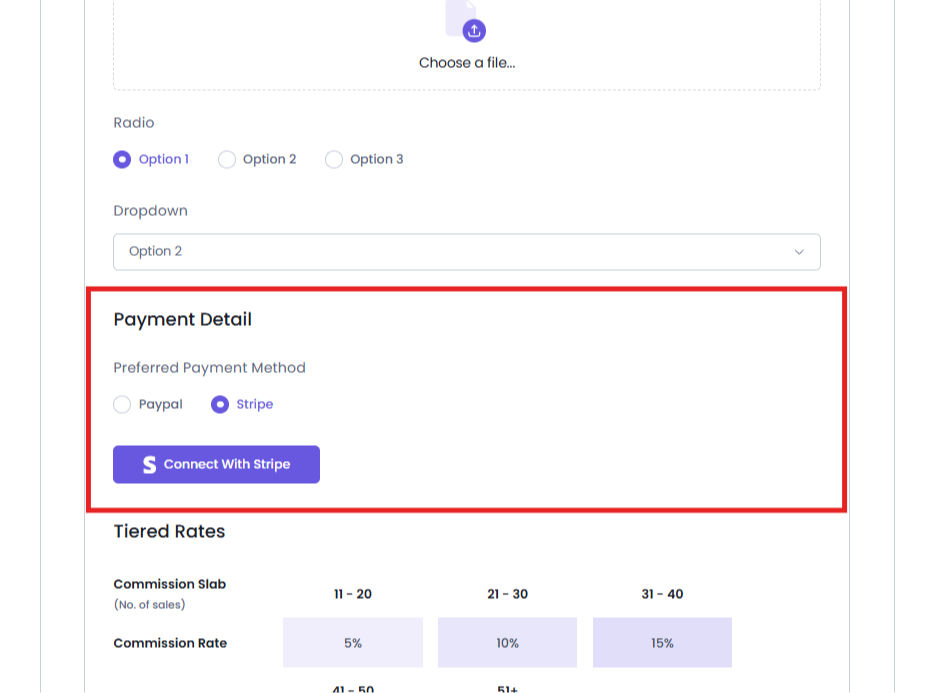
5. Complete the authorization process on Stripe.
After the connection is successful, the affiliate’s Stripe account will be linked to AffiliatePress and will be available for receiving commission payouts.
Note: Affiliates must connect their Stripe account before they can receive payouts through Stripe.
Modify Affiliate Panel Labels
You can customize the labels related to Stripe Payout from AffiliatePress → Settings → Label → Stripe Labels.
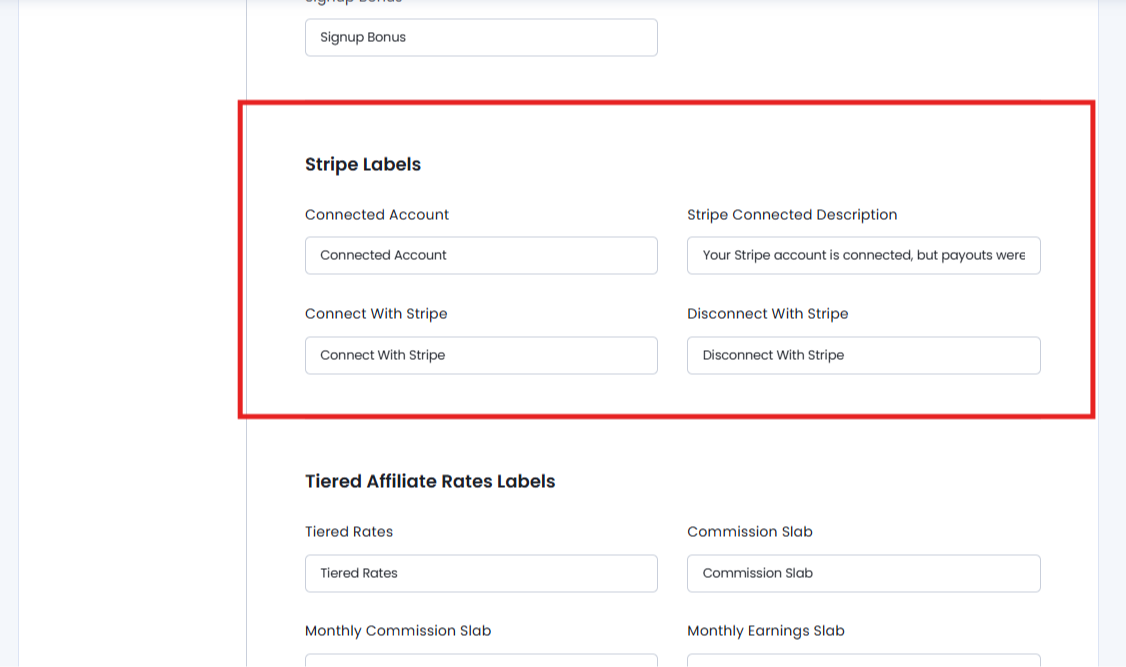
The Stripe Labels section allows you to customize the labels shown for Stripe-related payment features in the Affiliate Panel.
Remember, the labels customized here are shown only in the Affiliate Panel. They do not change the corresponding labels or terminology in the AffiliatePress admin dashboard.
For Stripe Payout, you can customize:
- Connected Account: The label shown when an affiliate’s Stripe account is connected.
- Stripe Connected Description: The description displayed when the affiliate’s Stripe account is connected but payouts were not enabled during authentication.
- Connect With Stripe: The label used for connecting a Stripe account.
- Disconnect With Stripe: The label used for disconnecting a connected Stripe account.
- Payments: The label used for the Payments section in the Affiliate Panel.
This gives you the flexibility to use terminology that fits your affiliate program and website the best.
Manage Affiliate Payouts
AffiliatePress makes it easy to manage and track affiliate payouts from one place. Just go to AffiliatePress → Payouts, and from here, you can:
- View all payout records.
- Check pending and completed payouts.
- Review payout details for each affiliate.
- Track paid and unpaid commissions.
Check out this beginner friendly guide for managing payouts in AffiliatePress.