



Get Started with AffiliatePress: Quick Setup Guide
This quick start guide walks you through the complete flow of setting up and launching your affiliate program with AffiliatePress. From configuring your commission rules and setting up affiliate registration to adding affiliates, managing payouts and sharing referral links, we’ll cover everything needed to get started.
By the end of this guide, your affiliate program will be ready to accept affiliates and start tracking referrals and commissions.
Note: If you’re new to AffiliatePress and need help installing or activating the plugin, here’s a handy guide for AffiliatePress Installation and Activation before getting started.
Set Up AffiliatePress to Start Your Affiliate Program
To launch your affiliate marketing program with AffiliatePress, you’ll need to set up the key parts of your program including commissions, affiliate registration, affiliates, payouts and referral links.
When everything is set, you’ll be ready to accept affiliates and start tracking referrals and commissions through AffiliatePress.
Please Note: If you’ve completed the AffiliatePress Setup Wizard, you can start running your affiliate program right away – without any of these steps below. But if you skipped it (or want to configure AffiliatePress yourself), follow the steps below.
Step 1: Set Your Commission Structure
Before you start inviting affiliates, you’ll need to decide how your affiliate program will work. This includes deciding how affiliates earn commissions and what commission amount they are going to get.
Firstly, go to AffiliatePress → Settings → Commissions tab, and set your default commission rules.
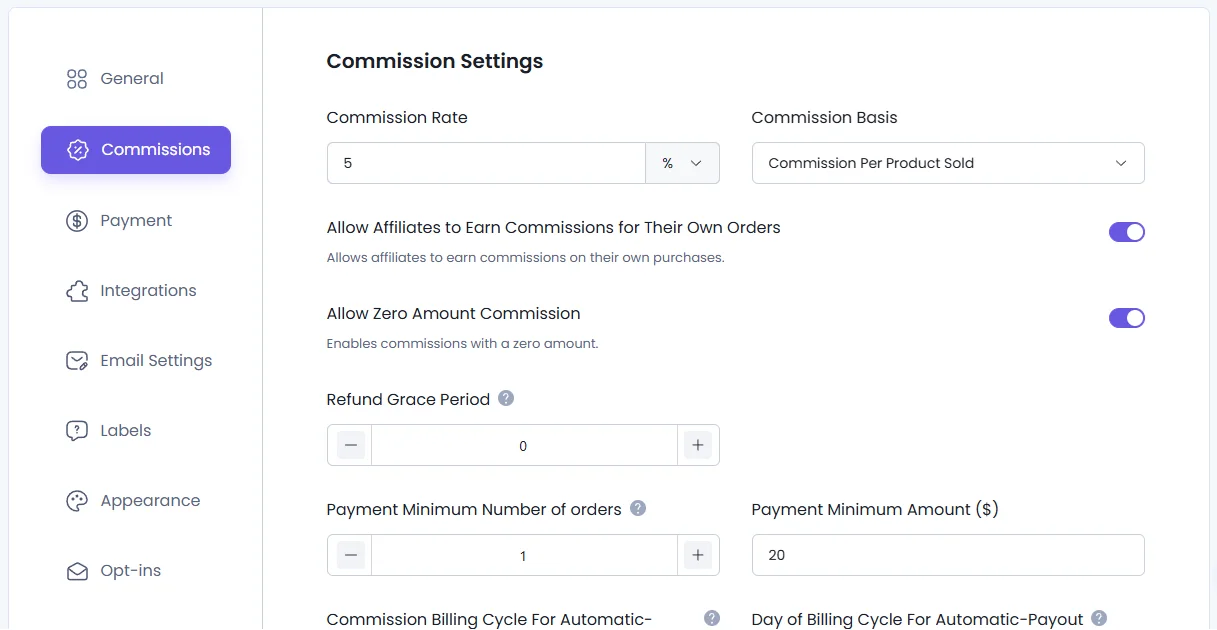
For a basic affiliate program, review the following settings” :
- Commission Rate: Decide the affiliate commission earned for a successful referral and also decide whether it is percentage or fixed.
- Commission Basis: Pick how the commission is calculated:
- Commission Per Product Sold
- Commission Per Order
- Refund Grace Period (Optional): Set a waiting period before a commission becomes eligible for payout, if needed.
- Payment Minimum Amount / Number of Orders (Optional): Set any minimum requirements for affiliate payouts.
You can set advanced commission options later including settings for specific products, customers, orders and other commission conditions. Check out this beginner friendly Commission Settings guide for more details.
Step 2: Set Up Affiliate Registration Form
After configuring your affiliate registration settings, the next step is to make the registration form available on your website so visitors can apply to become affiliates.
Note: AffiliatePress automatically creates an Affiliate Registration page for you. You can use this existing page, an existing page on your website or create a new page specifically for affiliate registration.
If you prefer to use the “Affiliate Signup” page created by AffiliatePress, you can skip this step completely. However, if you want to add the Affiliate Registration for in your WordPress page or post, simply add this shortcode using the WordPress editor:
[affiliatepress_affiliate_registration]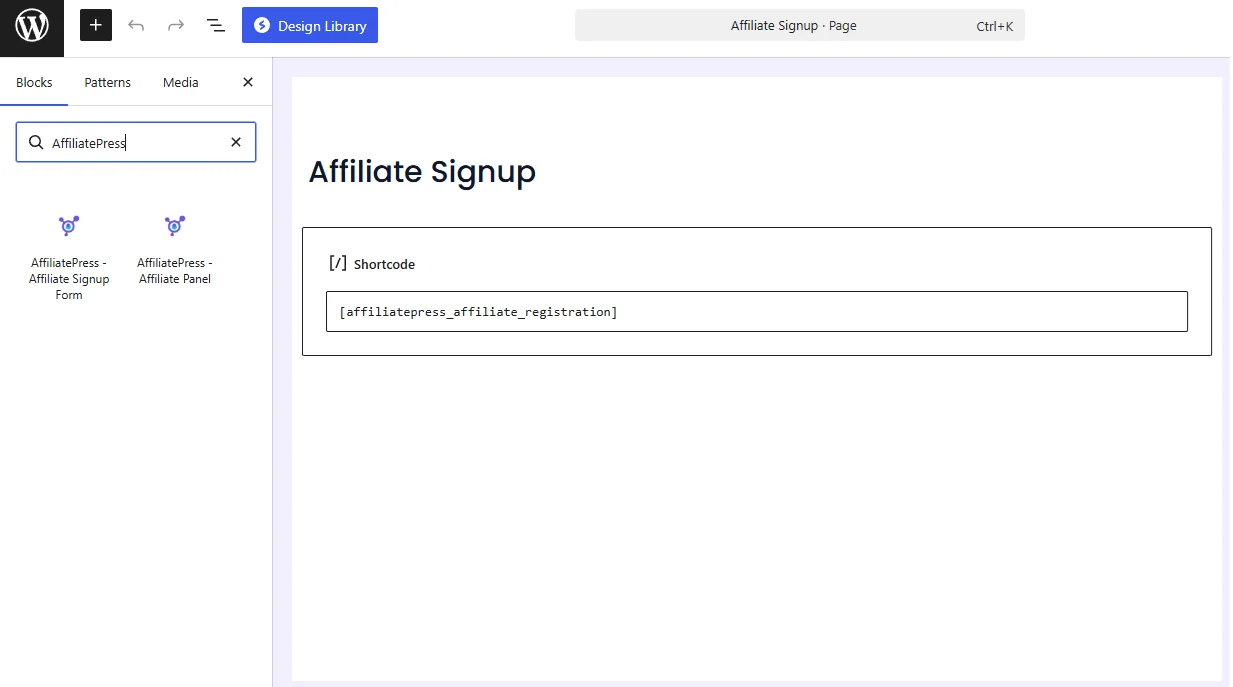
That’s it!
After publishing the page, visitors will be able to access the affiliate registration form from your website and submit their application to join your affiliate program.
For a detailed step by step Affiliate Registration guide, click here.
Step 3: Add Your Affiliates To The Program
Next you can start adding affiliates to your program.
AffiliatePress gives you two ways to add affiliates. Either you can let users register through your affiliate registration form, or add affiliates manually from your WordPress dashboard.
Approve Affiliate Registrations
If you’re allowing users to register through your affiliate registration form, you can review their applications and approve from AffiliatePress → Affiliates before they start promoting your products or services.
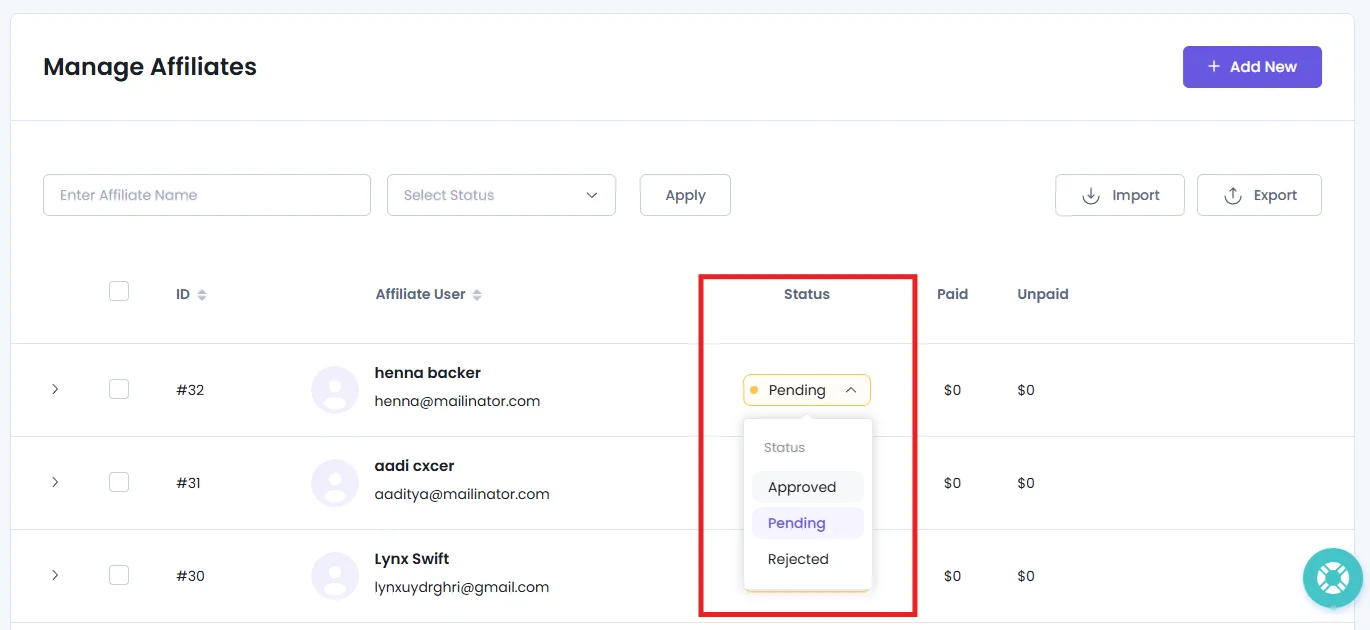
But if you enabled “Auto Approve & Activate New User Registration” in the previous step, you save yourself from the hassle of doing this too. AffiliatePress now will automatically approve and activate new affiliate accounts after registration.
Add an Affiliate Manually
If you want to add an affiliate yourself, go to AffiliatePress → Affiliates from your WordPress dashboard.
Click “Add New” and select the WordPress user you want to add as an affiliate. Simply fill in all the required details and save the affiliate.
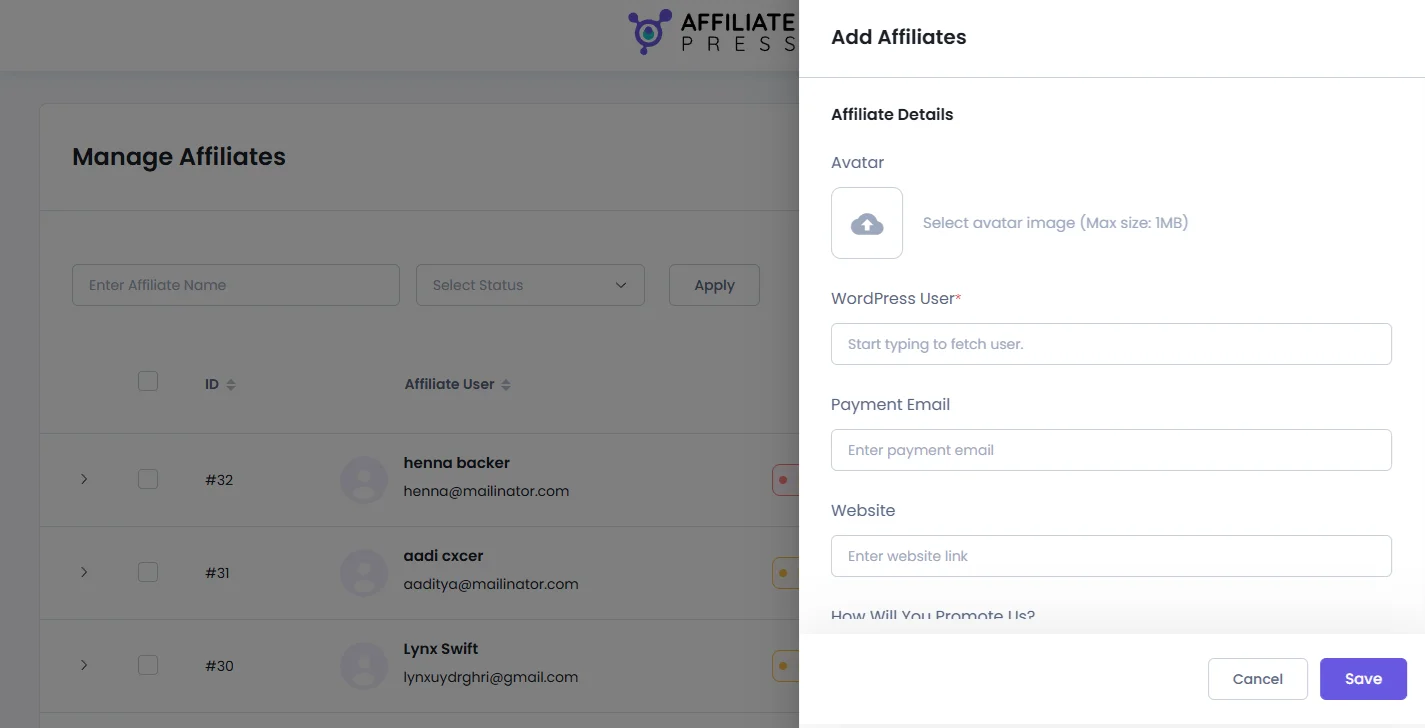
After the affiliate is added or approved, they’ll be able to access their Affiliate Panel and use their affiliate tools.
Note: You don’t need to add affiliates manually if you’re using the Affiliate Registration form. New users can register themselves and, depending on your approval settings, be approved automatically or reviewed manually.
For more detailed instructions, see the Affiliate Management guide from here.
Step 4: Configure Affiliate Payment Method
Once you’ve added your affiliates, decide how you’ll pay the commissions they earn. AffiliatePress allows you to configure payout methods so you can process affiliate payments directly from your WordPress dashboard.
Just go to AffiliatePress → Settings → Payment to configure your preferred payout method.
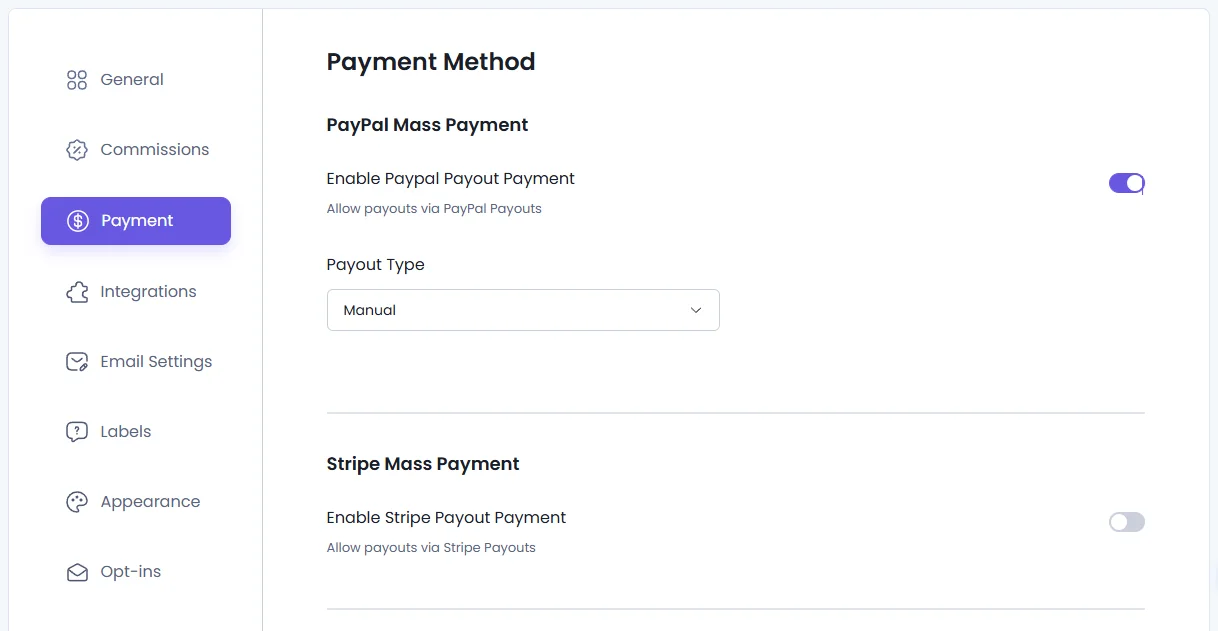
With AffiliatePress, you can pay your affiliates via:
- PayPal payment gateway
- Stripe payment gateway
Turn on the payout method you want to use, decide whether you wanna pay affiliates manually or automatically, and complete the needed payment details for that method.
You can configure the payment method that best fits your affiliate program. You don’t need to enable every available option.
For detailed instructions on configuring and processing affiliate payouts, see the Affiliate Payment guide from here.
That’s it for the main setup. Your affiliates can now log in to their Affiliate Panel, get their referral links, and start promoting your products or services.
How Do Affiliates Get Their Referral Links?
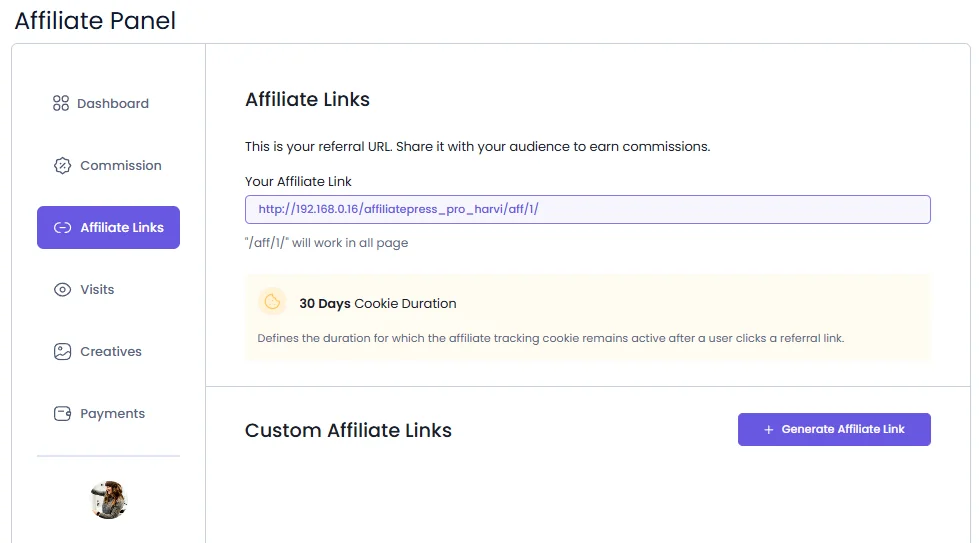
After an affiliate is added or approved, they can access their Affiliate Panel from your website.
From the Affiliate panel → Affiliate Links tab, each of your affiliates can get their referral links.
Affiliates can now copy their available referral link and share it with their audience. When someone clicks that link, AffiliatePress recognizes the affiliate associated with that referral and begins tracking the visit.
Once an affiliate starts sharing their referral links, AffiliatePress can track the visits and conversions generated through those links. For more details, here’s a complete beginner friendly guide on the Affiliate panel – just click here.
How Does AffiliatePress Track Referrals and Commissions?
AffiliatePress tracks the visits and conversions generated through affiliate referral links.
When a visitor clicks an affiliate referral link, AffiliatePress automatically records the visit and assigns it to the respective affiliate. And if that visitor completes a qualifying conversion, AffiliatePress records the commission based on the commission rules you set earlier.
The basic flow looks like this:
Affiliate shares referral link → Visitor clicks the link → Visit is tracked → Conversion occurs → Commission is recorded.
You can check each stage directly from your WordPress dashboard.
1. Check the Visit
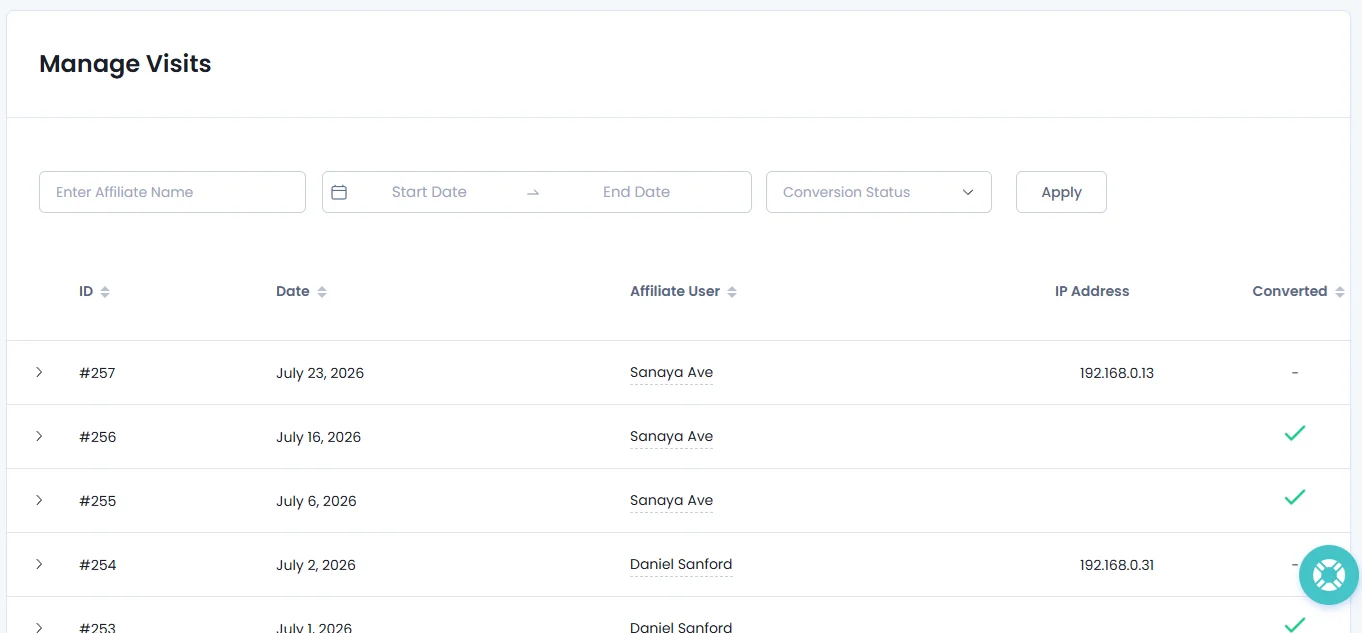
To view the visits generated by your affiliates, go to AffiliatePress → Visits.
Here, you can review the tracked visits and see information such as the affiliate, visit date, landing URL, and conversion status.
2. Manage the Commissions
When a tracked referral results in a qualifying conversion, AffiliatePress records the commission for the affiliate.
Go to AffiliatePress → Commission to view the commissions generated by your affiliate program. You can review the commission amount and its current status from here.
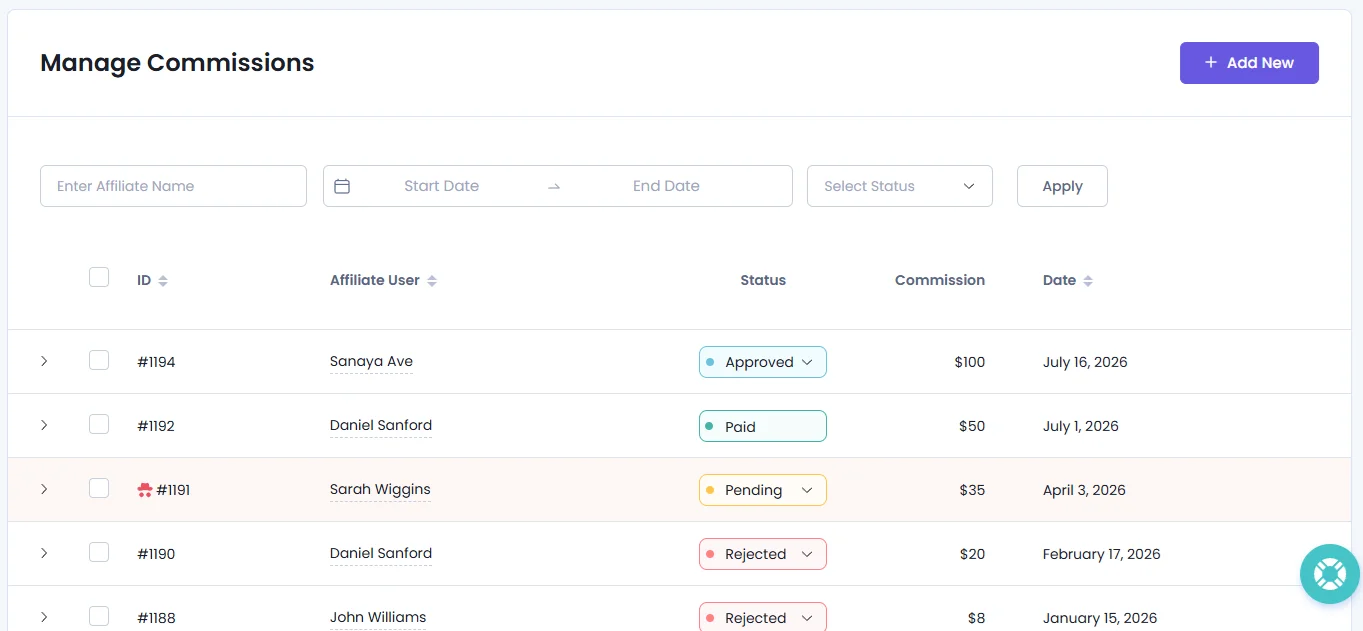
By default the commission status will be “Pending”. If you want to approve this Commission, change the status to “Approved“. If you want to reject this commission, change the status to “Rejected“.
Now if you already have paid the commission, (although this will be done automatically by the system) you can still manually change the status to “Paid” as well by editing a Commission record.
3. View Affiliate Payouts
Once commissions become eligible for payment based on your payout settings, you can manage the payments from AffiliatePress → Payouts.
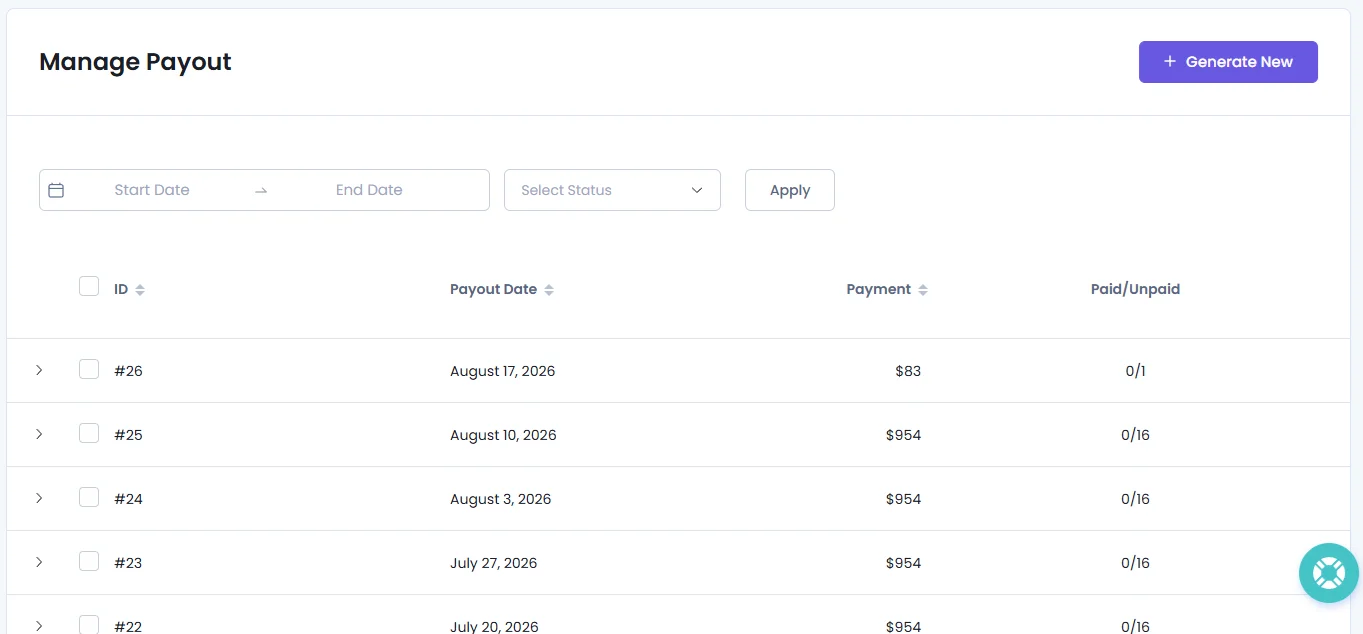
This lets you keep track of which commissions are ready to be paid and manage the payout process from your WordPress dashboard.
After you’ve confirmed that visits and commissions are being recorded correctly, your affiliate program is ready to go.
Your Affiliate Program Is Ready
That’s all! Your AffiliatePress affiliate program is now set up and ready to launch.
You can now start inviting affiliates to promote your products or services and track their referrals, commissions and payouts straight from your WordPress dashboard.
What to Do Next
Now that your affiliate program is up and running, you can explore additional AffiliatePress features and settings to improve your affiliate marketing workflow and get more from your program.
These next steps will help you get the most out of AffiliatePress and grow your business along with your affiliate system.