



AffiliatePress Setup Wizard: Get Your Affiliate Program Ready in Minutes
After installing and activating AffiliatePress, simply click on the AffiliatePress icon and you’ll be guided through its smart Setup Wizard.
The AffiliatePress Setup Wizard easily lets you set up your affiliate program in barely just a few minutes. From here, you can:
- Add your basic affiliate program information
- Configure your commission settings
- Set up email notifications
- Customize your Affiliate Panel styling
- Prepare your affiliate program for accepting affiliates and tracking commissions
You can always change these settings later from the AffiliatePress Settings.
Note: If you need help installing and activating AffiliatePress in your WordPress dashboard, check our beginner friendly AffiliatePress Installation and Activation Guide.
Basic Settings
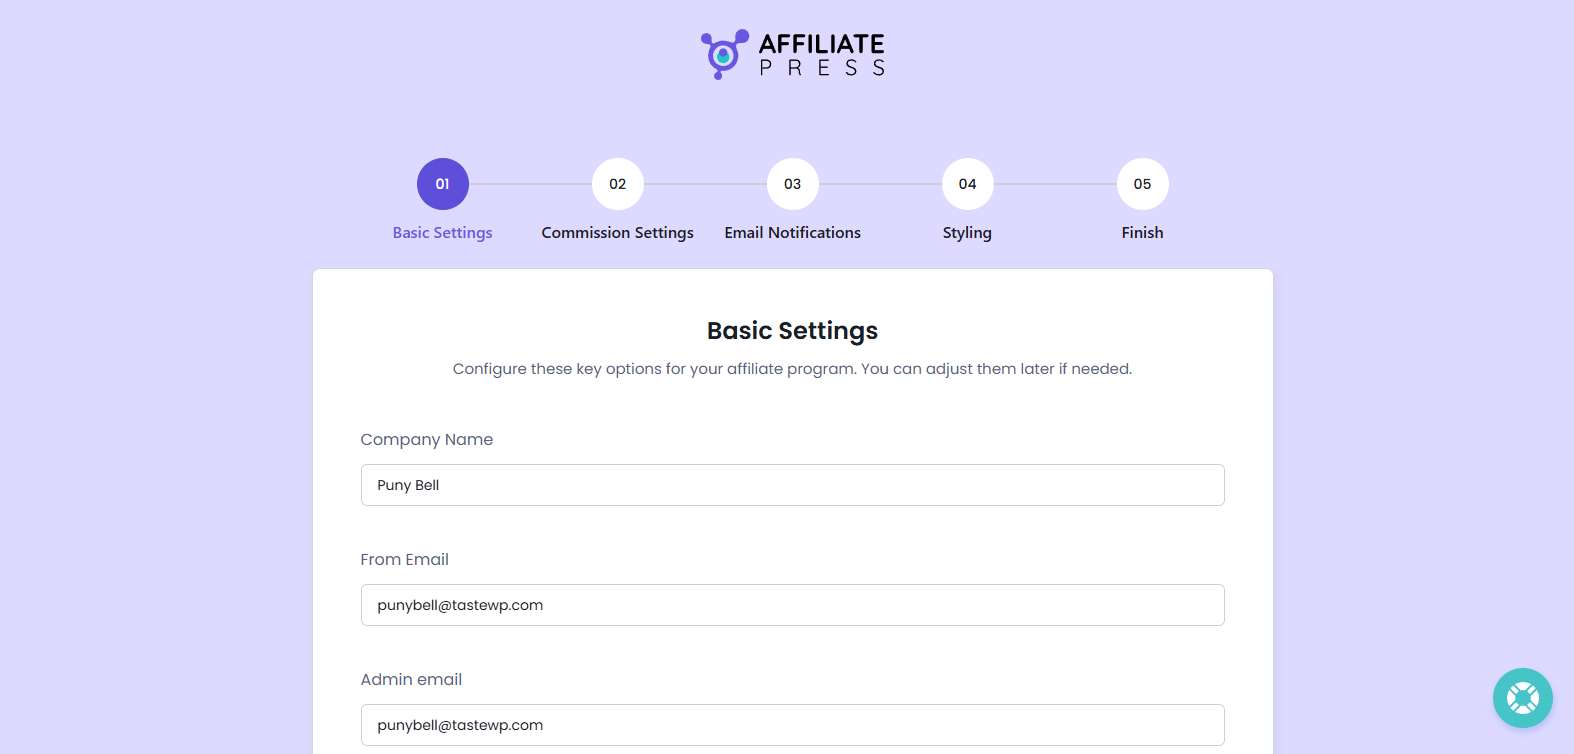
The Basic Settings section lets you configure the essential information for your affiliate program, including your company details, notification email addresses, and affiliate registration options.
From here you can add your details about your affiliate program such as:
- Company Name: Add your company name here.
- From Email: Add the email address that you want to use for sending affiliate emails.
- Admin Email: Add the email address where you want to receive AffiliatePress admin notifications.
Furthermore, you can allow visitors to sign up to your affiliate program and register as an affiliate from your website by simply enabling Allow Affiliate Signup.
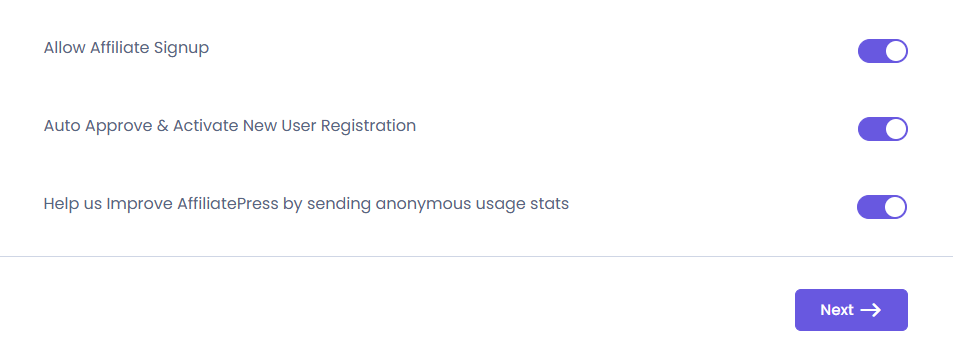
If you want to automatically approve and activate new affiliate registrations, just toggle on the Auto Approve & Activate New User Registration option.
You can also choose to share anonymous usage statistics to help improve AffiliatePress for you.
Once done, click on the “Next →” button to continue.
Note: Although we don’t recommend it, you can always skip the AffiliatePress Setup Wizard by clicking on the “Close and Exit Wizard Without Saving” option at the bottom of each step.
Commission Settings
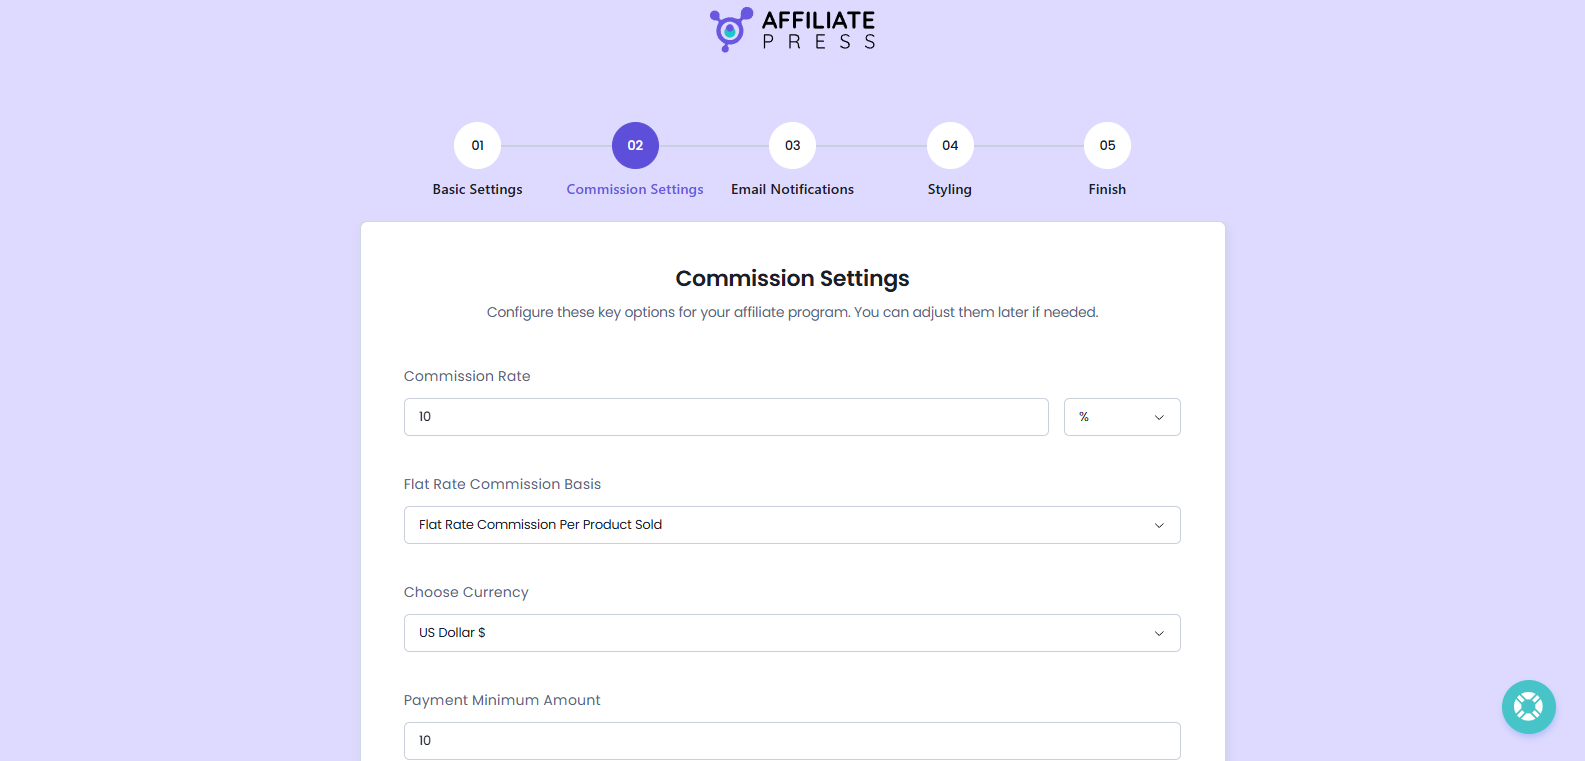
The “Commission Settings” section lets you set the basic commission related settings for your affiliate program.
From here, you can easily:
- Set your Commission Rate
- Choose your Commission Basis
- Select your preferred Currency
- Set the Payment Minimum Amount
- Configure your Integration
- Set the Refund Grace Period
The commission rate and commission basis you configure here will be used for calculating the commissions your affiliates earn. You can always modify these settings later from the AffiliatePress Commissions Settings.
From the Choose Currency, you can select the default currency of your affiliate program. And most importantly, make sure to select the other WordPress plugin you’re going to connect with AffiliatePress from the Integration dropdown list.
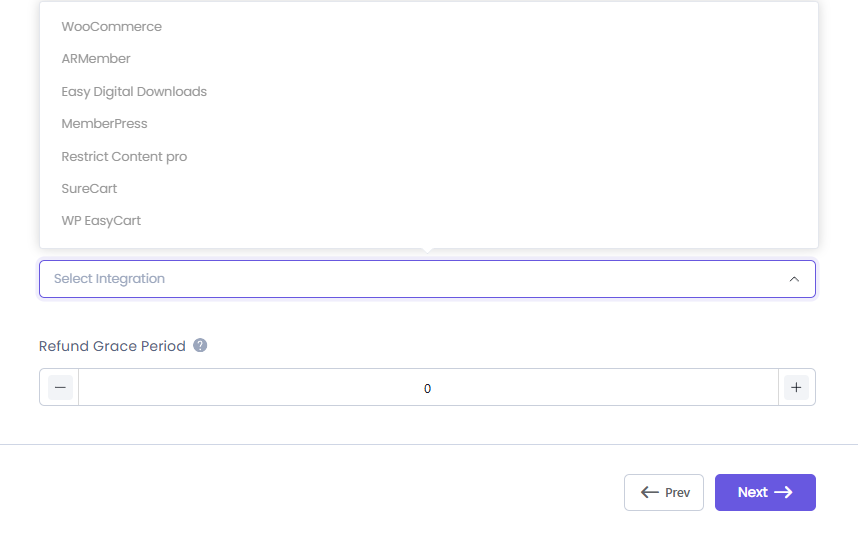
Plus, you can also set the minimum payment amount for affiliates and configure the refund grace period as per your affiliate program needs.
After you set your commissions settings, click on the “Next →” button to continue.
Note: If you want to make any changes in the previous step, simply click on the “← Prev” button at the end of the page.
Email Notifications
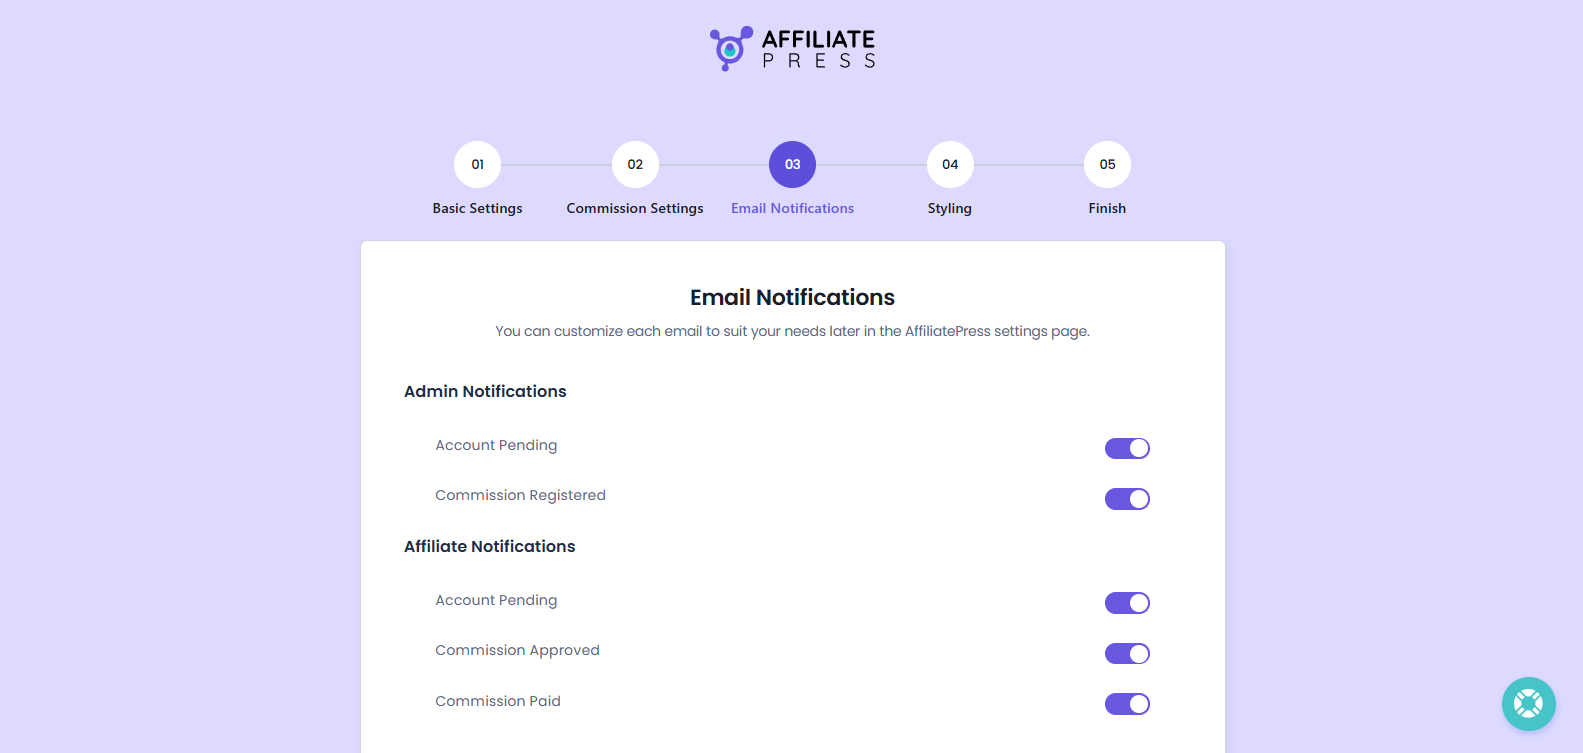
The “Email Notifications” section lets you set all the basic email notifications for your affiliate program.
From here, you can easily manage the email notifications for:
Admin Notifications
- Account Pending: Sends automatic notification if the affiliate application is still pending.
- Commission Registered: When a new commission is recorded, the system alerts you.
Affiliate Notifications
- Account Pending: If the affiliate application is still pending by the admin, it triggers a message.
- Commission Approved: Triggers when the commission of affiliate is approved.
- Commission Paid: Triggers when the commission is paid by admin.
You can customize each email to suit your needs later from the AffiliatePress Email Notification.
Once done, click on the “Next →” button to continue.
Styling
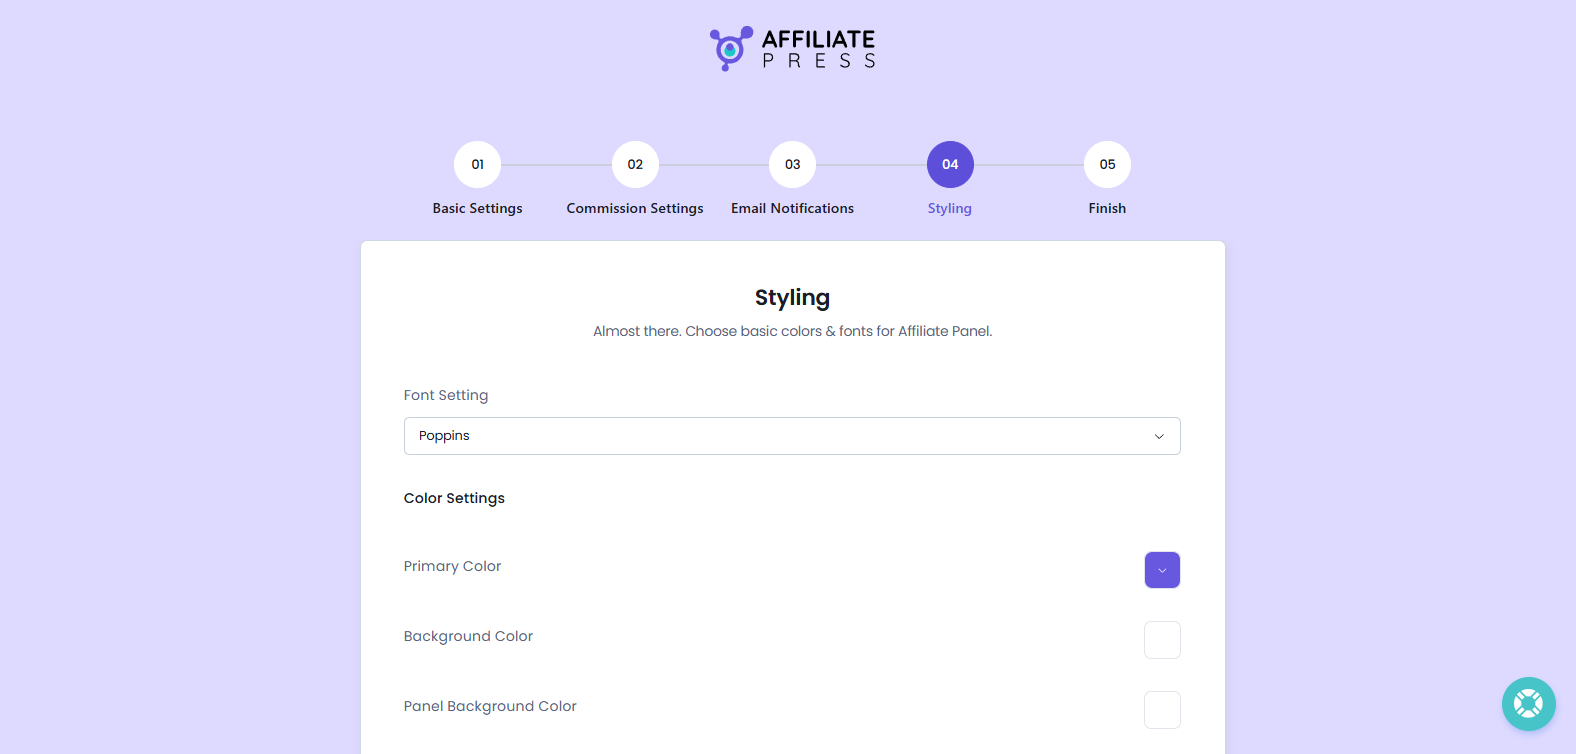
The “Styling” section allows you to customize the basic appearance of your Affiliate Panel. Remember the styling you set here will only be displayed to affiliates in their front-end affiliate panel.
From here, you can easily:
- Select your preferred Font Setting.
- Customize the Color Settings such as:
- Primary Color
- Background Color
- Panel Background Color
- Title Text Color
- Content Color
- Border Color
This way you can customize the basic appearance of your Affiliate Panel and make it match your website style. You can always customize your Affiliate Panel styling later from the AffiliatePress Appearance panel.
Once done, click on the “Finish” button to complete the AffiliatePress Setup Wizard.
Finish
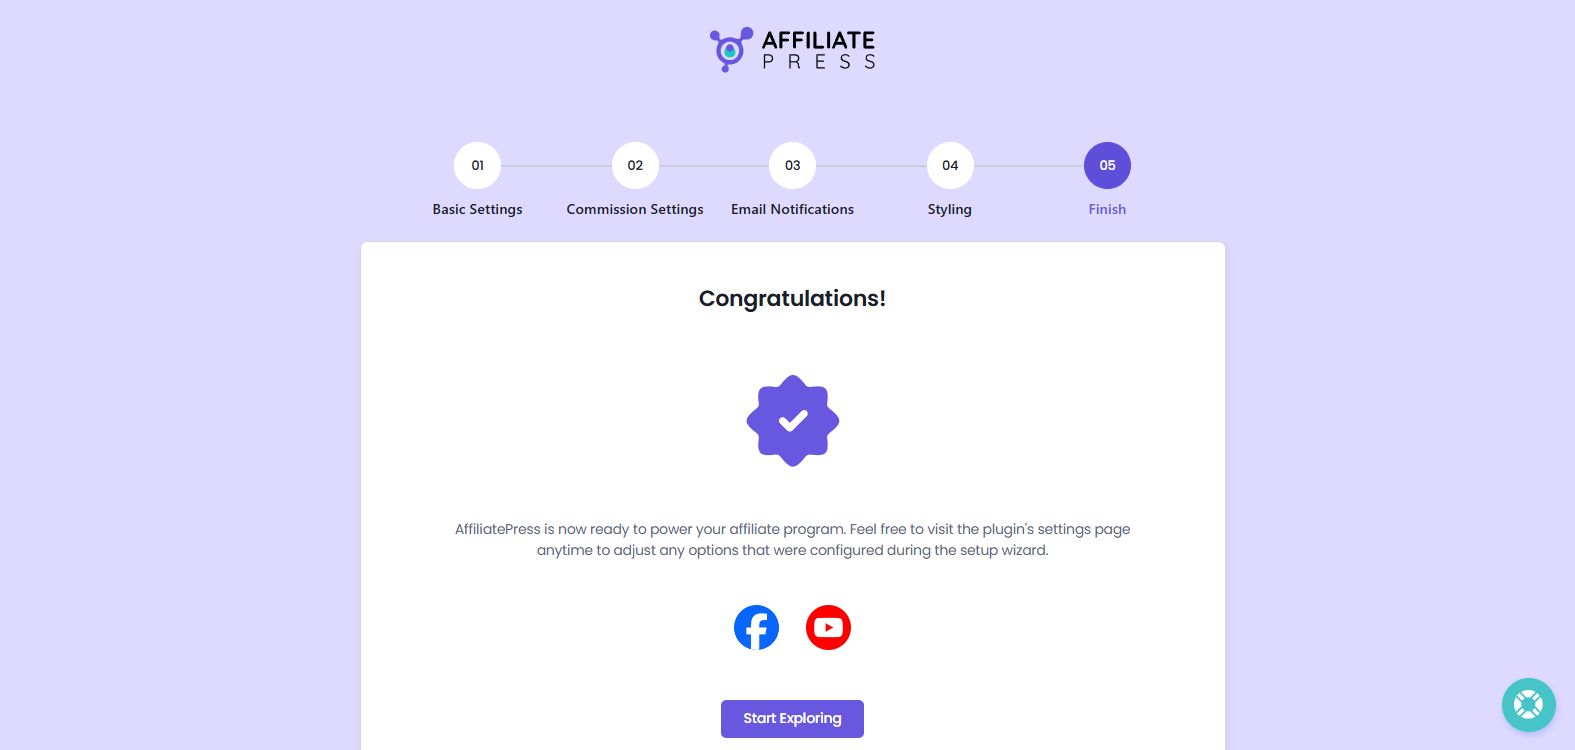
Congratulations! Your AffiliatePress setup is now complete, and it barely took no more than 10 minutes.
Now your affiliate program is ready to start managing affiliates and tracking their performance.
From this section, you’ll get:
- A link to join the AffiliatePress Facebook group and connect with other users.
- A link to subscribe to the AffiliatePress YouTube channel for useful tutorials and updates.
If needed, you can always update your settings later from the AffiliatePress General Setting panel.
Lastly, click on the “Start Exploring” button and you’ll be redirected to the AffiliatePress Dashboard from where you can track your complete affiliate program data.