


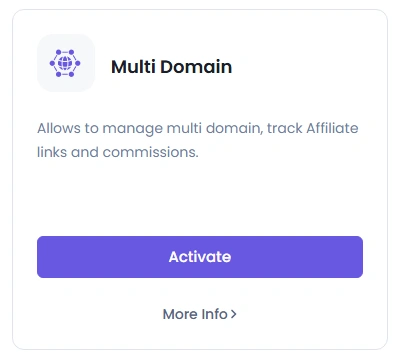
Multi Domain
The AffiliatePress Multi Domains Addon introduces a flexible and powerful enhancement to the affiliate marketing system by enabling multi domain. Designed to seamlessly connect and manage multiple domains with a centralized AffiliatePress installation. With this add-on, administrators can track, communicate, and synchronize the data between a parent site and its connected child domains.
This architecture ensures all affiliate tracking and operations are centrally controlled while being distributed across multiple domains. Using a secure API-based connection, the plugin allows seamless communication between the parent site and all connected subsites. By installing the Connector Addon on each child domain, you can centralize tracking of visits, clicks, and affiliate activity without duplicating configurations.
It is ideal for managing distributed websites, regional domains, or niche affiliate projects under one unified system. The setup process is simple, requiring only the parent site URL and API credentials to establish a secure and reliable connection.
Addon Activation
To start using the Multi-Domain Add-on:
- Ensure that the AffiliatePress Pro plugin is active.
- Navigate to
AffiliatePress > Addons. - Activate the Multi-Domain Add-on from the list.
Setup Multi Domains:
Once the add-on is activated, then access the WordPress dashboard under AffiliatePress > Manage Domains.
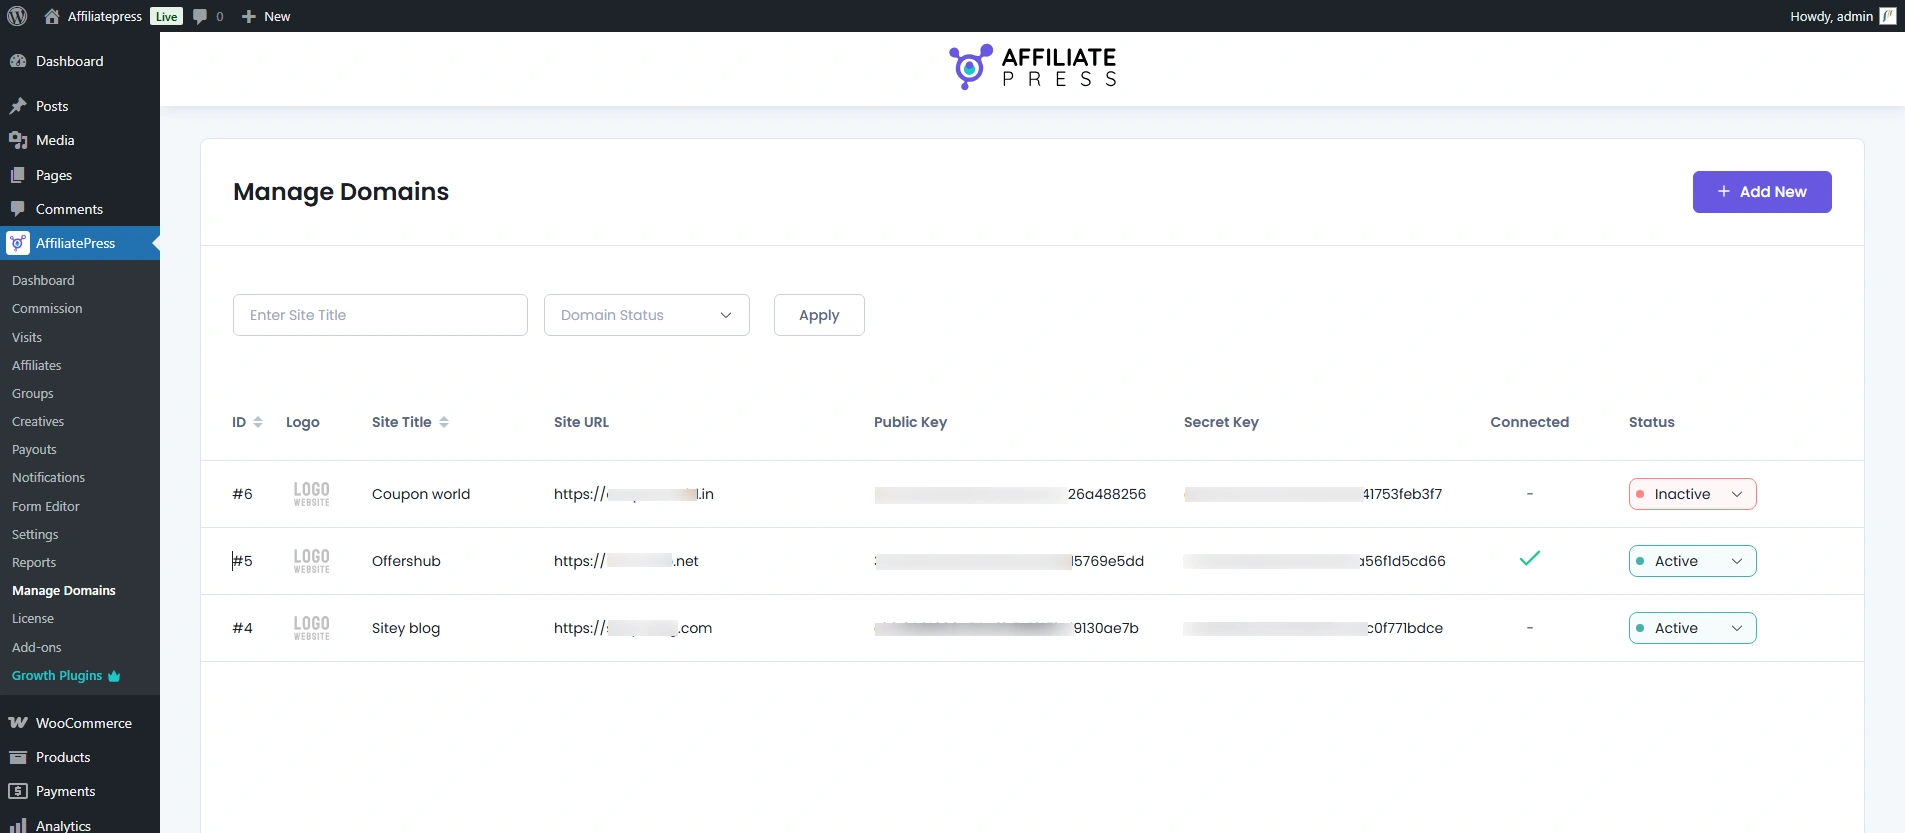
The Manage Domains page in the AffiliatePress admin panel is used to view, manage, and control multiple connected domains (websites).
Search Functionality
Admin can search for a domain by:
- Site title: It searches the child site.
- Domain Status: Each site displays its current status, helping admins quickly identify which child site is active or inactive.
Manage the site from AffiliatePress plugin.
AffiliatePress allows you to add sites directly from the plugin. You can add a site, navigate to Admin Panel > AffiliatePress > Manage Doamins the page, and then click on the Add New button available in the top right corner.
Required Fields:
- Site title: Add the child site to which you wish to connect.
- Site URL: Add the child site where you have installed the multi-domain connector.
- Site Logo: Add the child site logo.
- Site Status: Select the status of the site from Active or Inactive.
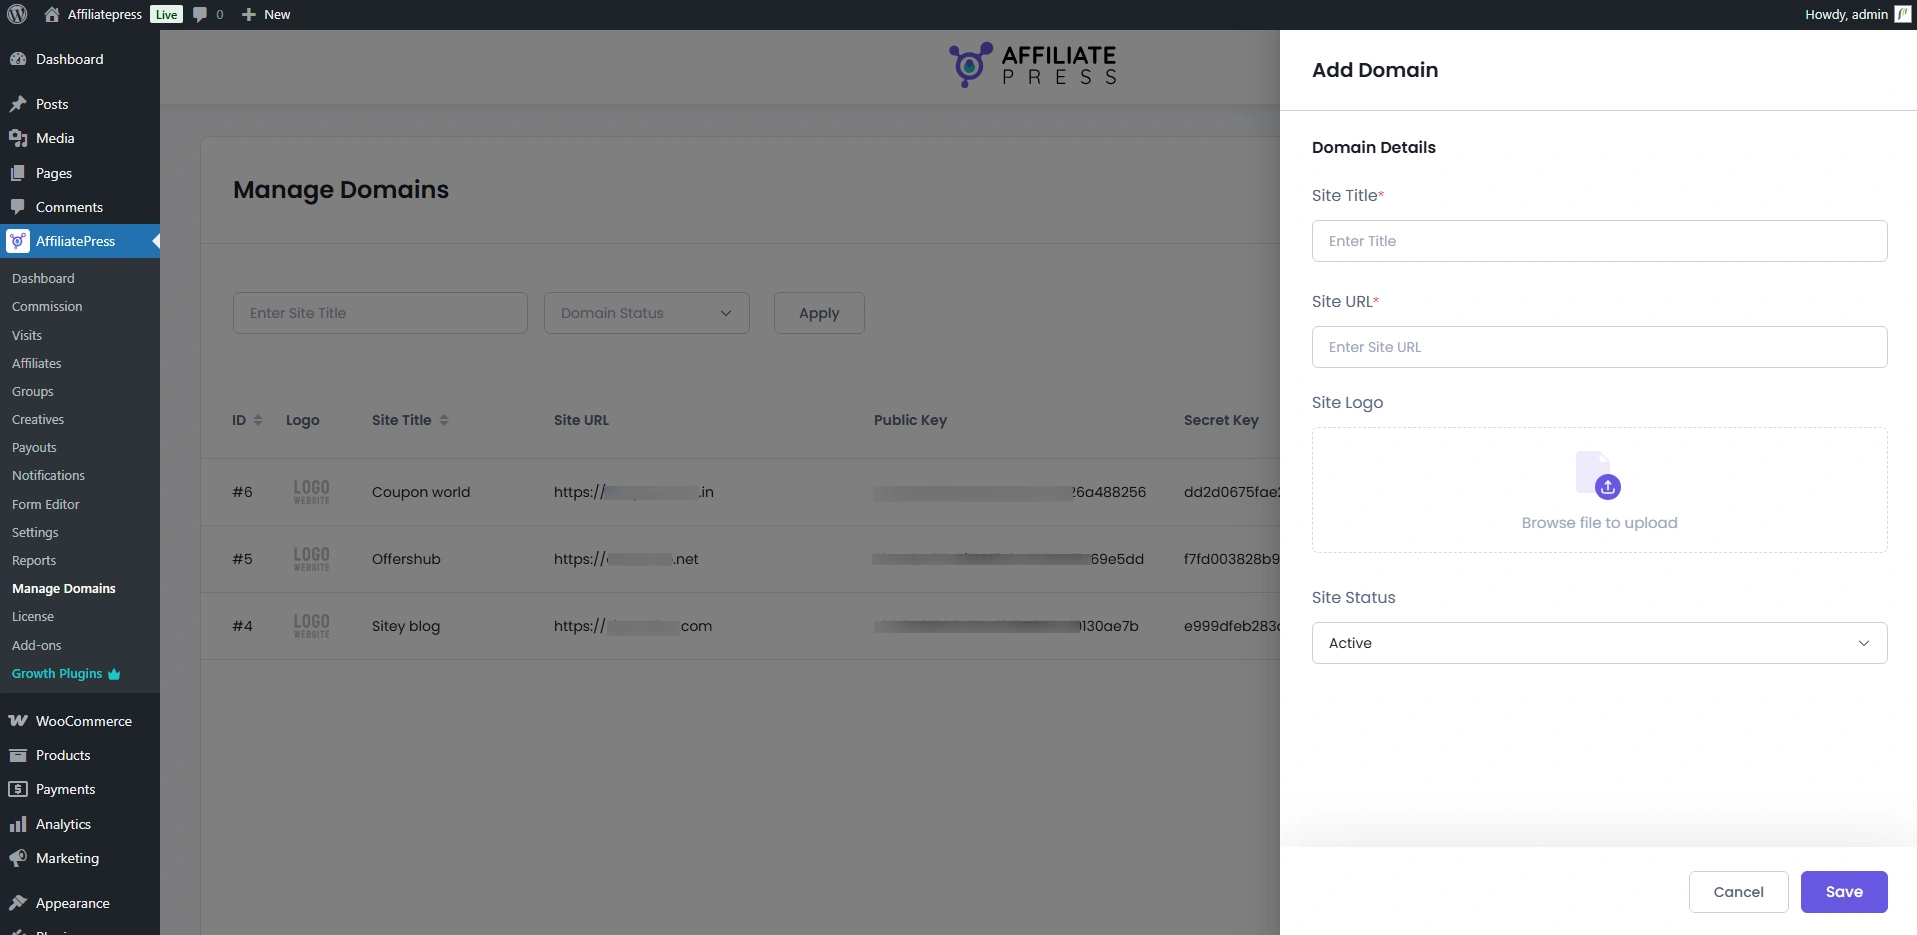
Furthermore, when you add the site, then after listing, display the public and secret key. These keys are used in the multi-domain connector setting.
Here’s an explanation of a child site with the configuration of the parent site. Click here to download and install the required connector plugin.
Log in to your child’s WordPress admin panel
Go to Plugins -> Add New -> Upload
Click on “choose file” and browse the download package. When the plugin uploads successfully, click on Activate Plugin.
Multi-Domain Connector
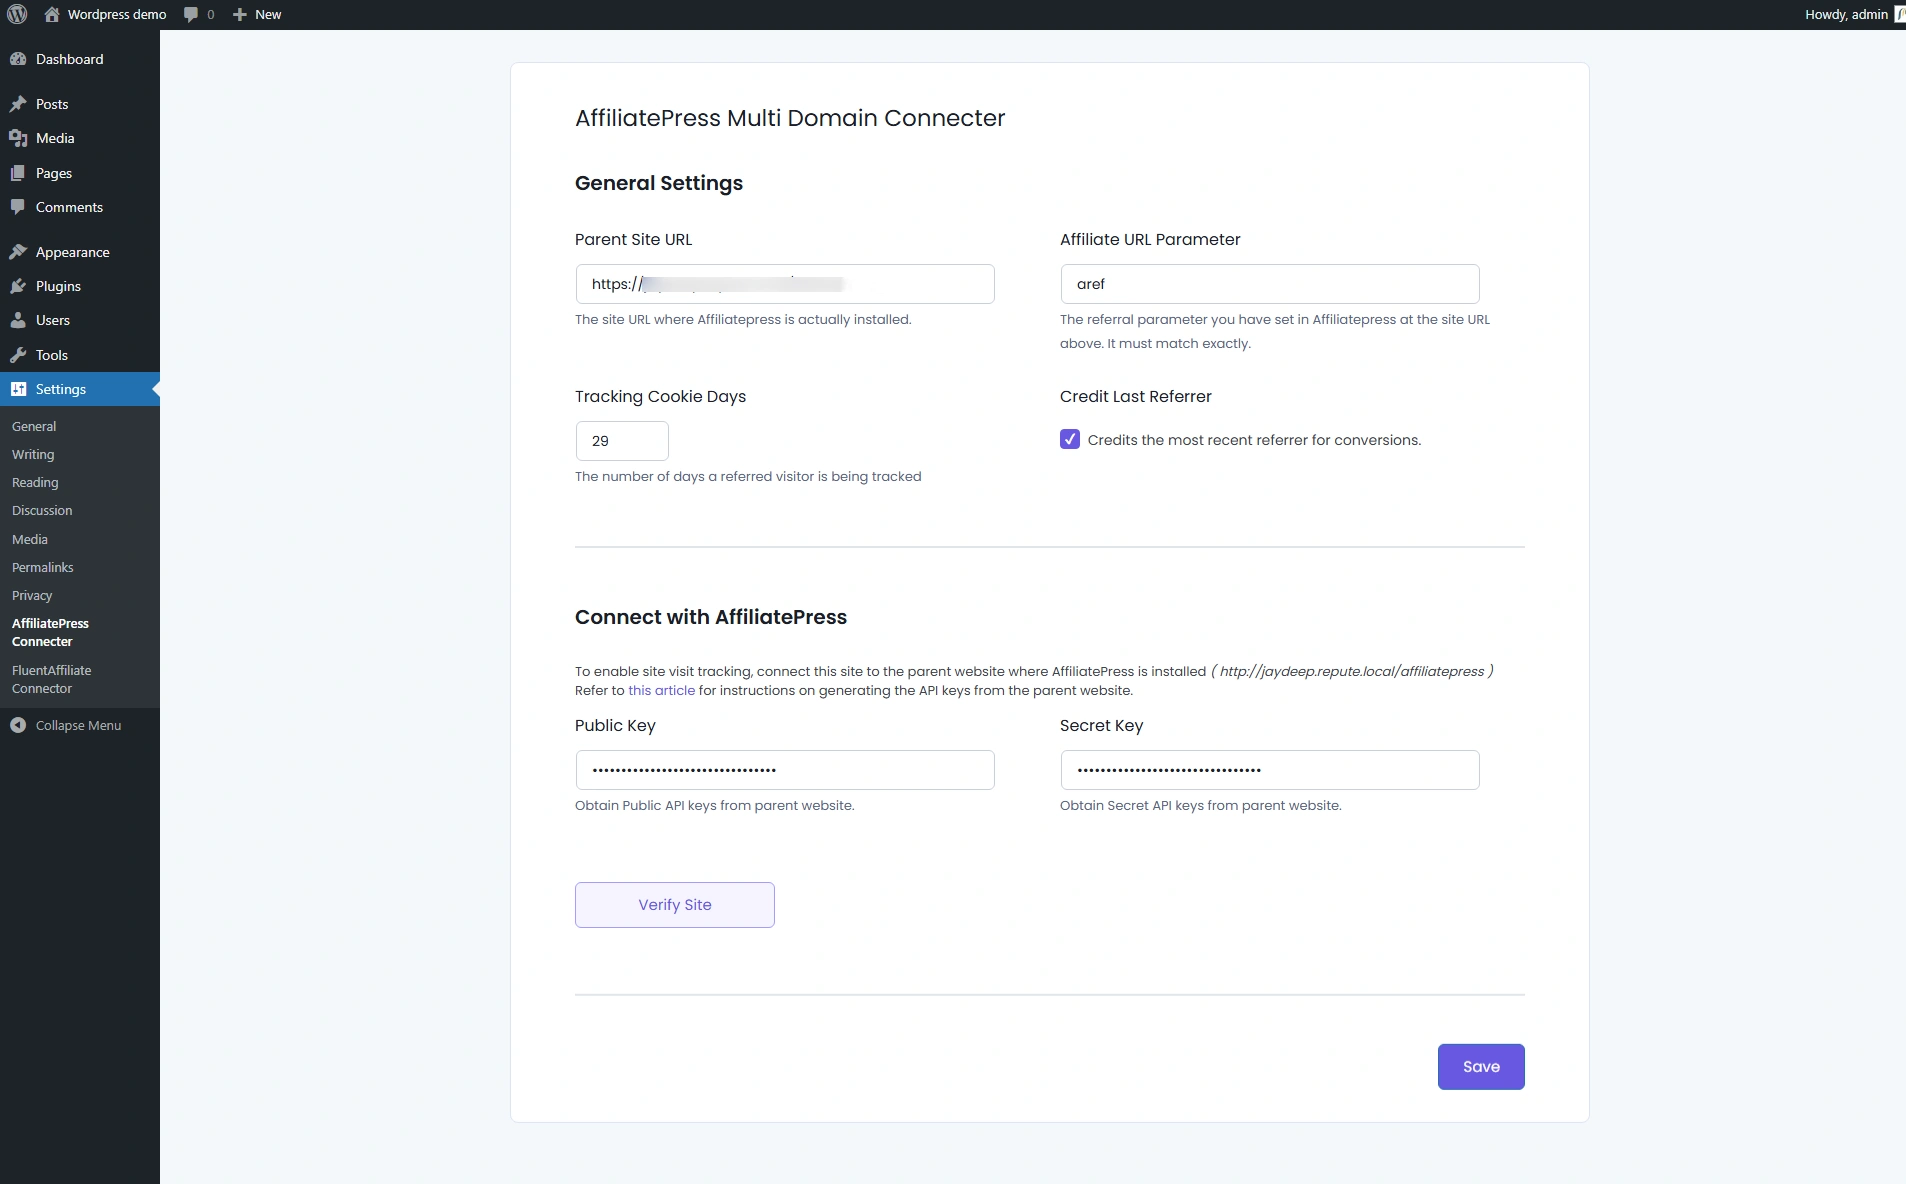
The AffiliatePress addon seamlessly integrates with Settings > AffiliatePress Connector
Overview: How it Works
- You have a parent site (where AffiliatePress is installed and managing affiliates).
- You install this AffiliatePress Multi-Domain Connector plugin on your child site(s).
- The connector:
- Reads the affiliate/referral parameter from URLs on the child site.
- Tracks visits (including campaign, IP, and browser data).
- Sends visit data securely to the parent site via API.
- This lets you track affiliates and conversions across multiple domains, but manage everything centrally in AffiliatePress on the parent sit
Configuration on the Child Site (Connector Plugin)
All child-site configurations are done in a single settings screen.
Go to Settings → AffiliatePress Connector (or click the Settings link under the plugin name on the Plugins page).
You will see two main sections:
- General Settings
- Connect with AffiliatePress (with an additional “Verify Site” button)
In the General Settings section, configure the following:
- Parent Site URL
Enter the exact URL of the parent site where AffiliatePress is installed. Example:https://parent-site.com(no trailing slash is required; plugin trims it). This is where visit data will be sent. - Affiliate URL Parameter
Enter the same referral parameter that is configured in AffiliatePress on the parent site. Example:ref. If your URLs on the parent site look likehttps://parent-site.com/?ref=123, then setref. - Tracking Cookie Days
Enter how many days a visit should be tracked after the first click. Example:30(default) – the affiliate will be credited for 30 days after the first visit. - Credit Last Referrer
Checked: The most recent referrer (last click) gets credit for the conversion.
Unchecked: First referrer or previous rules from your parent site may apply.
Connect with the AffiliatePress section and configure the following:
- Public Key
Paste the public API key generated on the parent site. - Secret Key
Paste the secret API key generated on the parent site.
Verify Site Connection
After saving the settings, verify the connection between the child site and the parent site.
On the same settings page, look for the Verify Site button in the “Connect with AffiliatePress” section.
Click the Verify Site button. If the site was already verified before, the button may show “Re-Verify Site” instead. If successfully verified, then the parent site’s “Manage Domains” page child site record row column “Connected” in the right sign is displayed.
How Tracking Works on the Child Site
When a visitor comes to the child site using such a URL,
- The connector captures
ref=123(+ optionalcampaign). - Creates/updates tracking info.
- Sends visit data to the parent AffiliatePress on
https://parent-site.com. - AffiliatePress tracks the visit under affiliate ID
123.
Assume:
- Parent Site URL:
https://parent-site.com - Child Site URL:
https://child-site.com - Affiliate URL Parameter:
ref - Affiliate ID:
123
You can use URLs like
https://child-site.com/?ref=123https://child-site.com/landing-page/?ref=123
How Your Affiliate Journey Turns Clicks into Commissions
It all starts with your affiliate sharing a unique referral link that leads to a valuable, engaging product on siteA.com
A potential customer clicks the link and lands on your content-rich page. Instantly, the system recognizes this visitor and securely tags them to the referring affiliate—no gaps, no confusion.
As the customer explores the product and builds trust, they’re naturally guided to your main store, siteMain.com, through a strategically placed link.
With interest now converted into intent, the customer completes their purchase on your main site.
And here’s the best part—even though the final transaction happens on siteMain.com, the system flawlessly tracks the entire journey and rewards the affiliate who initiated it.