

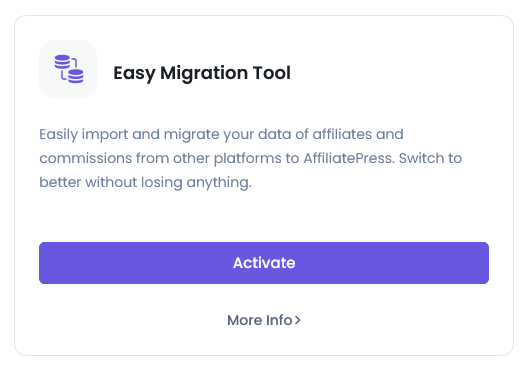
Easy Migration Tool
The AffiliatePress Easy Migration Tool Addon enables you to easily import data from other popular affiliate management plugins into AffiliatePress with just a few clicks.
Supported Plugins for Migration
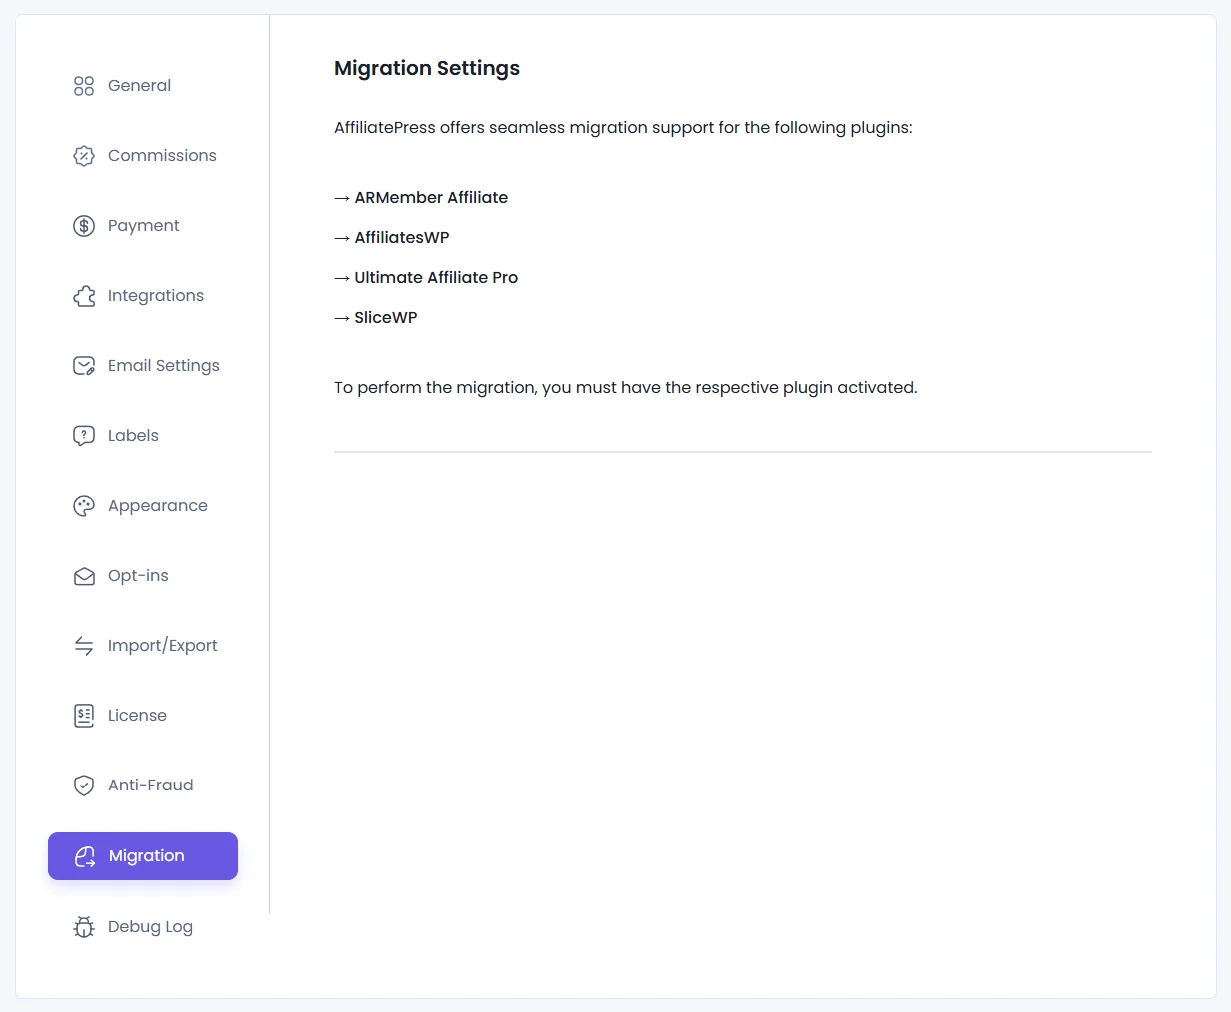
AffiliatePress currently supports seamless data migration from the following plugins:
- ARMember Affiliate
- AffiliateWP
- Ultimate Affiliate Pro
- SliceWP

Addon Activation
To start using the Migration Tool Addon:
- Ensure that the AffiliatePress Pro plugin is active.
- Navigate to
AffiliatePress > Addons. - Activate the Migration Tool Addon from the list.
Accessing the Migration Tool
The migration tab will appear in your WordPress dashboard under:
- Log into your WordPress dashboard.
- Navigate to
AffiliatePress > Settings > Migration.
Data That Can Be Migrated
The Migration Tool can import the following data:
- Affiliates
- Referral / Commission Data
- Creative
- Payout
- Affiliate Groups
- Visits
Using the Migration Tool
Step 1: Install and Activate the migration add-on.
Once the add-on is activated, the Migration tab will become available in your AffiliatePress settings.
Step 2: Select the Plugin to migrate from.
Within the Migration tab:
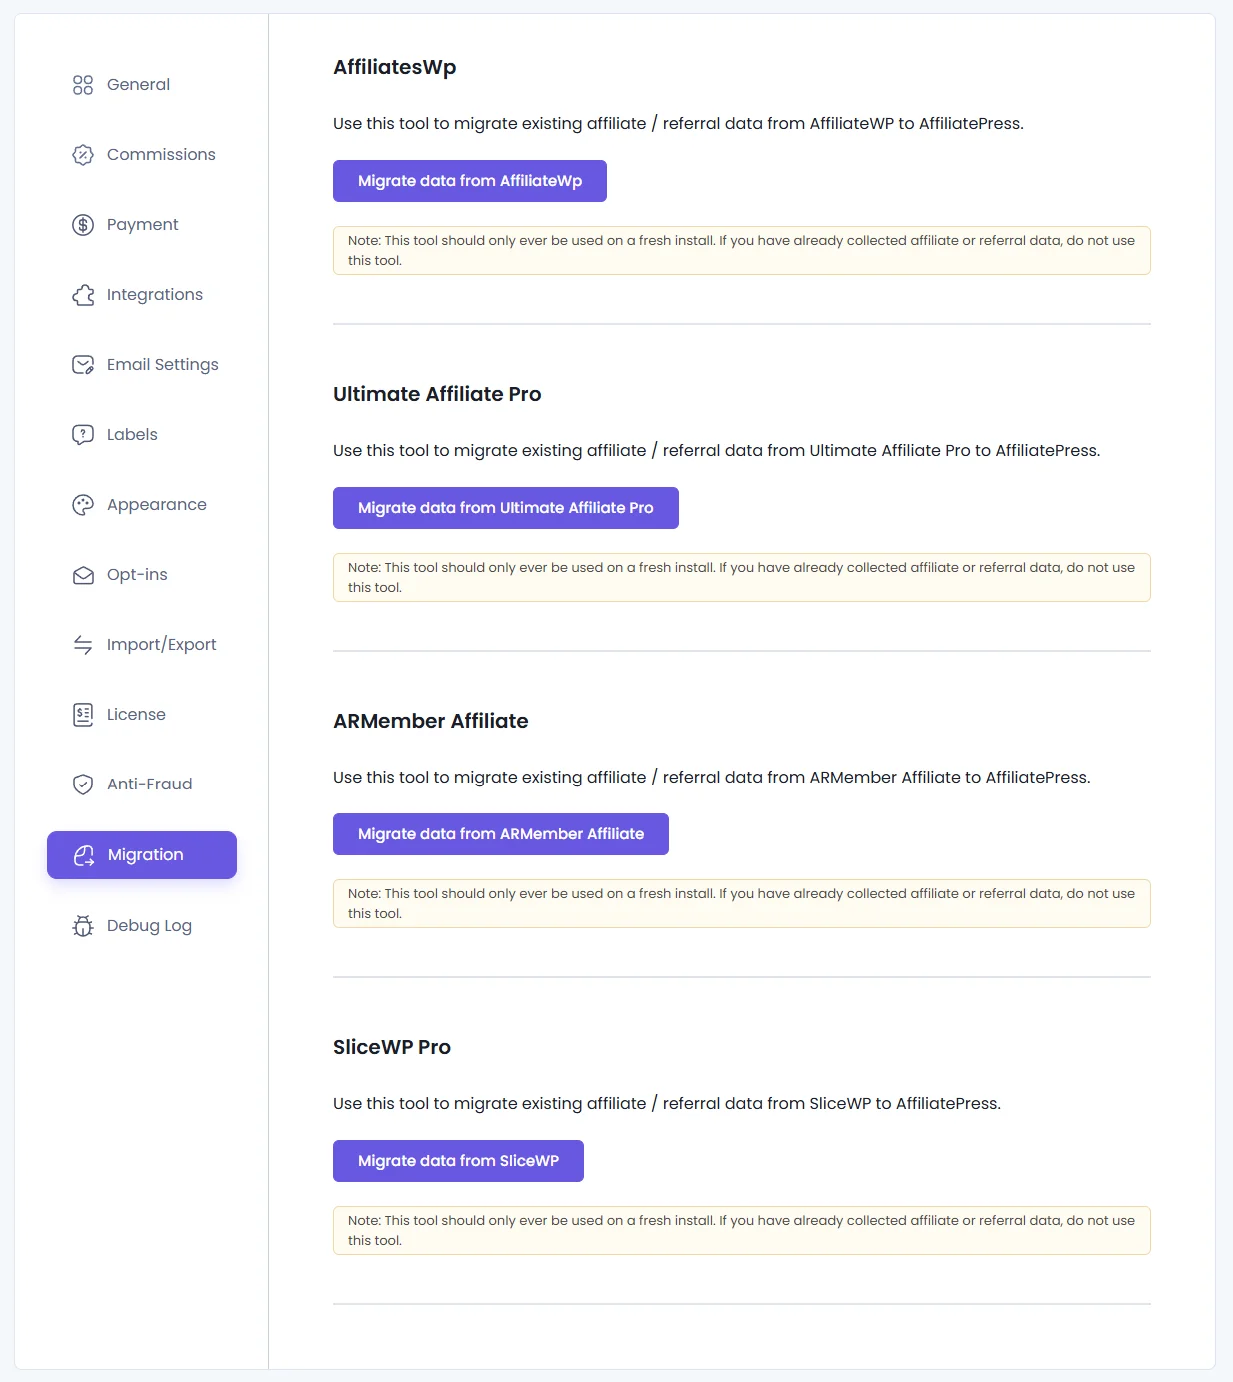
- You’ll see available migration options for each supported plugin.
Note: It will show a button for the plugin only if you have installed and activated that plugin.
- ARMember Affiliate:
- Click “Migrate Data from ARMember Affiliate.”
- AffiliateWP:
- Click “Migrate Data from AffiliateWP.”
- SliceWP:
- Click “Migrate Data from SliceWP.”
- Ultimate Affiliate Pro:
- Click “Migrate Data from Ultimate Affiliate Pro.”
Each tool will automatically detect and transfer existing data from the selected plugin into AffiliatePress.
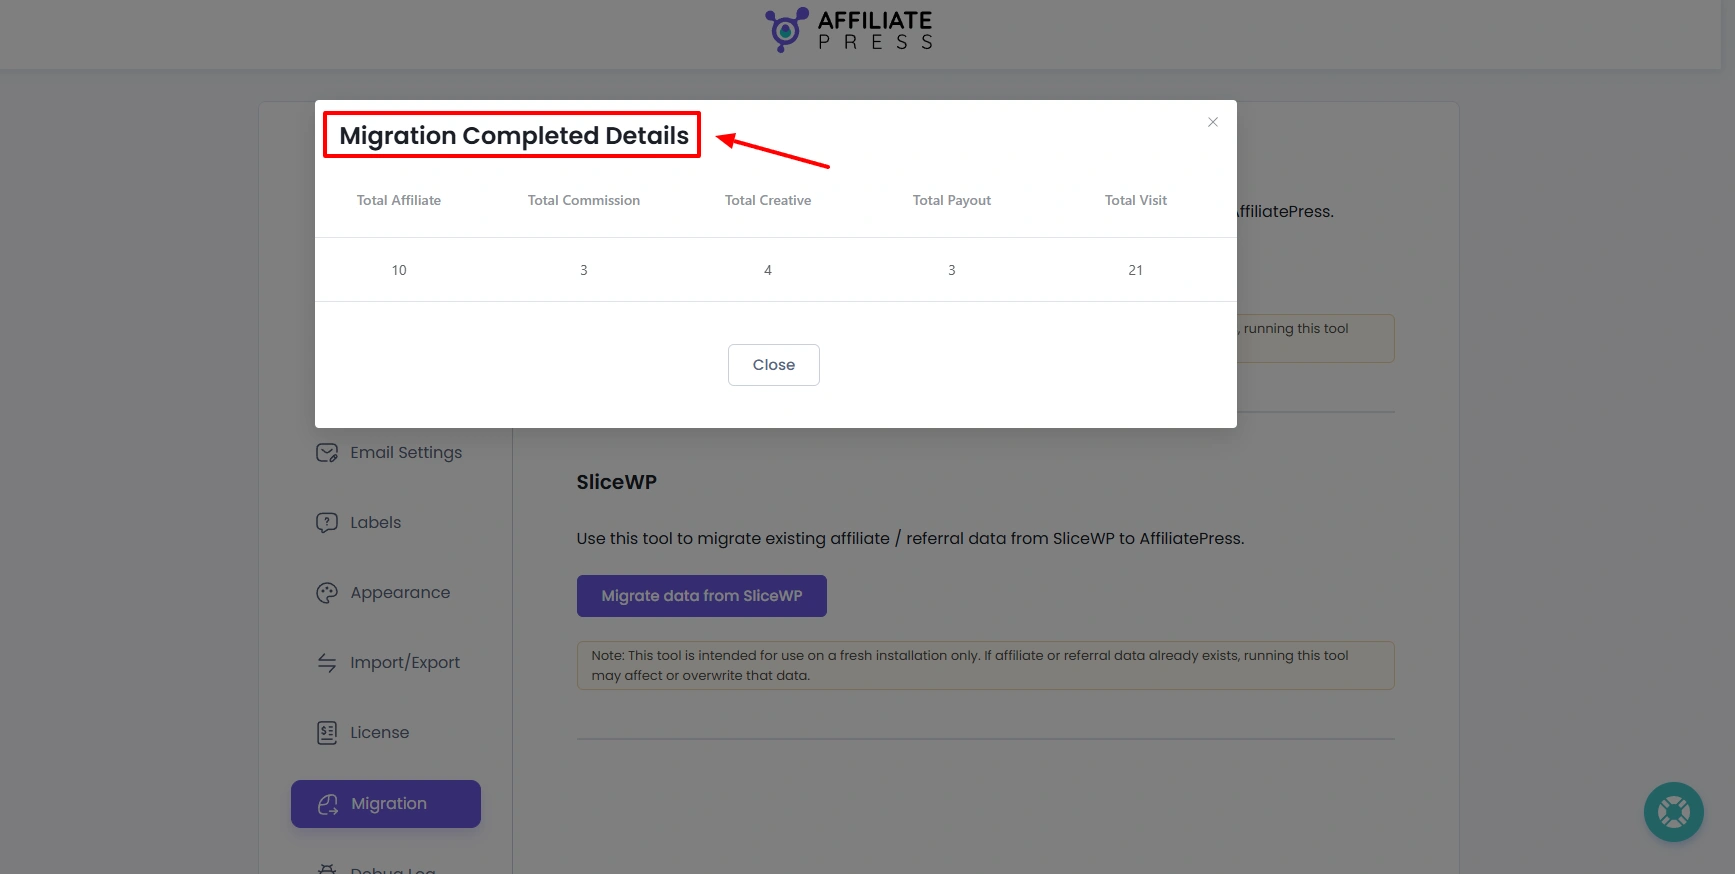
Step 3: Review Migration Summary
Once you click the button to migrate the date, then a popup will appear to show the summary of the data that will be imported. Before confirming you can review the number of records that will be imported to your system.
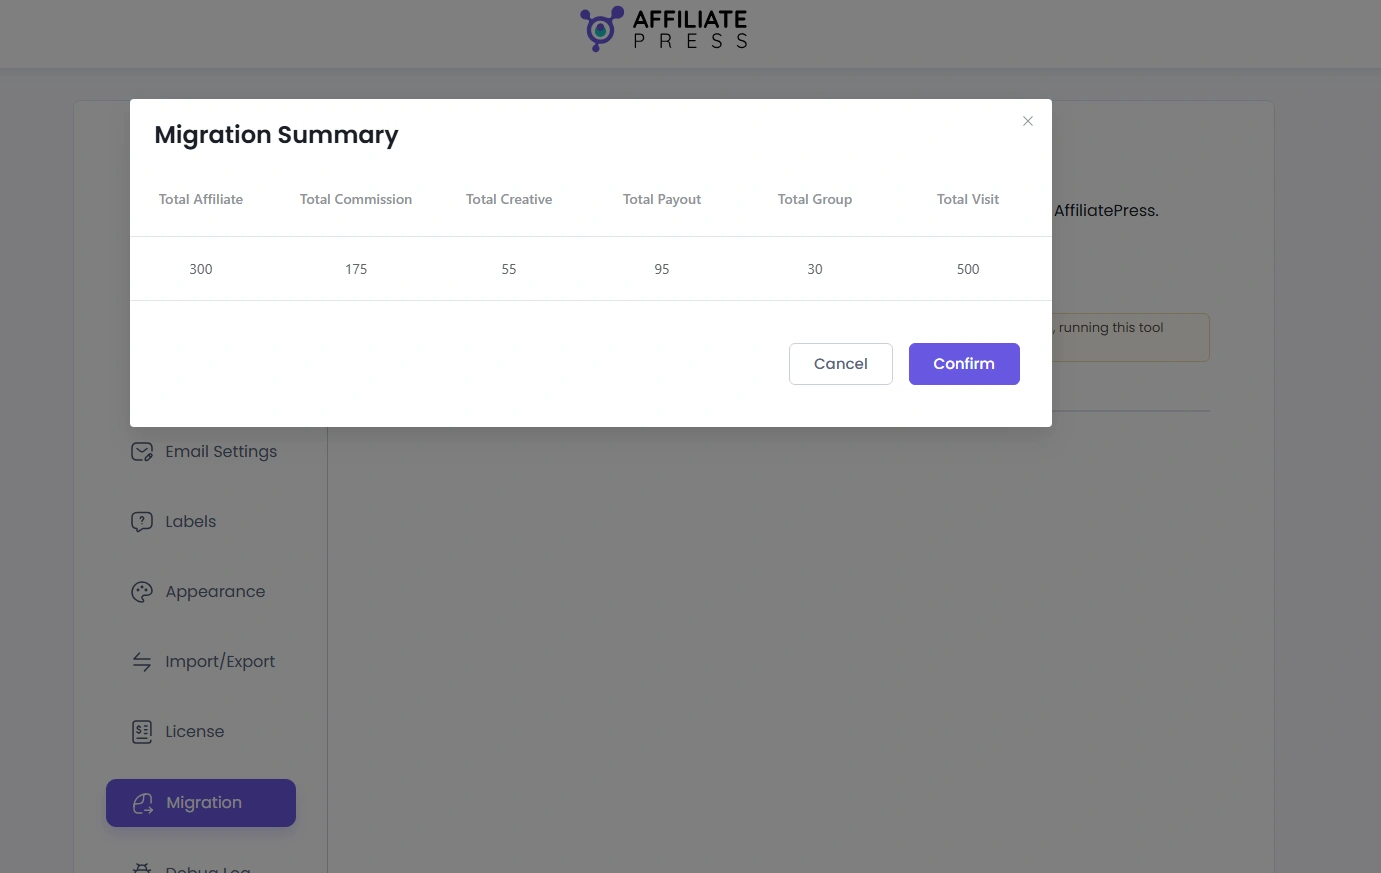
Step 4: Start Importing
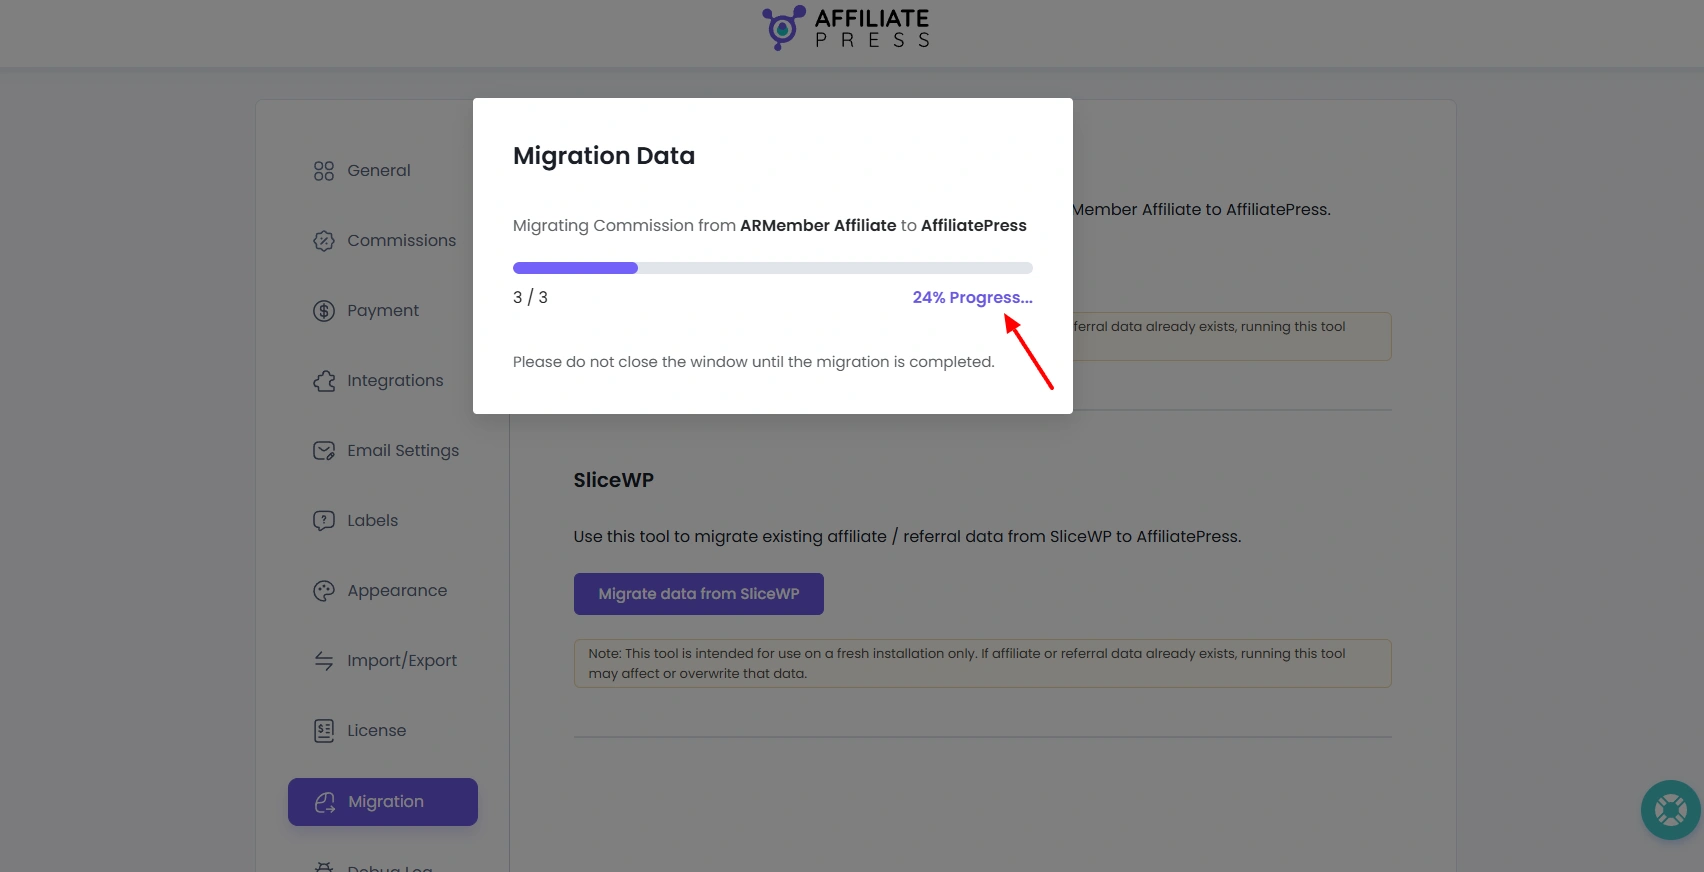
In order to start importing, click on the confirm button at the summary popup, and then the progress to import will start. Once the import starts at that time, the progress bar will show the process.
Step 5: Review the import completion
As soon as the import is completed again the popup will appear to show the records imported, as per the below screenshot.