

Affiliate Registration
AffiliatePress allows site owners to enable front-end affiliate registration using a shortcode or Elementor widget. This feature allows potential affiliates to sign up and join your affiliate program directly from your website.
Affiliate Registration Shortcode
AffiliatePress provides the [affiliatepress_affiliate_registration] shortcode, which can be used to render the affiliate registration form on any page of your website.
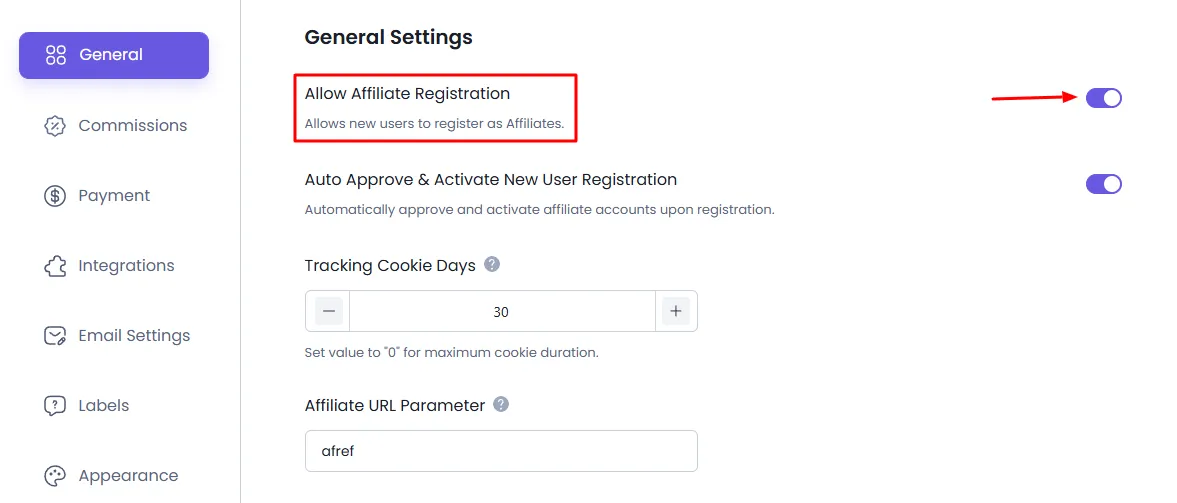
To ensure this form is functional, the “Allow Affiliate Registration” setting must be enabled.
To enable this setting, go to WordPress Admin > AffiliatePress > Settings > General and turn on the “Allow Affiliate Registration” option.
Default Pages Created by AffiliatePress
Upon activating the AffiliatePress plugin, two default pages are automatically created:
- Affiliate Signup — contains the [
affiliatepress_affiliate_registration] shortcode - Affiliate Panel — contains the [
affiliatepress_affiliate_panel] shortcode
These pages serve as the default landing points for new affiliate registrations and returning affiliate users.
Using the Registration Form on a Custom Page
If you prefer to add the registration form to a different page (instead of using the default “Affiliate Signup” page), you can do so by:
- Creating or editing the desired WordPress page.
- Adding the [
affiliatepress_affiliate_registration] shortcode to that page.

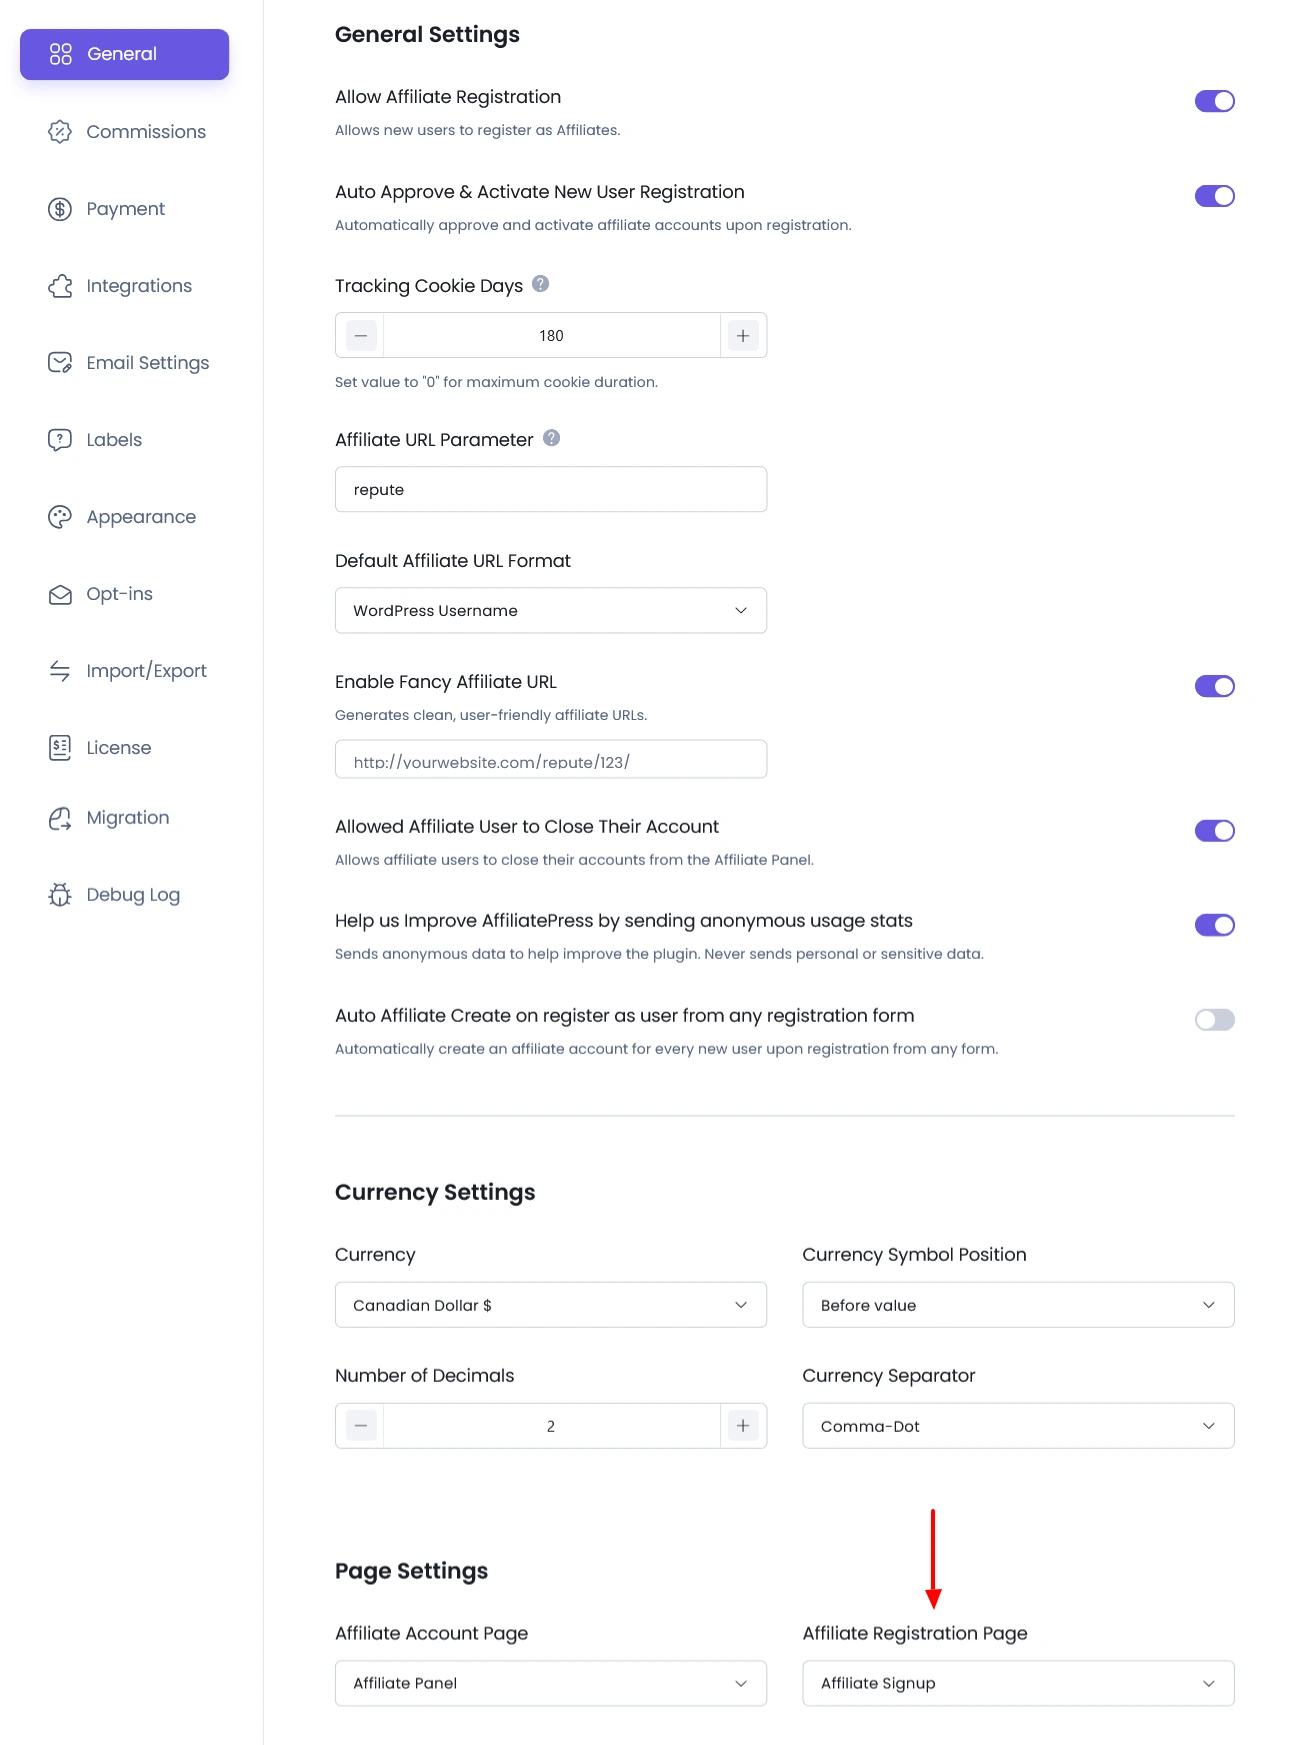
- Then, go to
WP Admin > AffiliatePress > Settings > General, and set this new page under “Page Settings” for the “Affiliate Registration Page” option.
Elementor Integration
AffiliatePress also supports Elementor. If you are using the Elementor page builder, you can add the Affiliate Registration Form using the AffiliatePress Elementor widget. Simply drag the widget into your page layout and configure its settings accordingly.
This offers more flexibility in terms of page design and layout customization for your registration process.
Managing Form Fields and Label
To customize the registration form fields, labels, and error messages, follow these steps:
- Navigate to
WordPress Admin > AffiliatePress > Form Editor. - Here, you can:
- Add or remove fields from the registration form.
- Modify field labels and placeholders.
- Customize validation messages (e.g., required field errors, invalid input notices).
This allows you to tailor the affiliate registration form to better suit your business needs or data collection preferences.

Affiliate Account Activation
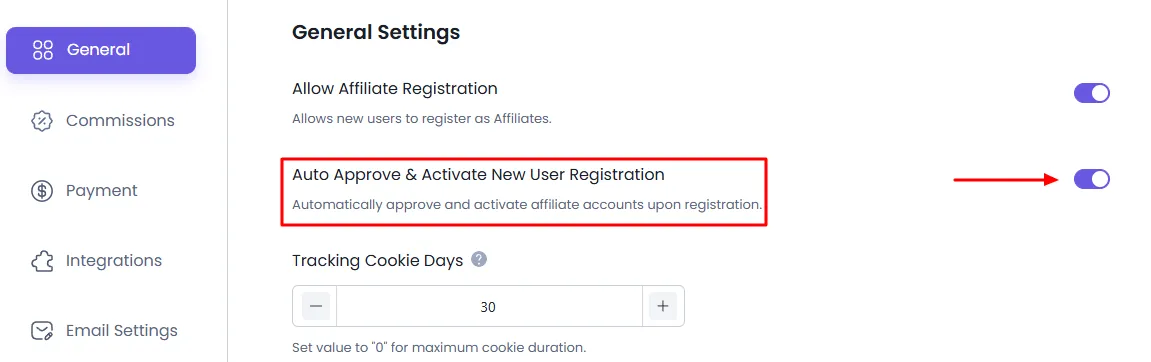
After registration, the new affiliate account can either be auto-approved or require manual approval, depending on the setting:
- Go to
WordPress Admin > AffiliatePress > Settings > General. - Locate the setting labelled “Auto Approve & Activate New User Registration”.
There are two possible configurations:
- Turned on – The affiliate is automatically approved after submitting the registration form and can access the affiliate panel immediately.
- Turned off – The affiliate account is marked as Pending, and the admin must manually review and approve the registration.
This setting gives you control over who gets immediate access to your affiliate system.
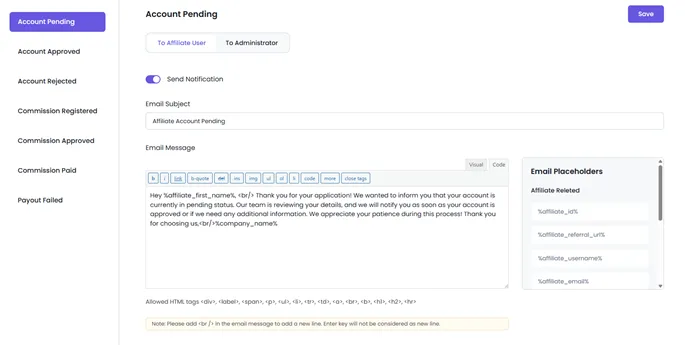
Email Notifications
Both the admin and the affiliate user will receive email notifications upon registration. The content and behaviour of these emails depend on the affiliate’s approval status and can be customized from the backend.
To configure email notifications:
- Go to
WordPress Admin > AffiliatePress > Notifications. - From here, you can:
- Enable or disable email alerts.
- Edit the content of emails sent to affiliates and admins.
- Customize subject lines and message bodies.
- Use dynamic placeholders for personalized communication.
These notifications ensure clear communication during the registration and approval process.