

AWeber Integration
Set Up AWeber Integration with AffiliatePress to seamlessly connect your affiliate leads to your AWeber mailing list. Follow these simple steps to set up the integration.
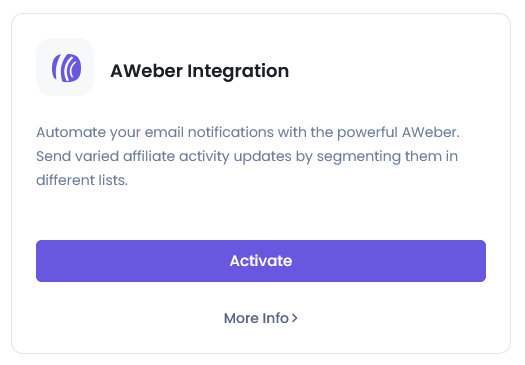
To activate the AWeber Addon you can simply head over to AffiliatePress > Addons and activate the same.
Set Up AWeber Integration
Once the addon is activated:
- Go to
AffiliatePress > Settings > Opt-Ins. - If you have multiple opt-ins enabled, select the AWeber tab from the top bar.
Here you can enter the Authorization code and click on the Authorize to fetch the lists from your AWeber account.
How to Fetch the Authorization Code
- Click the Get Code button next to the Authorization Code field.
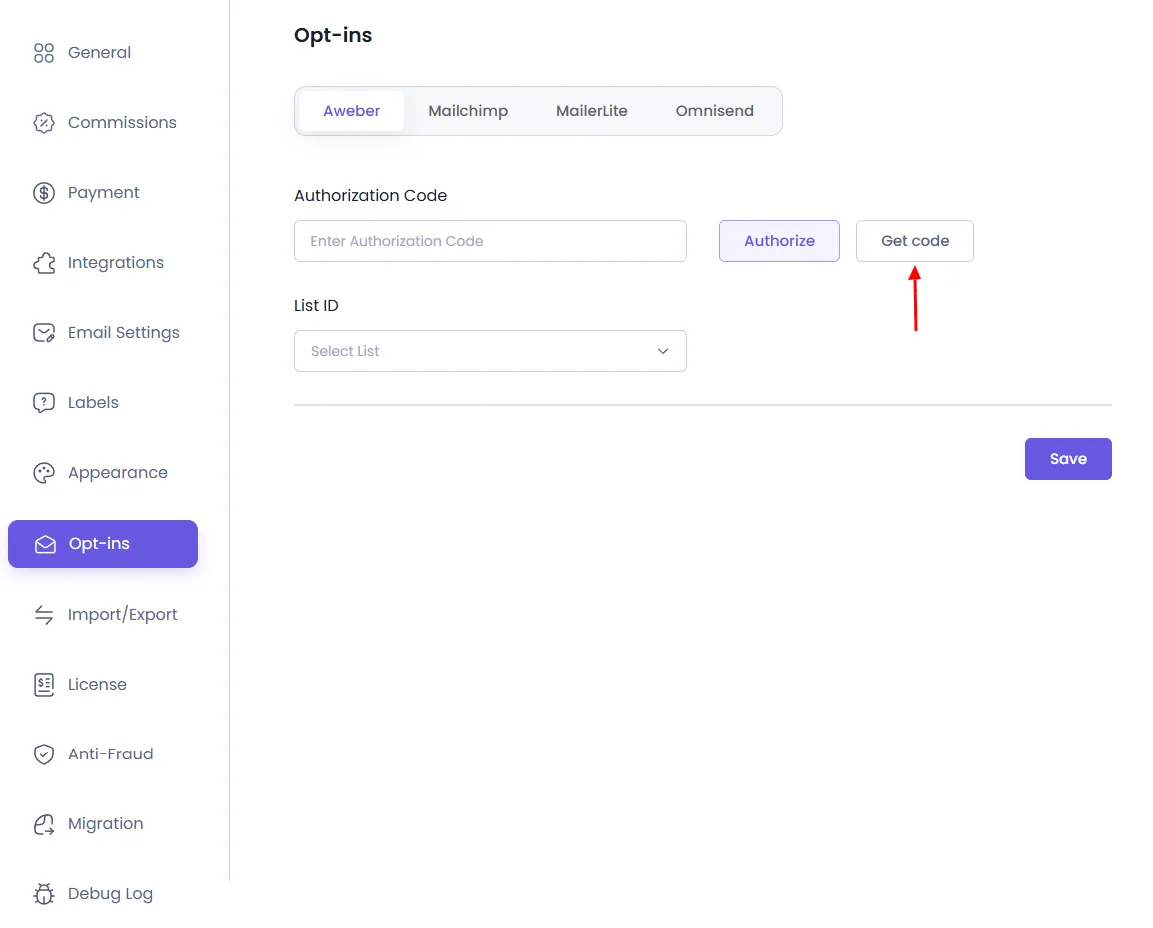
- A new window will open prompting you to log in to your AWeber account. In order to create an AWeber Account, click here.
- Once logged in, you’ll receive an Authorization Code.
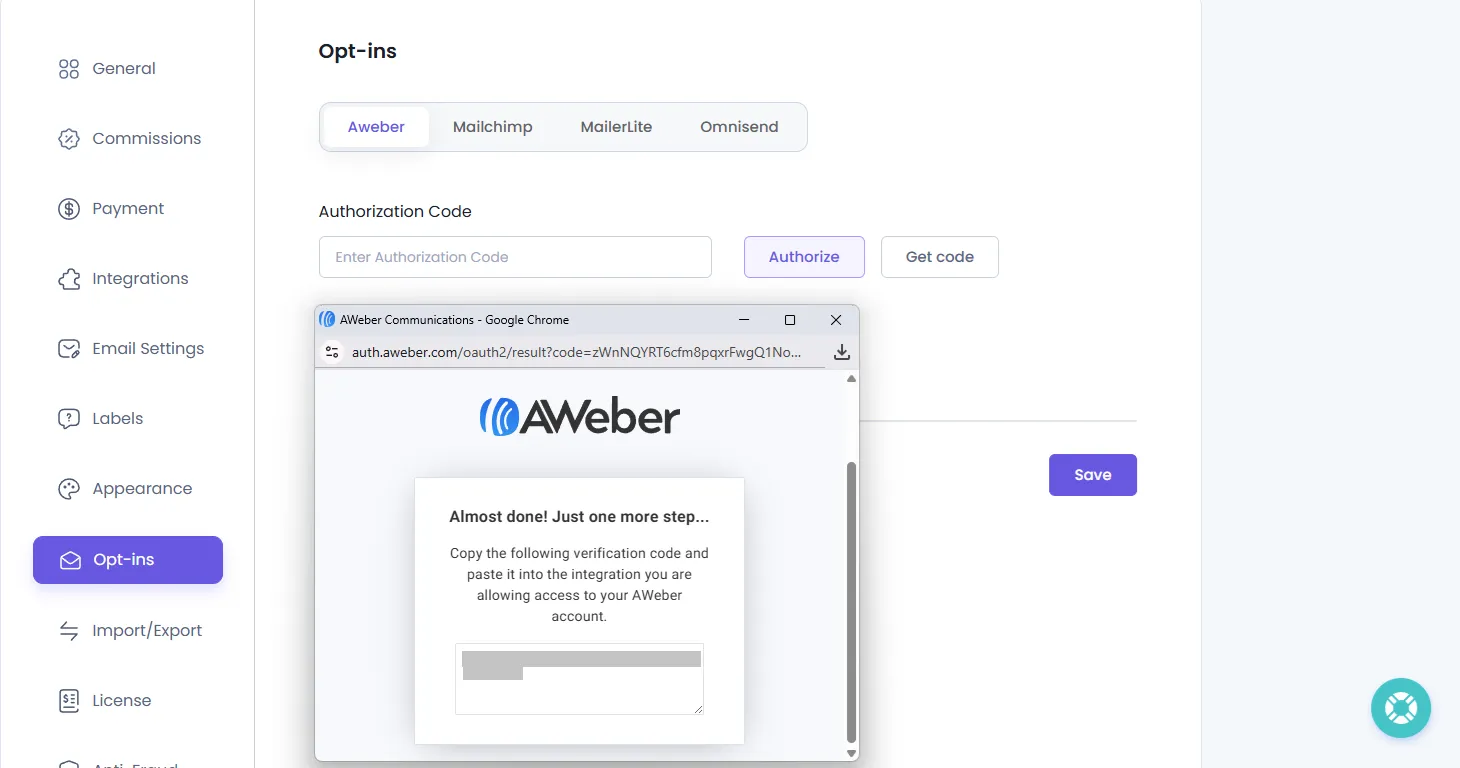
- Copy and paste this code into the Authorization Code field.
- Click the Authorize Code button.
After authorization, your AWeber lists will automatically populate.
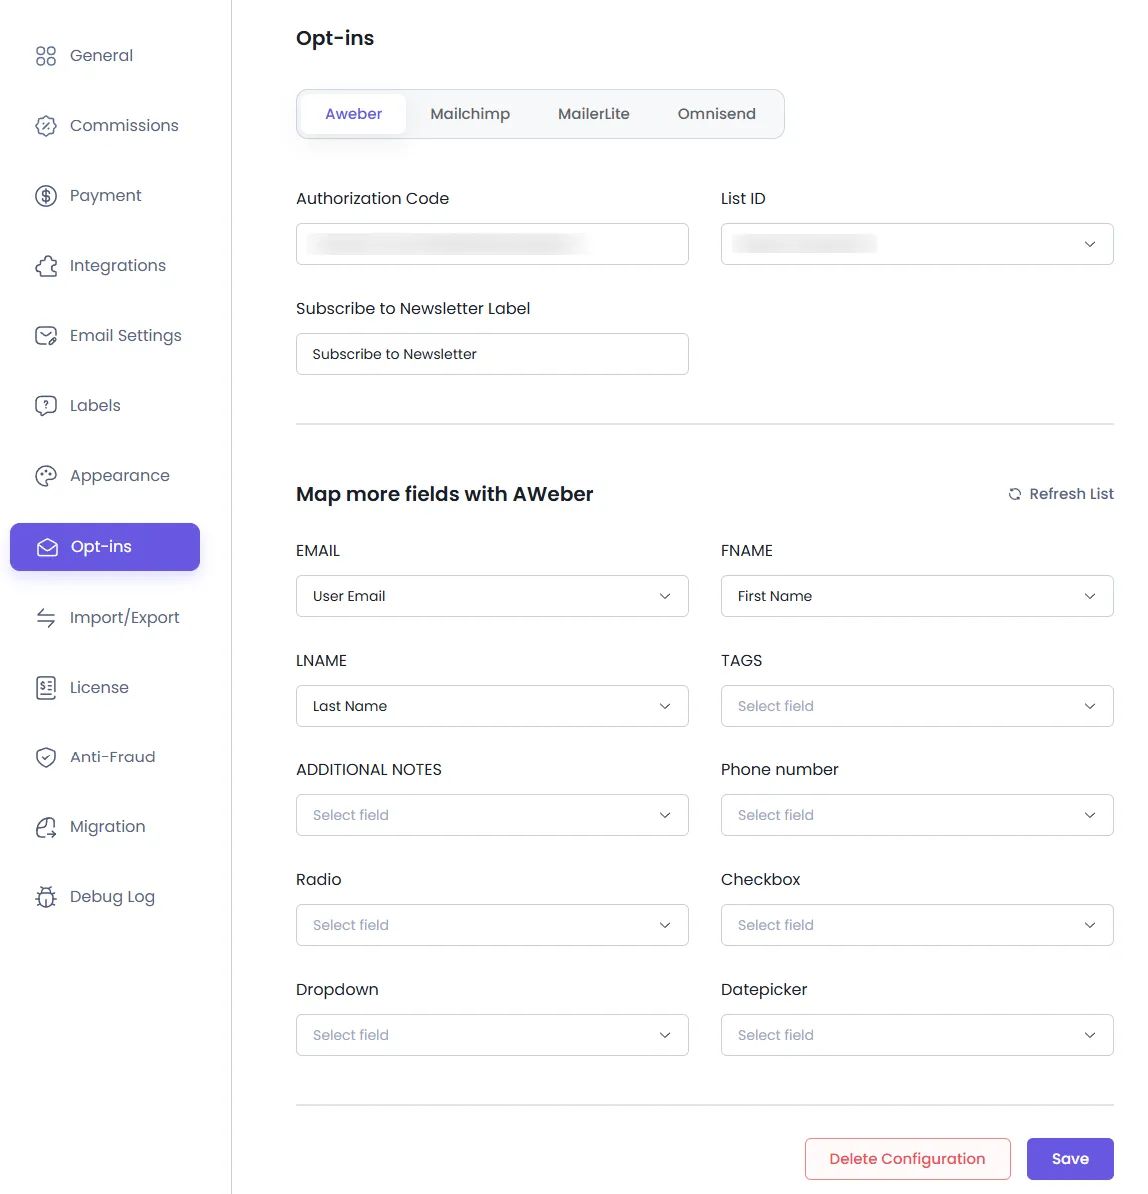
Selecting List & Mapping Fields
- Use the List ID dropdown to select your preferred AWeber list.
- Once a list is selected, the AWeber list fields will be displayed.
- Map each field to the corresponding field from your Affiliate Signup Page (e.g., First Name, Email, Tags, etc.).
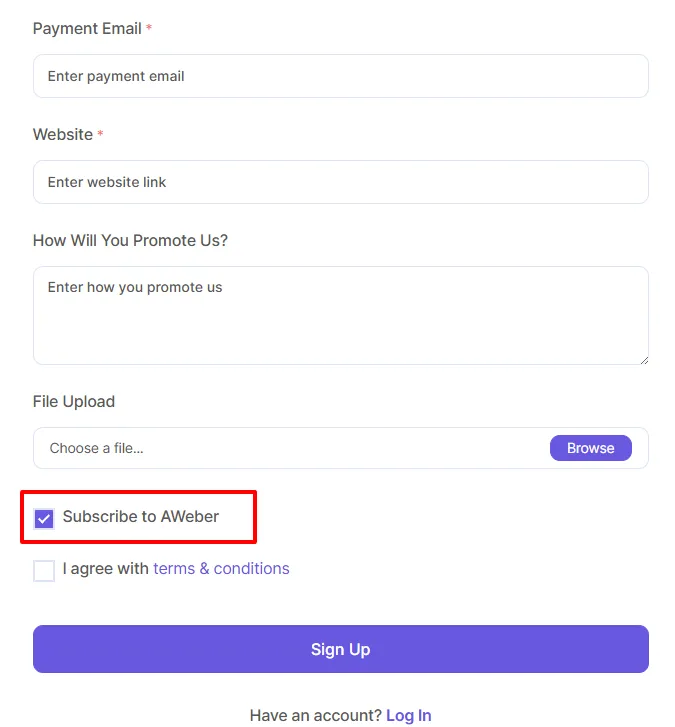
Customize Checkbox Label
- You can set a custom label for the Newsletter Subscription Checkbox.
- This checkbox appears on the front-end signup form.
- The user must check this box to allow their data to be sent to your AWeber list.
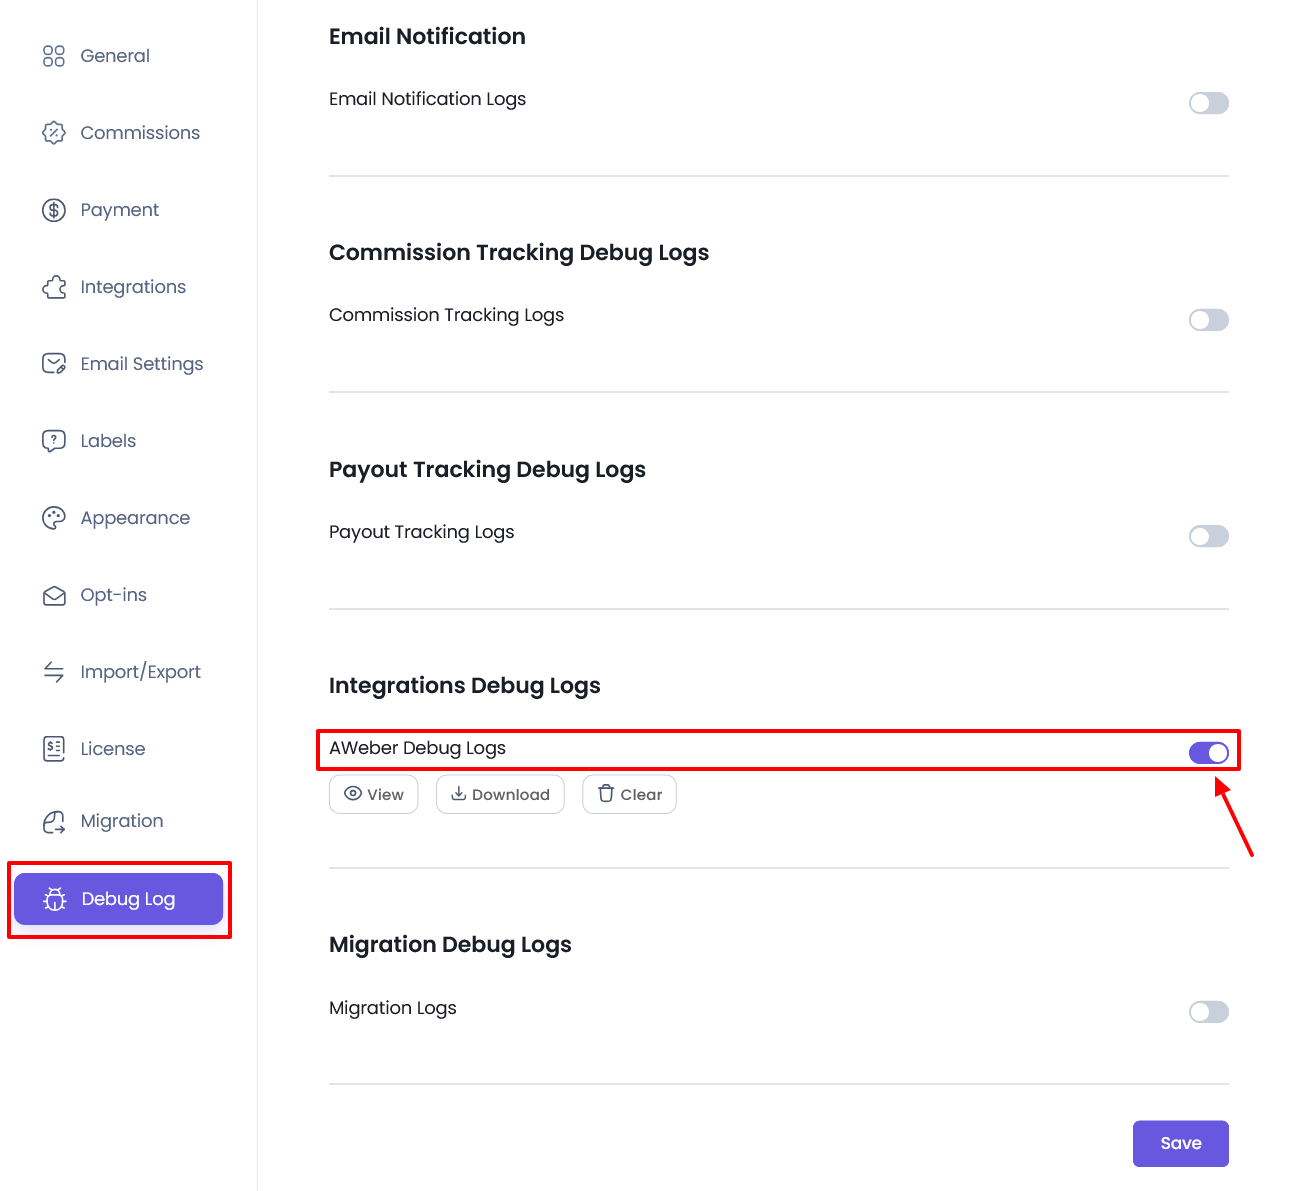
Debug Logs for Aweber
AffiliatePress does allow admin to track the debug log for the Integrations to the email marketing tool. In order to enable the logs, you can navigate to the AffiliatePress > Settings > Debug Log page.