

Appearance Settings

The Appearance Settings in AffiliatePress let administrators personalize the visual style of the plugin interface. From color schemes to fonts, you can align the look of the affiliate dashboard with your brand.
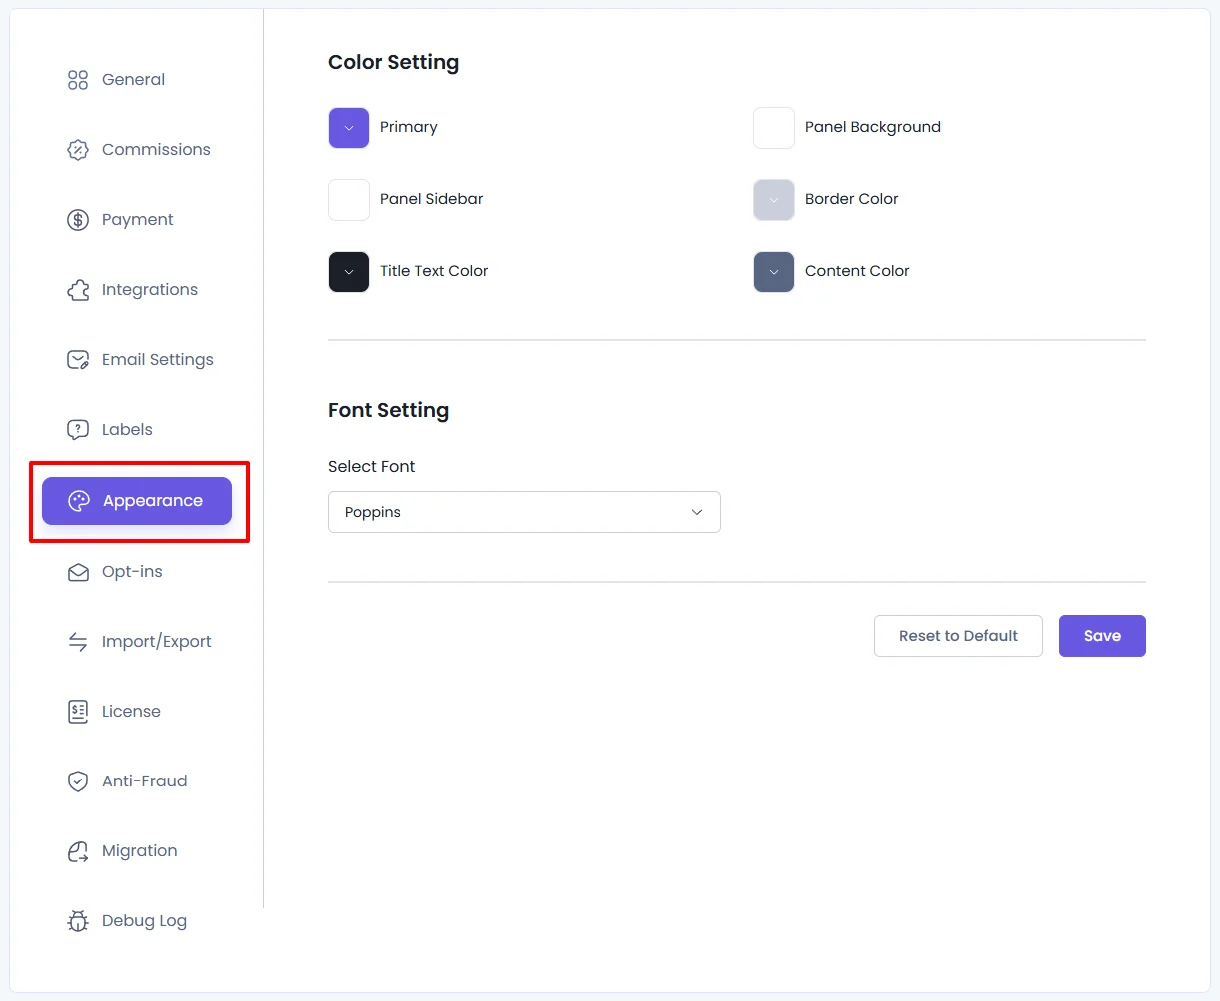
How to Access Appearance Settings
- Go to AffiliatePress in your WordPress admin dashboard.
- Click on Settings.
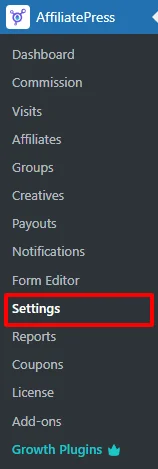
- Navigate to the Appearance tab.
Customization Options
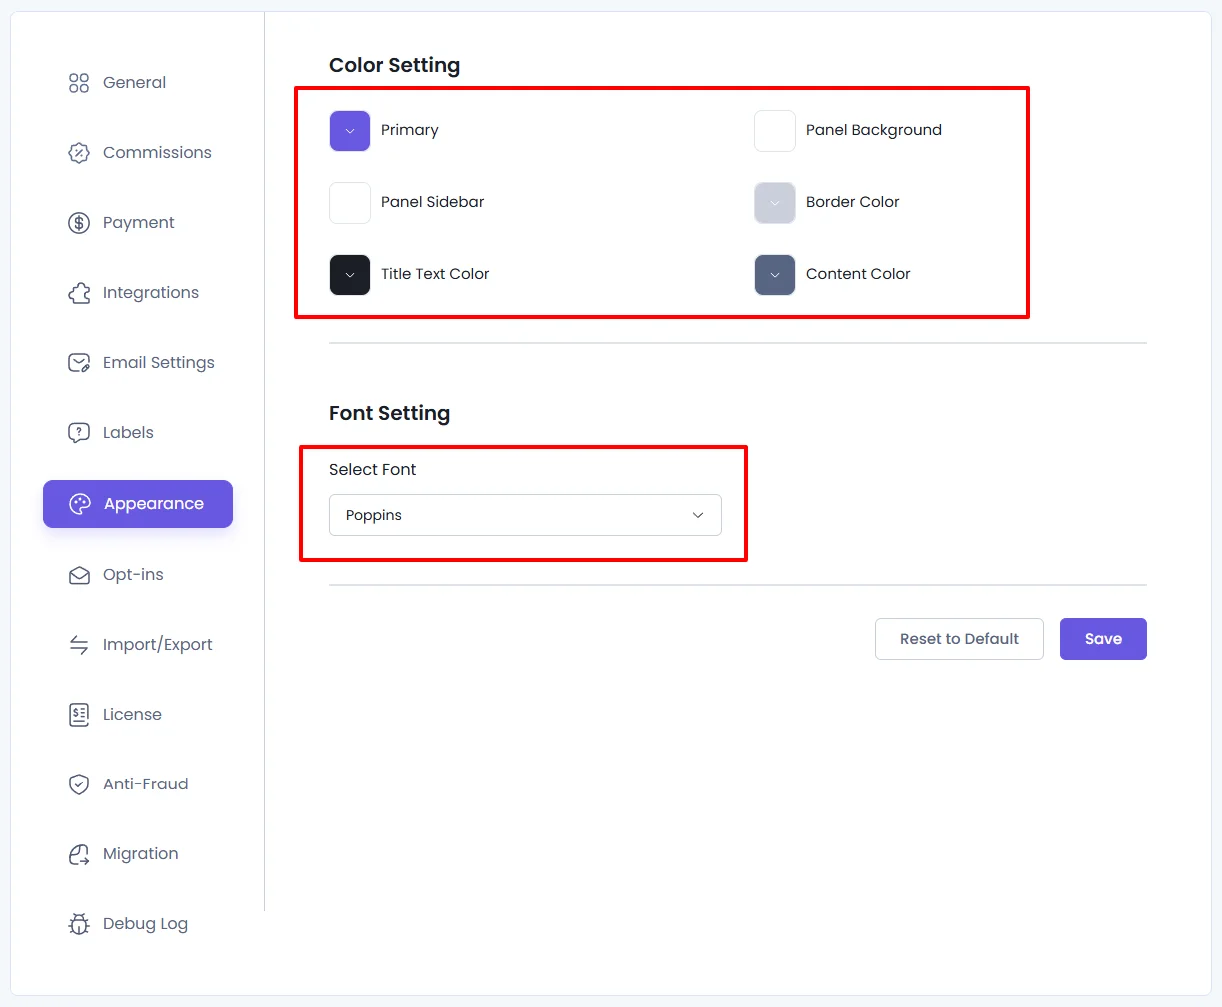
1. Color Settings
Customize the look and feel of different interface elements using the following options:
| Setting | Description |
|---|---|
| Primary Color | Defines the main accent color (used in buttons, highlights, etc.). |
| Background Color | Sets the overall page background color. |
| Panel Background Color | Adjusts background for panels/containers. |
| Title Text Color | Sets the color for headings and section titles. |
| Content Color | Changes the color of body text and content. |
| Border Color | Defines the color of borders around UI elements. |
2. Font Settings
- Font Selection: Choose your preferred font for the AffiliatePress interface. Default font: Poppins
Saving Changes
Once you’ve made your customizations:
- Click the Save button (bottom-right of the screen).
- The new styles will be instantly applied to the Affiliate Panel frontend.
After saving, visit the affiliate panel to see your customized appearance in action.
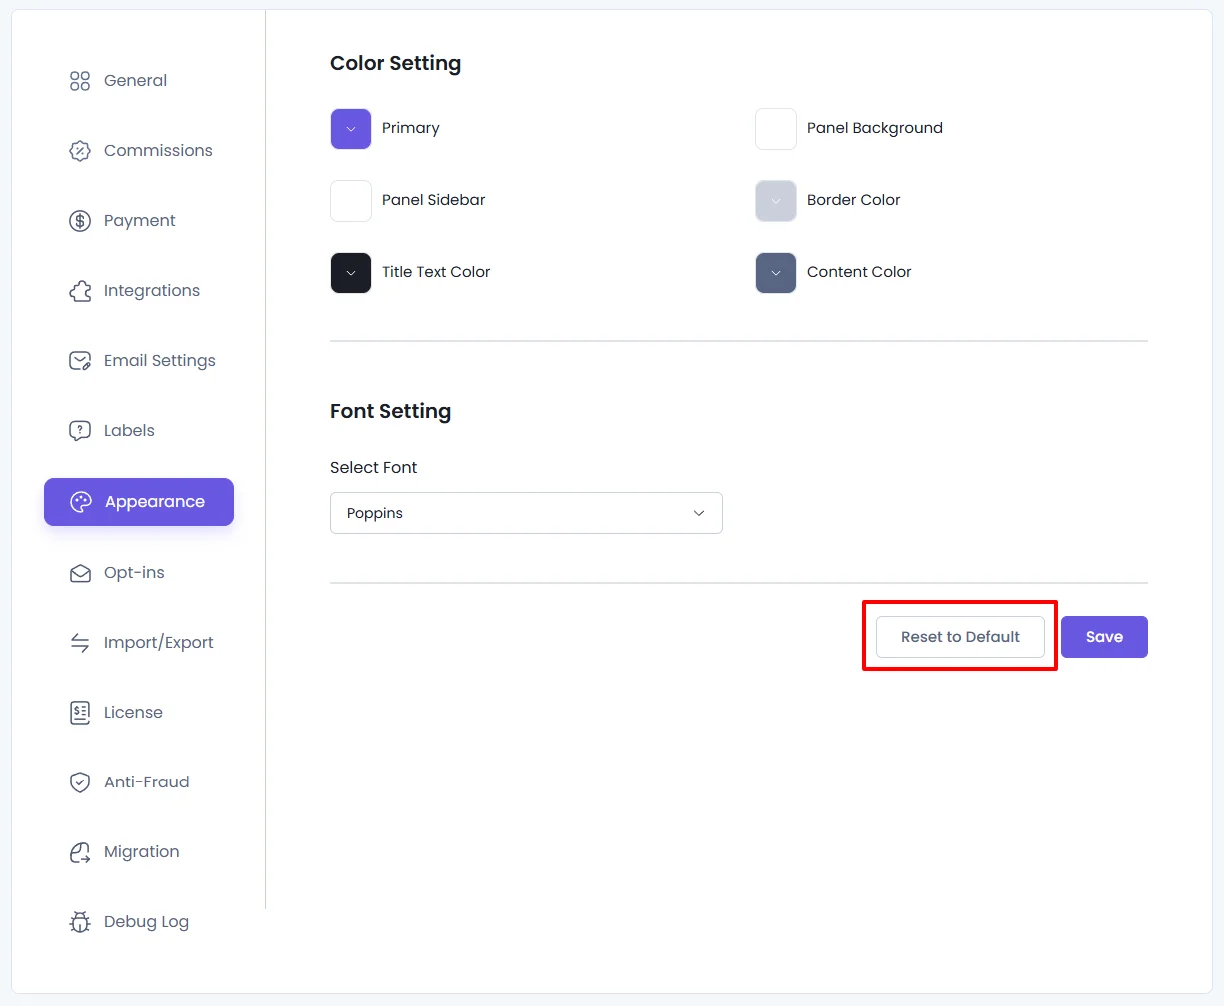
Reset to Default
Want to revert your changes?
Just click the Reset to Default Button to restore all appearance settings to their original defaults.