



Email Notification Settings
The Email Settings allows you to set how AffiliatePress sends email notifications to affiliates and administrators. You can choose an email delivery method, set sender information, configure SMTP, and send a test email to verify that everything is working correctly.
You can set your email notification settings from AffiliatePress → Settings → Email Settings.
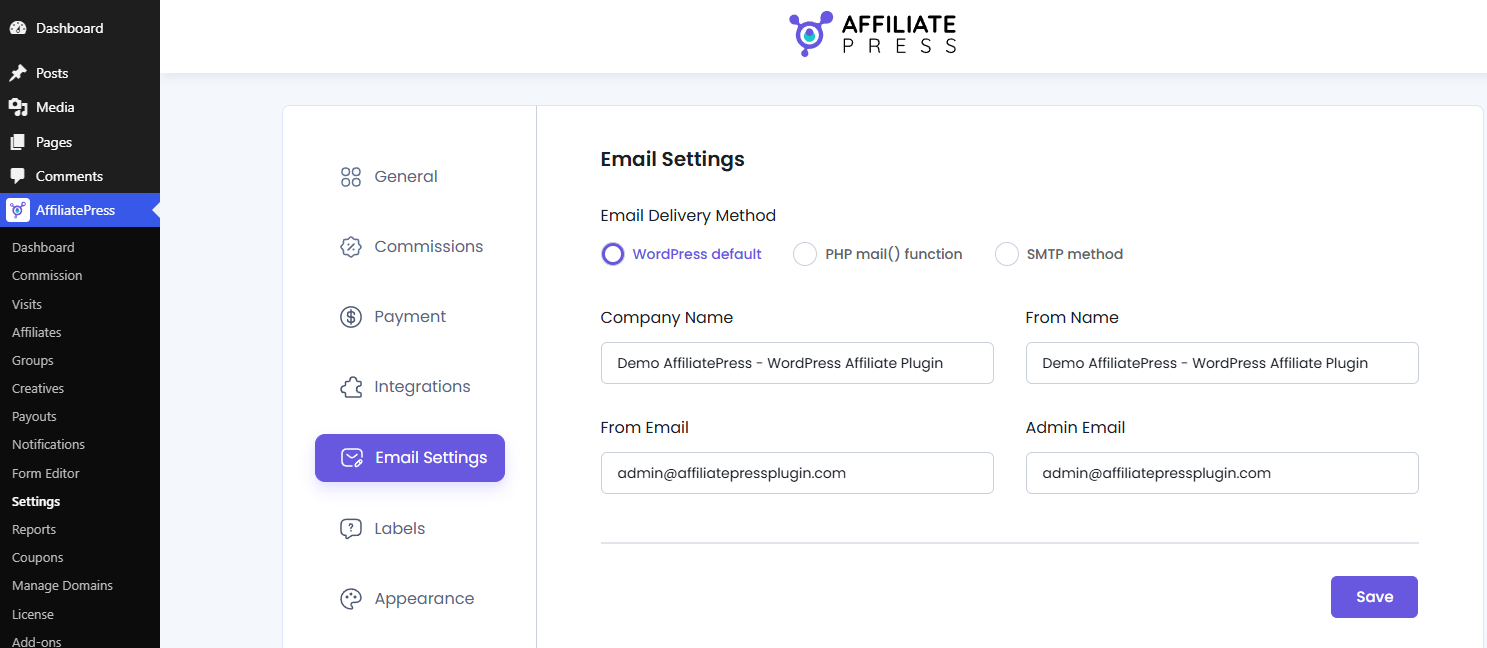
Email Delivery Method
The email delivery options below make sure your emails are delivered reliably and appear correctly to customers. Please select one of the email services to send email notifications.
- WordPress Default: Sends emails using WordPress’s built-in mail function
- PHP Mail: Uses your web server’s native PHP mail() function to send emails
- SMTP (Simple Mail Transfer Protocol): Sends emails via an external mail server which gives a more reliable email delivery
Best Practice: Always use SMTP for live websites because it offers better email deliverability and reduces the chances of emails being marked as spam.
WordPress Default/ PHP Mail Settings
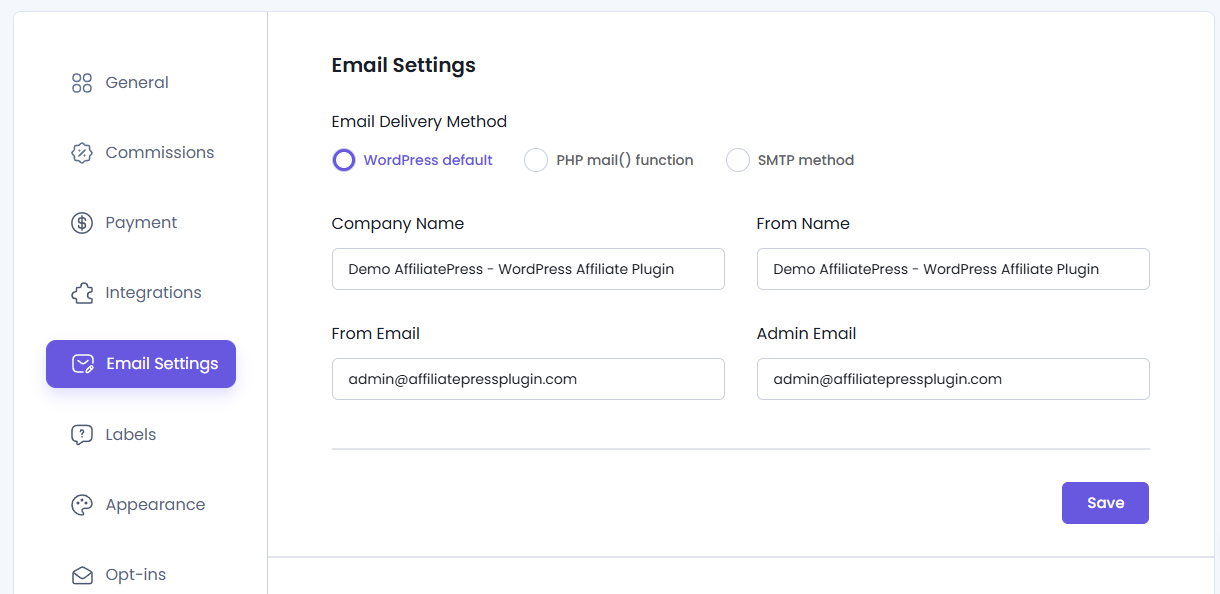
If you go with WordPress Default or PHP Mail() function as your email delivery method, below are the sender’s details you need to fill up:
- Company Name: Your company or business name
- From Name: Specify the sender name that appears in email notifications
- From Email: Enter the email address used as the sender of all outgoing emails
- Admin Email: Add the email address that will receive administrator email notifications
Finally, don’t forget to click the Save button.
Although these methods are quick to set up, email delivery depends on your server configuration. On many hosting environments, emails sent using WordPress Default or PHP Mail may be delayed, rejected or delivered to the recipient’s spam folder.
Note: WordPress Default may also be overridden by third party SMTP plugins installed on your website.
SMTP Settings
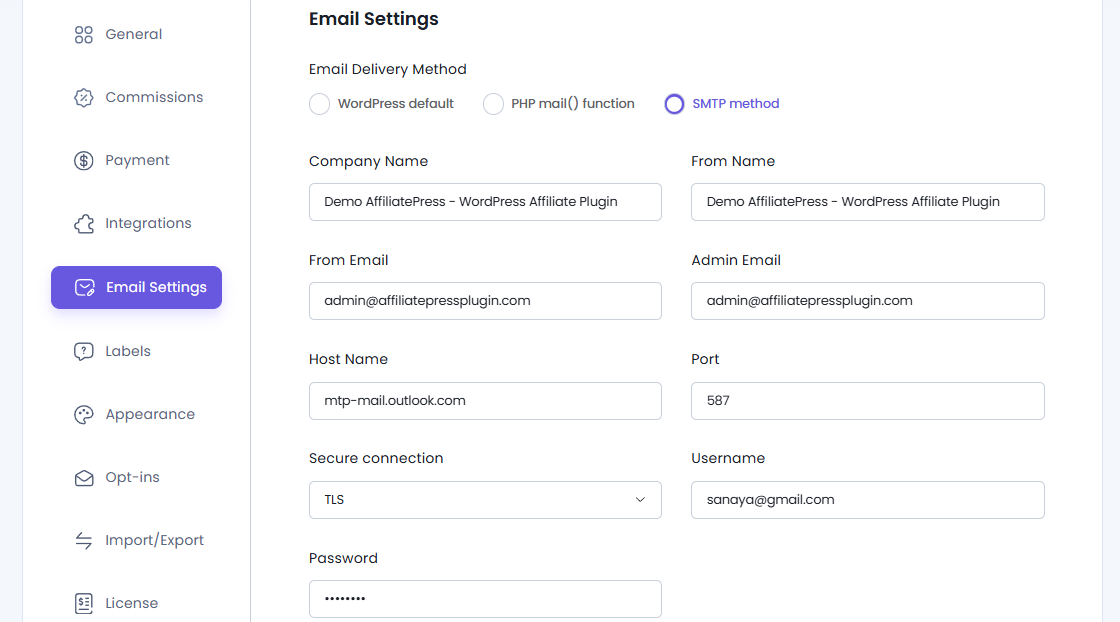
The SMTP email delivery method is the recommended option for most production websites because it gives you more reliable email delivery.
Configuring SMTP first steps are the same as other email delivery methods. Enter your sender’s details such as:
- Company Name
- From Name
- From Email
- Admin Email
Apart from this, setting up SMTP email delivery method needs you to get the required credentials from your hosting provider or SMTP service such as:
- Host Name: The SMTP server address.
- Port: The port number provided by your SMTP service.
- Secure Connection: Select the right encryption method from the dropdown list: SSL or TLS. Further, you can even Disable it.
- Username: Your SMTP account username, usually your email address.
- Password: The password or app password for your SMTP account.
An Outlook SMTP configuration example:
- Host Name: smtp-mail.outlook.com
- Port: 587
- Secure Connection: TLS
- Username: Your Outlook email address
- Password: Your Outlook email password
Note: The SMTP credentials required for this setup are provided by your hosting provider or email service. If you’re unsure about any of the values, contact your hosting provider.
Send Test Email Notification
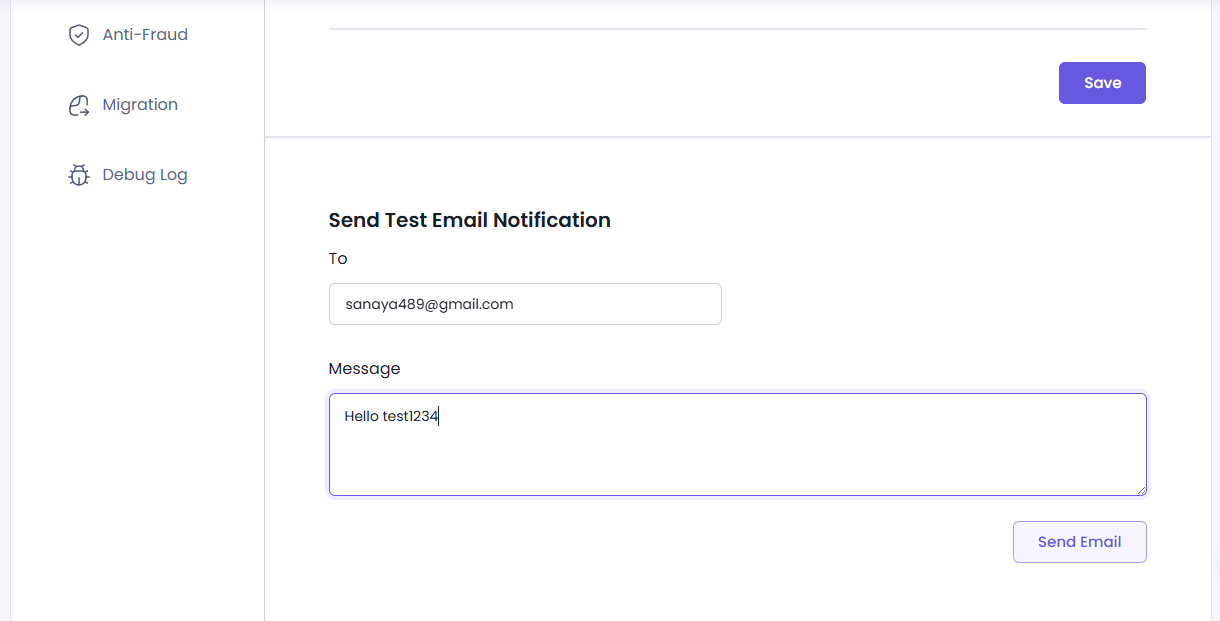
After you set your email delivery method, you can test its connection status. Whether it got successfully connected or not. You can test it by sending a test email to any email address, to check if the email is received or not.
To send a test email:
- Enter the recipient’s email address in the “To” field.
- Enter a short message in the “Message” field.
- Click the Send Email button.
If the test email is delivered successfully, your email configuration is working correctly. If not, check your spam or junk folder first. If the issue persists, verify your email delivery method and SMTP credentials before trying again.
Note: Always remember to send a test email after updating your email settings to confirm that notifications will be delivered successfully.