



MailChimp Integration
The Mailchimp Integration allows you to automatically add new affiliate registrations to your Mailchimp audience, so you can easily send welcome emails, onboarding sequences, newsletters, and promotions automatically.
Here we’ll show you how to integrate AffiliatePress with MailChimp integration.

Before You Begin
Mailchimp is an email marketing platform that lets you automatically add new affiliate registrations to your mailing list. You can use it to send welcome emails, newsletters, promotions, and other updates to your affiliates.
Before setting up the Mailchimp integration, make sure you have:
- A Mailchimp account
- The AffiliatePress Mailchimp Add-on (included with all AffiliatePress Premium plans)
- Permission to manage Mailchimp audiences
- An Affiliate Registration page
If everything is ready, follow the steps below to connect Mailchimp with AffiliatePress.
How to Integrate The MailChimp Add-on in AffiliatePress
1. Activate The Mailchimp Addon
To activate the Mailchimp Add-on, go to AffiliatePress → Add-ons, scroll down until you find the Mailchimp Integration add-on, and click Activate.
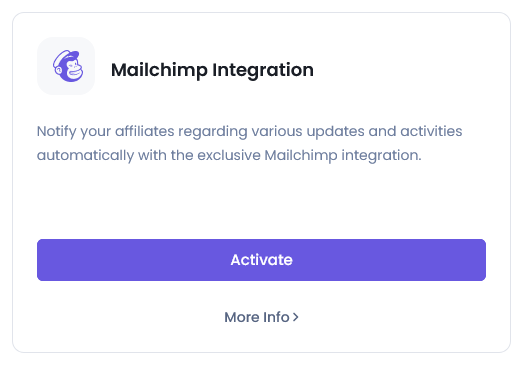
After the add-on is activated, click Configure to open AffiliatePress → Settings → Opt-ins, then select the Mailchimp tab if you’ve more than one opt-ins activated.
2. Connecting Mailchimp with AffiliatePress
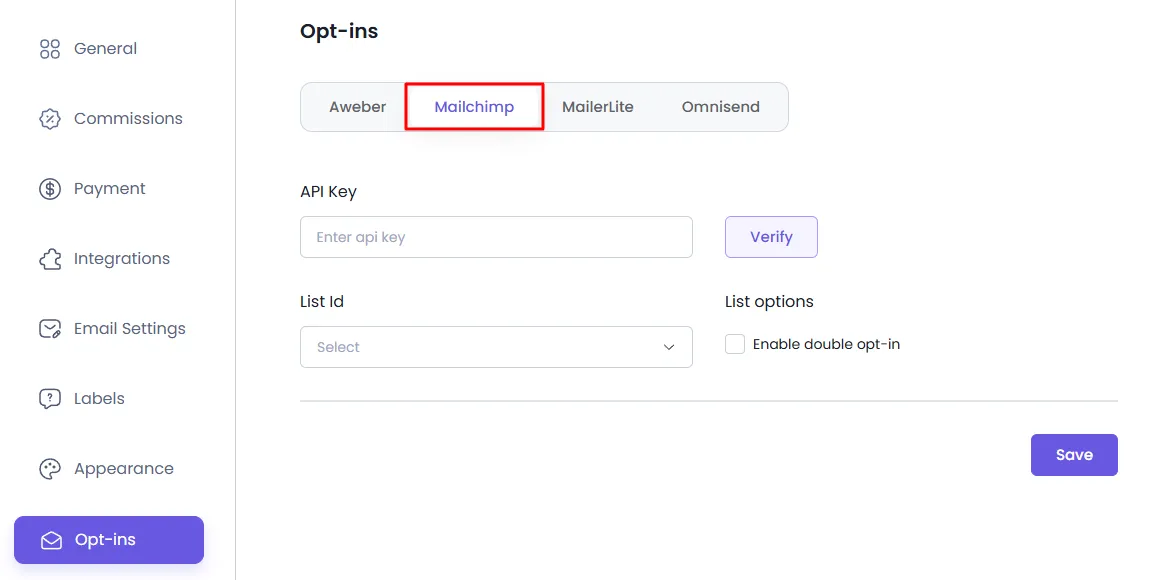
Inside the Mailchimp panel, you have to add the API Key needed for connecting Mailchimp accounts. You’ll need to fetch it manually from your Mailchimp account.
If you still don’t have the Mailchimp account, create one right now from here.
Getting Your Mailchimp API Key
- Log into your Mailchimp account.
- Click your profile name in the top-right corner and choose Account.
- Navigate to the Extra’s dropdown menu and select API keys.
- You can either copy an existing key or click Create A Key to generate a new one.
- Once created, copy the API key to use it inside AffiliatePress.
After getting the API key, paste it inside the AffiliatePress API key field and click on Verify. If your Mailchimp account is connected successfully, you’ll see a quick success popup letting you know your settings have been verified.
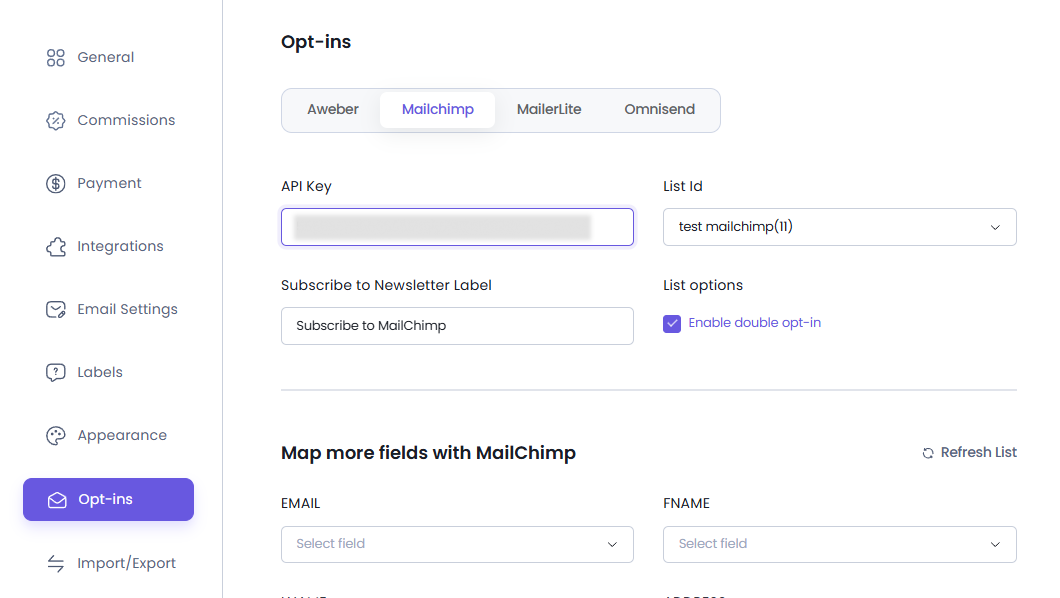
If the connection is successful, your available Mailchimp audiences will appear in the List ID dropdown along with additional configuration options.
3. Select a List ID
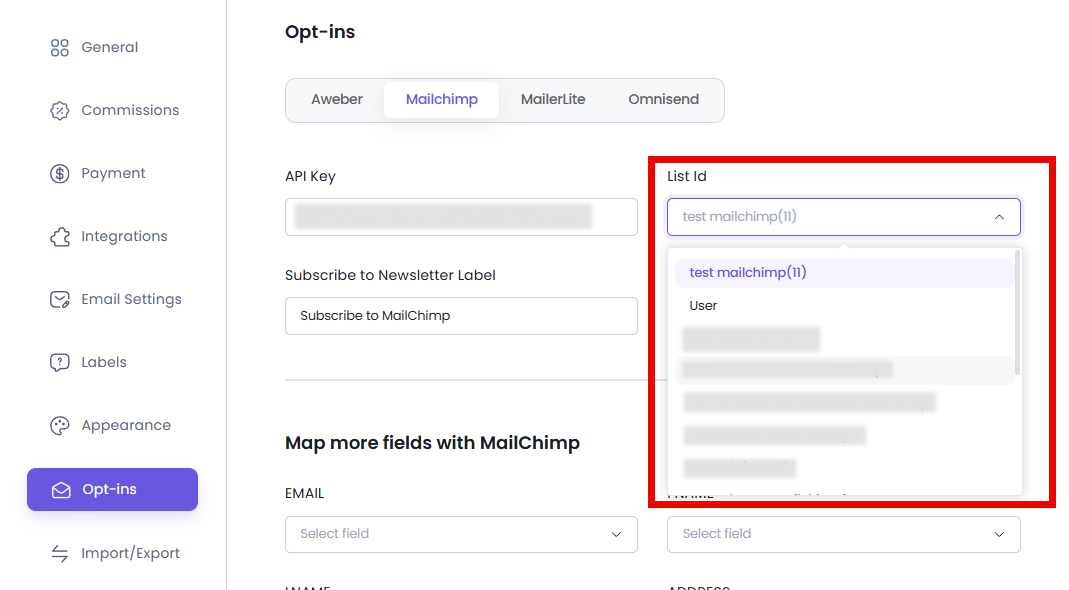
After verifying your Mailchimp account, all your available Mailchimp audience lists will appear under the List ID field.
From here, select the Mailchimp audience where new affiliate registrations should be added. After selecting a list, all available Mailchimp fields will be shown under the Map more fields with Mailchimp section.
4. Customize the Newsletter Checkbox
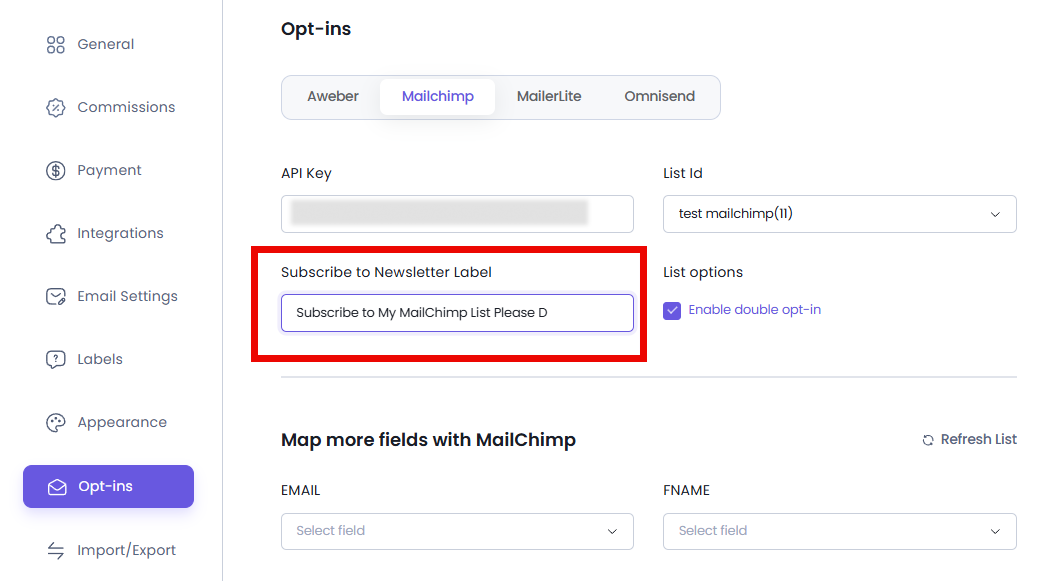
You can customize the default Subscribe to Newsletter Label, which will be shown on your Affiliate Registration form.
After saving your changes, visit the AffiliatePress Affiliate Registration page to see the updated subscription label.
Affiliates must select the Subscribe to Newsletter checkbox during registration to join your Mailchimp audience. This helps keep your registration form compliant with email marketing consent requirements, as users explicitly agree to receive emails before being added to your mailing list.
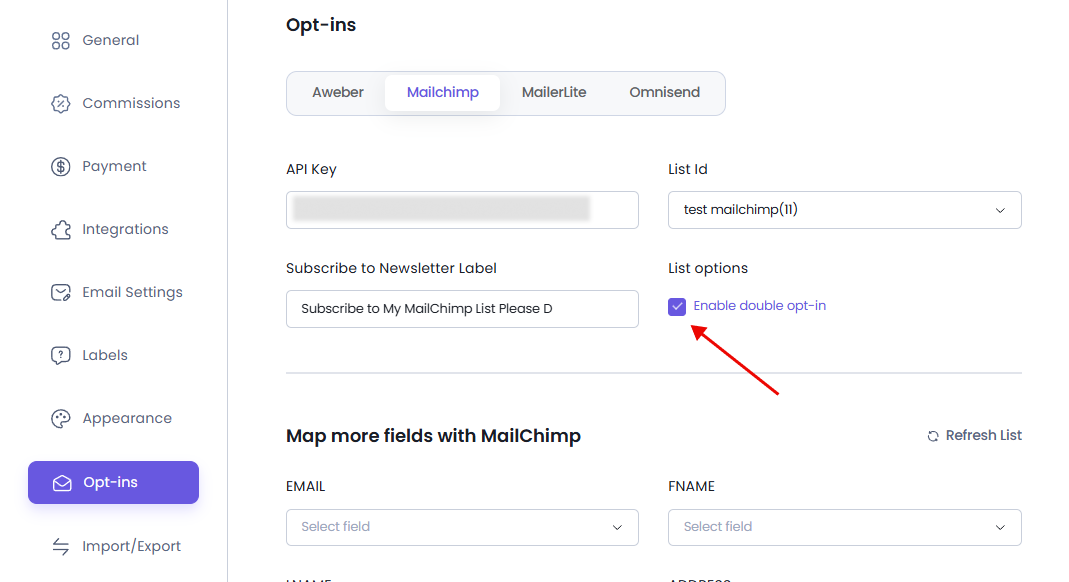
If you’d like affiliates to confirm their subscription before being added to your Mailchimp audience, you can also enable the Enable Double Opt-in under List Options.
When checked, Mailchimp sends a confirmation email, and affiliates are added to your audience only after confirming their subscription.
5. Map Affiliate Registration Fields
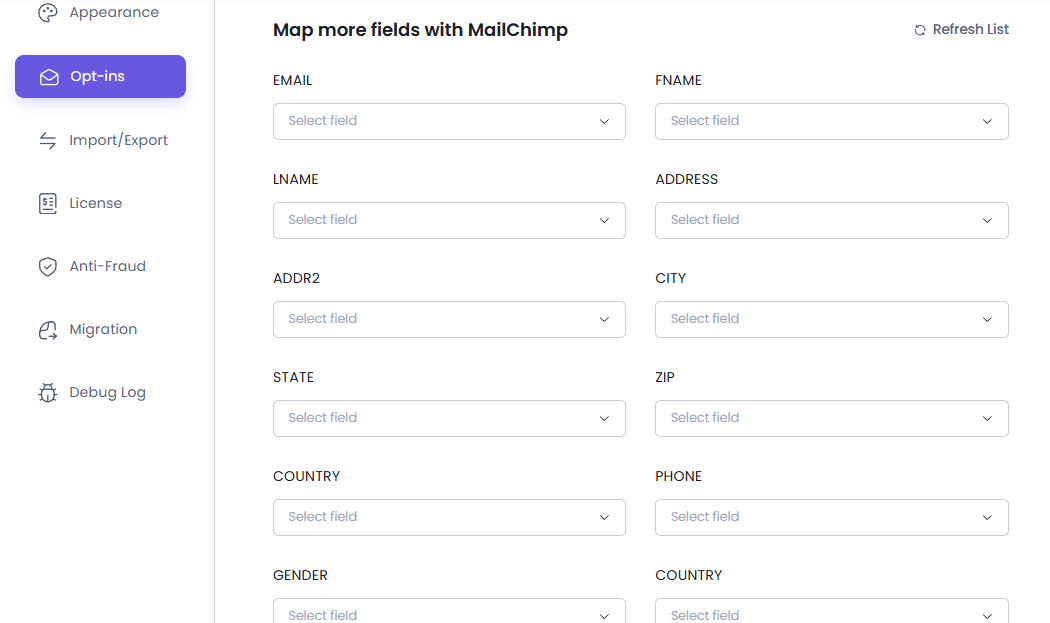
At last, make sure to map each Mailchimp field with the corresponding field from your Affiliate Registration Form, such as:
- First Name
- Last Name
- Address
- City
- State
- ZIP Code
- Country
- Phone Number
- Gender
- Date Field
- and more.
Field mapping tells AffiliatePress which registration field should be sent to each corresponding Mailchimp field.
For example:
- Affiliate Email → EMAIL
- Affiliate First Name → FNAME
- Affiliate Last Name → LNAME
After correctly mapping all Mailchimp fields with your AffiliatePress registration fields, remember to Save all the changes.
If you misconfigure anything, you can click Delete Configuration to remove the current setup.
Moreover, if your latest Mailchimp audience fields are not showing, or you’ve recently added new fields to your Mailchimp audience, click the Refresh List button next to the Map more fields with Mailchimp section to reload the latest audience fields.
Debug Logs for Mailchimp
AffiliatePress does allow you to track the debug log for the Mailchimp Integration if in-case you ran into any troubleshooting. If you experience any issues while connecting AffiliatePress with AWeber or syncing affiliate data, you can check the Mailchimp Debug Logs from AffiliatePress → Settings → Debug Log.
For more details about viewing, downloading, and managing debug logs, see our Debug Log Settings documentation by clicking here.