



Ninja Forms Integration
Integrating Ninja Forms with AffiliatePress barely takes a few steps.
Afterwards, you can easily track all affiliate signups in real time. Whether you’re accepting registrations, event bookings, donations, service requests, or product payments, this integration makes sure affiliate commissions are created based on successful form submissions.

Here we’ll show you how to integrate Ninja Forms with AffiliatePress.
Before You Begin
Before configuring the integration, make sure you have the following installed and activated:
- WordPress with administrator access
- Ninja Forms
- A supported payment gateway configured in Ninja Forms
- AffiliatePress
Set Up Ninja Forms Integration
Follow these steps to connect Ninja Forms with AffiliatePress:
- Head over to AffiliatePress → Settings → Integrations.
- Scroll down until you find the Ninja Forms integration.
- Turn on the integration.
- Save your changes.
Configure AffiliatePress for a Ninja Form
The integration must be configured individually for each form that should generate affiliate commissions.
To configure a form:
- Head over to Ninja Forms → All Forms.
- Open the form you want to use for affiliate commission tracking.
- Inside the form builder, click the Emails & Actions tab.
- Click Add New Action.
- Select AffiliatePress Commission from the available actions.
Once added, you’ll see several configuration fields.
Configure the Commission Action
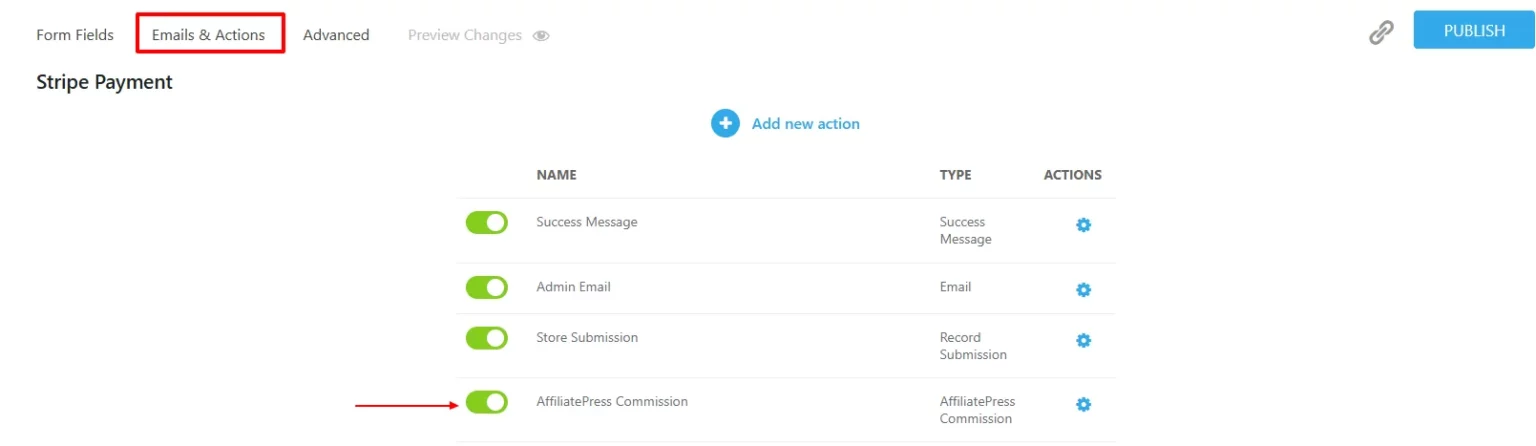
Complete the required fields to allow AffiliatePress to calculate commissions correctly.
Total Amount Field
Choose the field that stores the final payment amount. AffiliatePress uses this value to calculate the commission.
Customer Email
Select the field containing the customer’s email address. This helps associate the transaction with the purchaser.
Description
Choose the field that contains the product, service, or payment description. This information appears with the commission record.
Commission Type
Select the Commission Type to set the type of commission generated by the form. You can choose from Sale, Opt-In or Lead.
After completing the configuration, click Publish to save the form.
Payment Gateway Requirement
Affiliate commissions are generated only after a successful payment. Before publishing your form, make sure:
- A payment field has been added to the form.
- A supported payment gateway is connected and configured.
- The payment is completed successfully.
If the form does not process a payment, AffiliatePress will not generate a commission.
Product-wise Commission Add-on Support
AffiliatePress allows you to set different commission rates for individual Ninja Forms.
To use this feature, you must install and activate the AffiliatePress Product-wise Commission Rate Add-on. Once activated, you can assign custom commission rates to specific forms while keeping your default commission settings for other forms.
For example:
| Form | Commission |
| Event Registration | 20% |
| Service Booking | 15% |
| Consultation Request | Default Rate |
Form specific commission rates always take priority over:
- Default commission
- Group commission
- Affiliate specific commission
Forms without a custom commission rate continue using your default AffiliatePress commission settings.
For detailed setup instructions and more information, click here.
Product Selection Add-on
AffiliatePress allows you to control which Ninja Forms are eligible for affiliate commissions.
To use this feature, you must install and activate the AffiliatePress Product Selection Addon. Once activated, you can select specific forms that should generate affiliate commissions. Forms that are not selected will not generate commissions.
After installing the add-on:
- Go to the Ninja Forms integration settings.
- Choose the forms under Allowed Products.
- Save your settings.
Note: Products selected through this add-on override the Disable Commissions product setting and will still generate commissions.
For detailed setup instructions and more information, click here.
How Ninja Forms Commission Tracking Works
Once the integration has been configured:
- A visitor clicks an affiliate link.
- The visitor submits a Ninja Form and completes the payment.
- AffiliatePress verifies the transaction.
- A commission is created for the referring affiliate according to your commission settings.
- The commission becomes available in the AffiliatePress dashboard for further processing.