



How to Create Ultimate Affiliate Portal with AffiliatePress


How can you automate affiliate registration and manage affiliate portals in AffiliatePress? If you run an online store, membership website, or paid content platform on WordPress, adding an affiliate program can help you attract more customers and grow your revenue through referrals.
With AffiliatePress, you can either manually add affiliates yourself or let affiliates register automatically through a front-end signup form. You also provide affiliates with a professional affiliate portal where your partners can manage commissions, links, payouts, and promotional materials.
In this tutorial, we’ll walk through:
- How to add affiliates manually
- How to enable automatic affiliate self-registration
- How to add affiliate self-registration forms to your WordPress site
- How to customize registration experiences through fields and notifications
- How the affiliate portal works and what affiliates can do inside it.
Let’s get started.
TL;DR: AffiliatePress allows you to make a full affiliate portal in WordPress where you can manually add affiliates or enable automatic self-registration through signup forms. Also, you get a complete affiliate dashboard where affiliates can easily manage links, track commissions, view payouts, and access all creatives for better promotion
How Can You Add Affiliates in AffiliatePress?
AffiliatePress gives you two primary ways to add affiliates to your program.
Option #1 – Manually Add Affiliates
This option is perfect if you want full control over who joins your affiliate program or if you collect affiliate applications through a simple contact form first.
To manually create an affiliate account, go to WordPress → Affiliates → Add New.
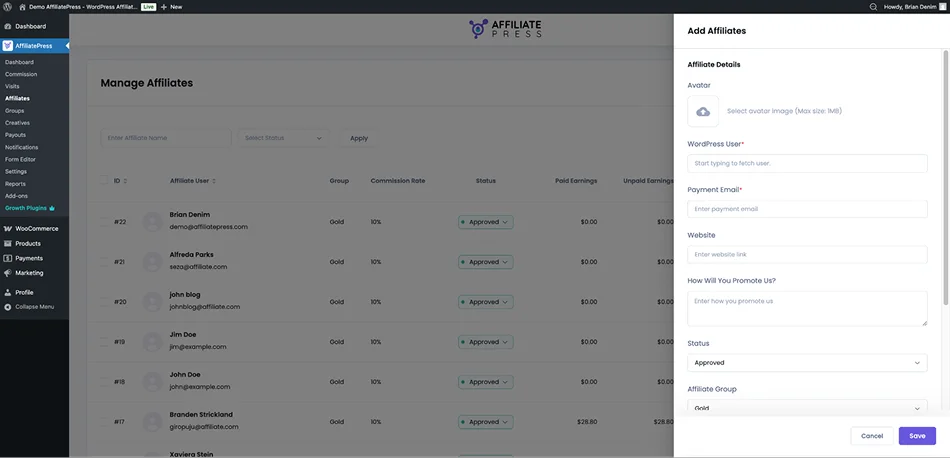
You’ll be able to configure details such as:
- Avatar image
- Payment email used for affiliate payouts
- The affiliate’s website URL
- Promotion methods or channels
- Status (Pending, Approved, Rejected)
- Affiliate Group (if you use any)
- Optionally – individual commission rate, when you assign a custom commission percentage
- Optional admin-only notes.
Most fields are optional except the payment email and the linked WordPress user account.
In most cases, you’ll first need to create a regular WordPress user account through the Users menu on WordPress and then select that user while creating the affiliate profile.
For additional control over affiliate approvals and payouts, you should also better understand the statuses. AffiliatePress automatically updates related commission statuses when an affiliate account is rejected.
If an affiliate’s status changes to Rejected:
- All Pending commissions become Rejected
- All Approved commissions become Rejected
- Previously Rejected or Paid commissions remain unchanged.
If the affiliate is later switched back to Pending or Approved:
- Previously rejected commissions stay rejected
- Paid commissions remain unchanged
- Commission statuses are not automatically restored.
Option #2 – Automatic Affiliate Self-Registration
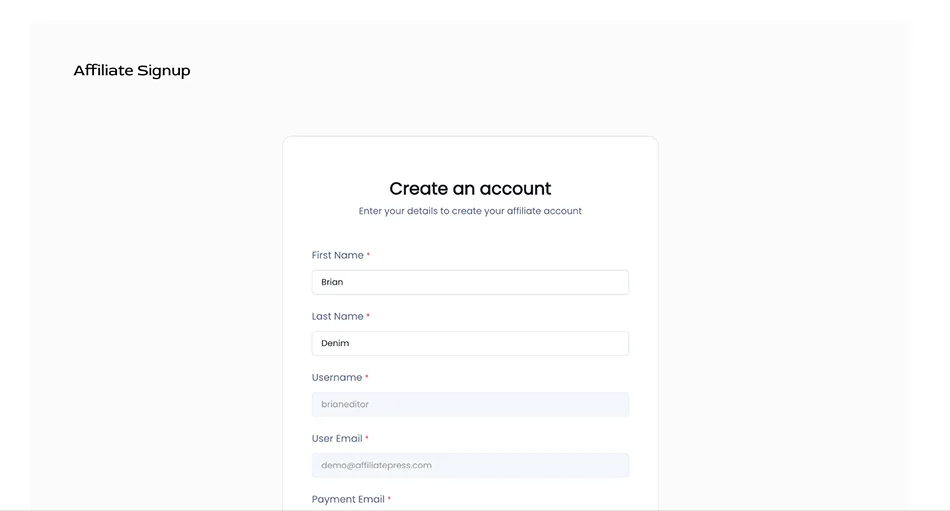
This is probably what you are looking for – you can allow affiliates to register themselves directly on your website through the AffiliatePress-powered forms.
This is an easier way to grow an affiliate program quickly.
With AffiliatePress, affiliates can complete a professional registration form that includes the same details you’d normally enter manually.
After a new affiliate submits the registration form, the account can either:
- Be automatically approved
- Stay pending until manually reviewed
It’s important to configure this via: WordPress → AffiliatePress → Settings → General. Find the setting: “Auto Approve & Activate New User Registration”.
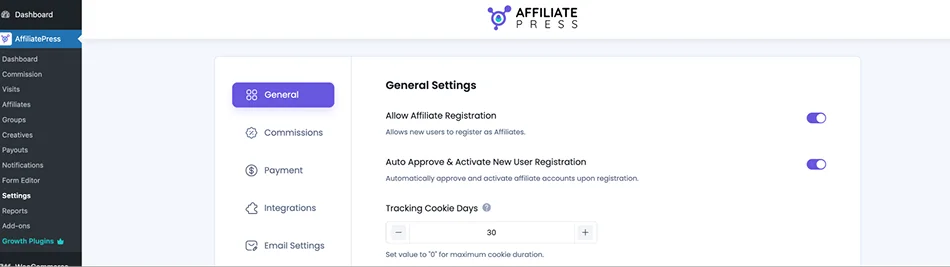
When enabled, affiliates are automatically approved – and they can access the affiliate panel immediately after registration.
Turn it off if new affiliates should receive a Pending status. Then you need to manually review and approve accounts.
How to Add an Affiliate Registration Form to Your Website
AffiliatePress comes with a built-in affiliate registration form that can be added anywhere on your WordPress site using a shortcode or Elementor widget. In any case, shortcode is flexible enough to be added via any builder.
Before the form works on your site, affiliate registration must be enabled via WordPress → AffiliatePress → Settings → General → Enable “Allow Affiliate Registration”.
When you activate AffiliatePress, the plugin automatically creates two important pages:
- ‘Affiliate Signup’ containing the [affiliatepress_affiliate_registration] shortcode.
- ‘Affiliate Panel’ containing [affiliatepress_affiliate_panel].
These pages act as the default signup and dashboard pages for affiliates.
However, you may manually do the same thing. In this case, AffiliatePress uses the following shortcode to display the registration form – you can place this shortcode on any WordPress page:
[affiliatepress_affiliate_registration]
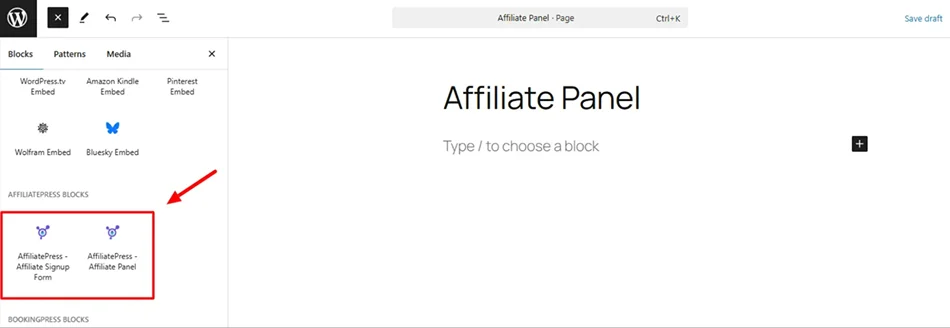
So, if you want to place the registration form somewhere else:
- Create or edit a WordPress page.
- Insert the shortcode: [affiliatepress_affiliate_registration]
- Then go to: WordPress → AffiliatePress → Settings → General.
- Under Page Settings, assign your custom page to: Affiliate Registration Page.

Once done, AffiliatePress will use your preferred registration page.
The plugin automatically detects if a user is logged in, displaying the login form first, then revealing the dashboard upon successful entry.
Customize Affiliate Registration Fields
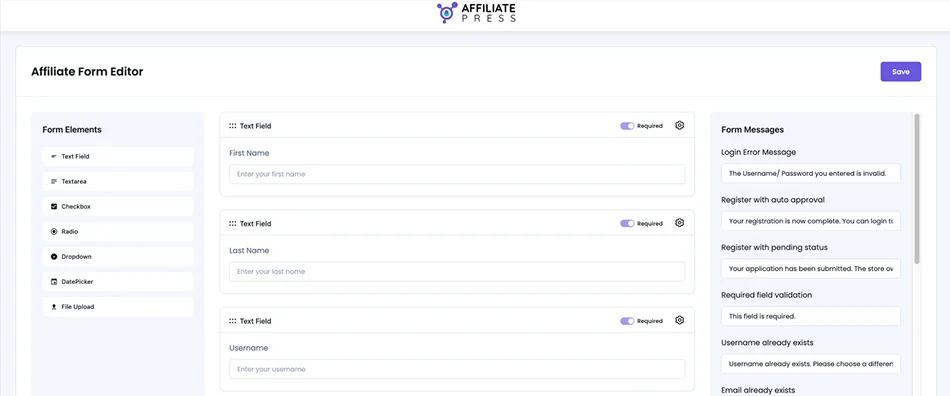
AffiliatePress includes a built-in Form Editor that allows you to customize the registration experience for your affiliates.
If you don’t like defaults, go to: WordPress Admin → AffiliatePress → Form Editor.
In this menu, you can:
- Add or remove registration fields
- Edit field labels
- Change placeholders
- Customize validation and error messages
For example, you can collect social media profiles, traffic sources, marketing experience, coupon promotion preferences, etc.
Configure Affiliate Registration Emails
AffiliatePress automatically sends email notifications during registration and approval – to you and affiliates. If you want to update them, edit the templates at:
WordPress → AffiliatePress → Notifications.
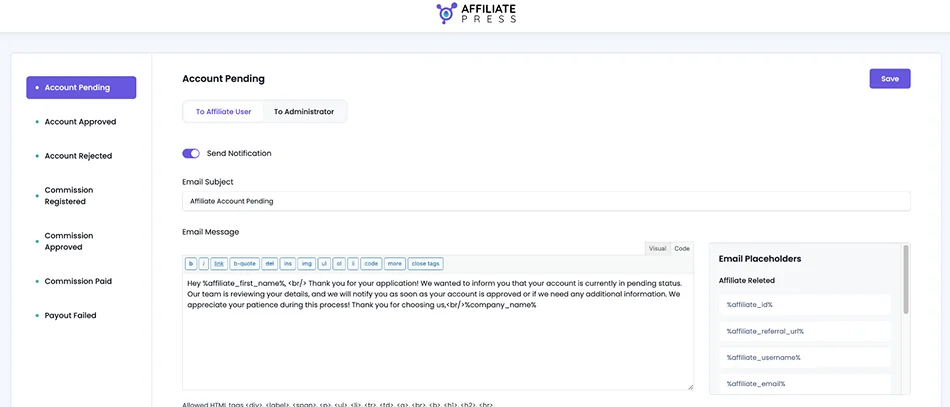
Here you can:
- Enable or disable emails
- Customize subject lines
- Edit message content
- Use dynamic placeholders
- Configure approval and rejection emails.
So, you can make the whole process fully automated!
Guide Through the Affiliate Portal in AffiliatePress
Once affiliates register and log in, they gain access to the AffiliatePress-powered affiliate portal that displays all the real-time data for their individual activities.
An affiliate portal (or affiliate dashboard) is the area where affiliates manage their campaigns, commissions, referral links, and payouts.
To display the affiliate dashboard on any page, use [affiliatepress_affiliate_panel]. You can insert this shortcode into WordPress pages with or without Gutenberg blocks, Elementor layouts, or custom affiliate landing pages.
Affiliates must log into their account before accessing the panel. Inside the panel, logged-in users will see a personalized dashboard where they can manage all affiliate activity.
Main Features Available in the Affiliate Portal
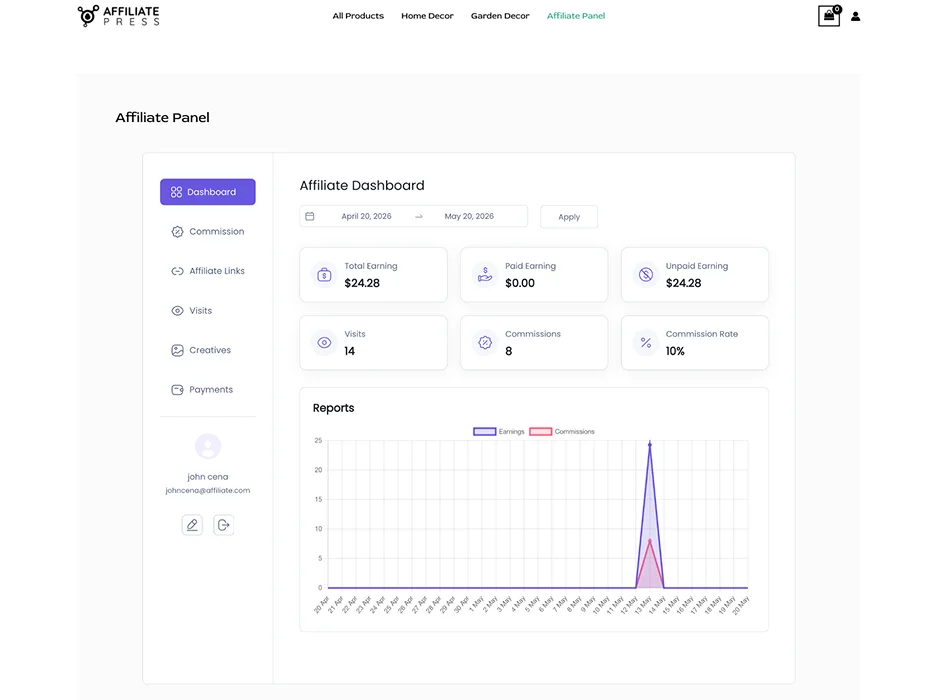
The dashboard gives affiliates a quick overview of the total commissions, paid and unpaid earnings, visits and conversions, commission charts, and statistics.
Affiliates can filter data by:
- Custom date ranges
- Last six months
- Previous year
Commission
The Commissions section displays detailed commission records, including:
- Amount
- Status
- Source
- Date
Users can filter by Commission date and Status (Approved, Pending, Rejected, Paid).
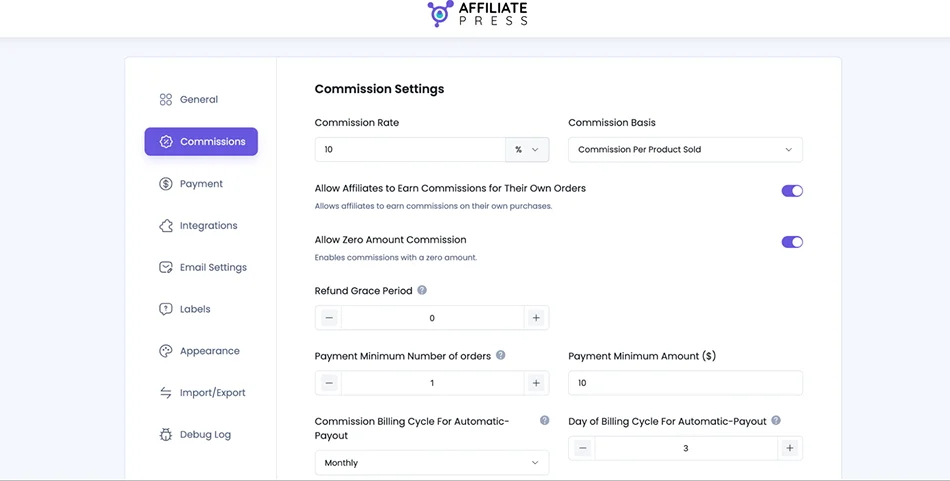
If the setting: “Hide Pending and Rejected Commissions from Affiliate User” is enabled under
AffiliatePress → Settings → Commissions, then affiliates will only see Approved and Paid commissions.
Affiliate Links
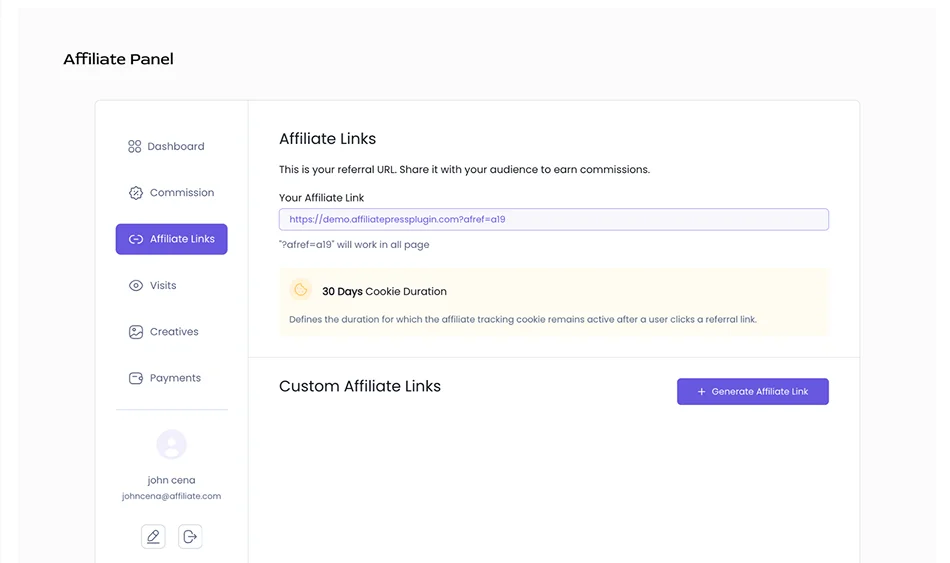
Affiliates can:
- Copy their default referral URL
- Generate custom affiliate links
- Track campaigns
- Add Sub IDs
- Delete unused links
Custom links are super useful – they help affiliates measure performance across different traffic sources and campaigns.
Visits
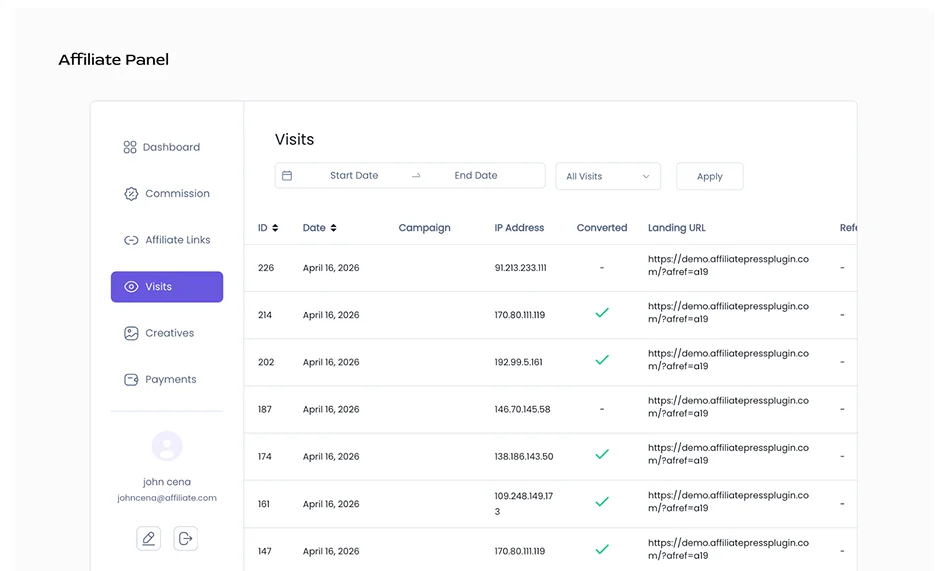
In the Visits section, all referral traffic generated by the affiliate is displayed, helping your partners analyze traffic quality. It allows affiliates to track visit dates, converted vs non-converted visits, and campaign performance.
Creatives
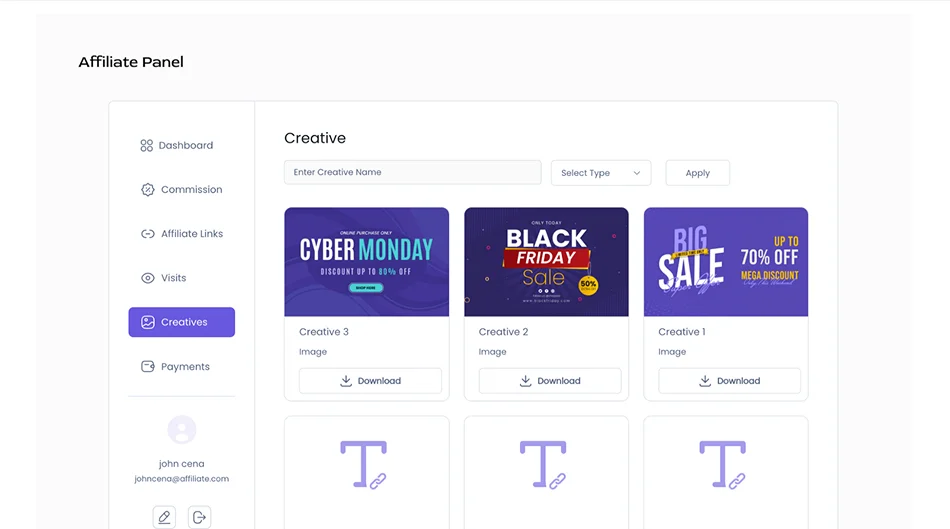
If you use the option of uploading custom-branded assets through AffiliatePress, affiliates will access them through the Creatives tab in their accounts. You can add various banner images, text ads, HTML snippets, and text links.
Payments
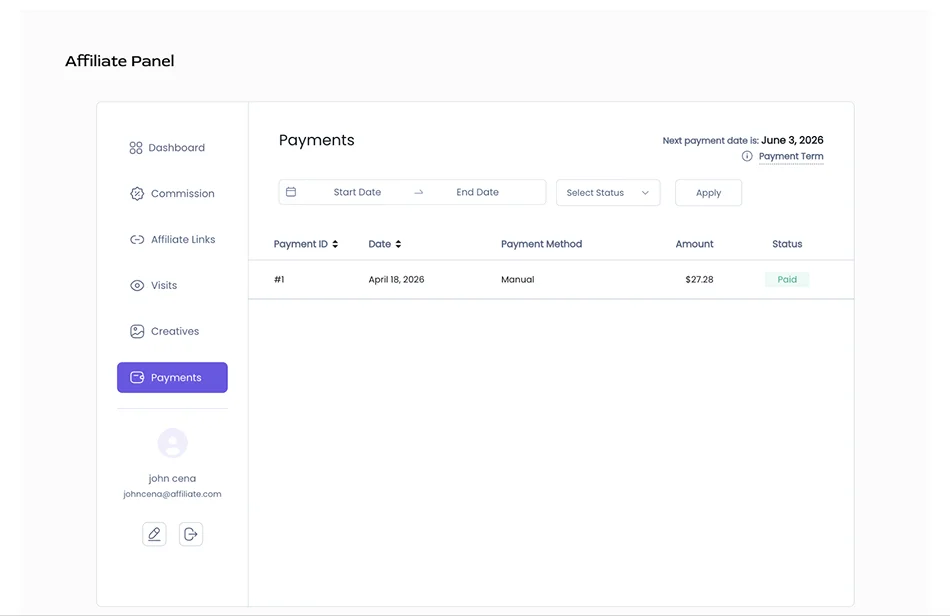
One of the most visited sections by AffiliatePress! The Payments menu displayed payout history:
- Payment amounts
- Payment dates
- Payment methods
- Payment statuses
Affiliates can filter payouts by date and status.
Edit Profile
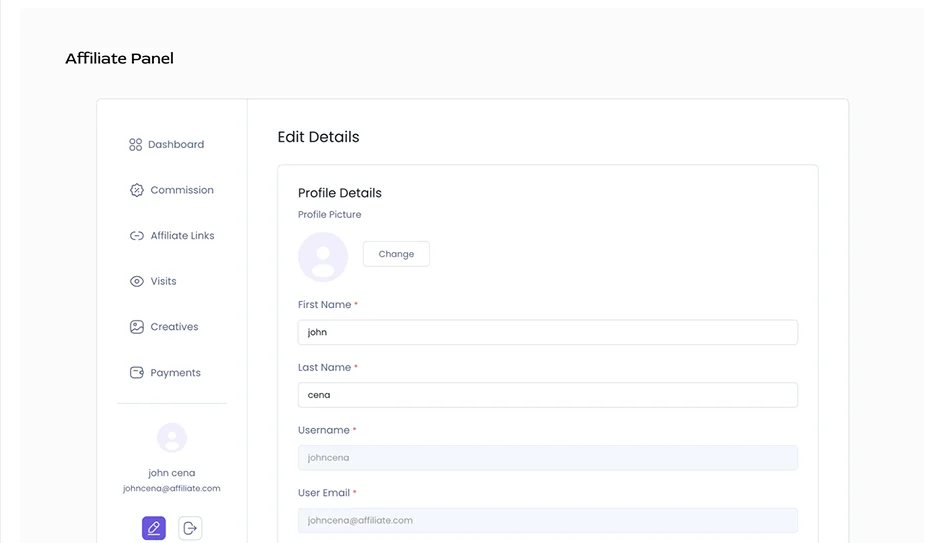
Affiliates can manage account information, such as their profile image, name, username, email, payment email, website URL, and password.
Let’s Conclude: Creating Powerful Affiliate Portals with AffiliatePress
AffiliatePress is a powerful WordPress affiliate management plugin for sellers. When it comes to providing your affiliates with the best login areas, you can fully rely on the modern plugin tools. Moreover, AffiliatePress allows you:
- Manually approve affiliates for maximum control
- Fully automate affiliate onboarding
- Customize registration forms and emails
- Provide affiliates with a complete self-service dashboard
- Let affiliates analyze their performance and control their tools in personal accounts.
With AffiliatePress, you have all the tools needed to scale affiliate marketing directly from WordPress.
Related articles: