

Do you need a system that records which affiliate referred a customer to your WooCommerce-based store on WordPress? Looking to fairly credit people who bring you sales?
Since WooCommerce doesn’t include affiliate tracking out of the box, you need to add it via affiliate plugins – and we’re eager to explain the process with the AffiliatePress example.
AffiliatePress is an affiliate program management plugin for WordPress, which, among other integrations, seamlessly works with your WooCommerce store. Let’s explain more!
TL;DR. AffiliatePress enables full affiliate tracking in WooCommerce, including clicks, referrals, and conversions. Easily set commissions, manage payouts, and monitor performance, making it a practical solution for building and scaling affiliate programs efficiently.
What Does AffiliatePress Tracking for WooCommerce Include?
Affiliate tracking provided by AffiliatePress for WooCommerce isn’t just one thing, it covers several pieces:
- Click tracking (who clicked which affiliate link).
- Referral tracking (to identify which affiliate in your system sent the visitor to your store).
- Conversion tracking (did that visit turn into a sale?).
- Cookie duration, which allows you to configure how long the referral is remembered (e.g., 30 days).
- Order attribution (linking the purchase back to the affiliate).
- Full analytics to identify top performers and problems, too.
Now, let’s take a look at the key steps required to set up affiliate tracking for WooCommerce with AffiliatePress.
Set up AffiliatePress to Create Tracking Rules
Chances are, you already have WooCommerce installed. Since AffiliatePress will be our baseline plugin for the affiliate program creation, we need to set it up, too.
- Install and activate AffiliatePress (you can start with a free version to try things out). If you are on a paid version, get your license first in your account on the AffiliatePress site and then activate it through your WordPress site.
Note: for a quick, seamless setup, you can use the Setup Wizard prompted after the installation.
- Start with the global Settings menu: they include different levels of setups. The other plugin menus are more for tracking.
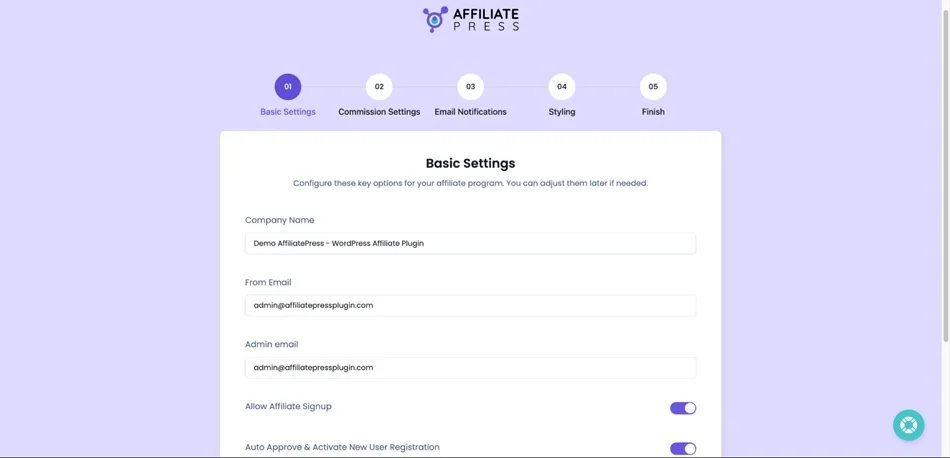
The settings let you go step by step through the needed configurations. For example, from top to bottom, customize the general environment:
- Currency
- Affiliate registration on the site (automatic or manual)
- Cookie duration
- Basic URL structure for affiliate links
- Select the WordPress page for the affiliate account and affiliate registration page (you can later add the needed shortcodes to these pages).
In the wizard, you will also set up all the associated business names and email addresses.
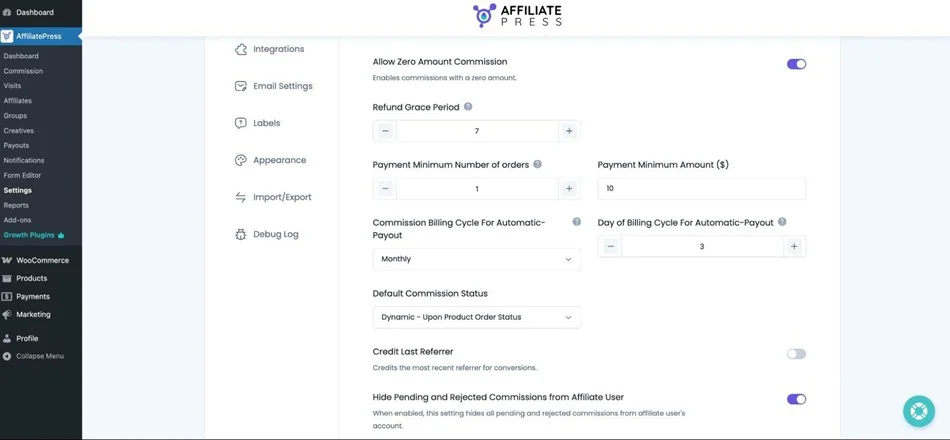
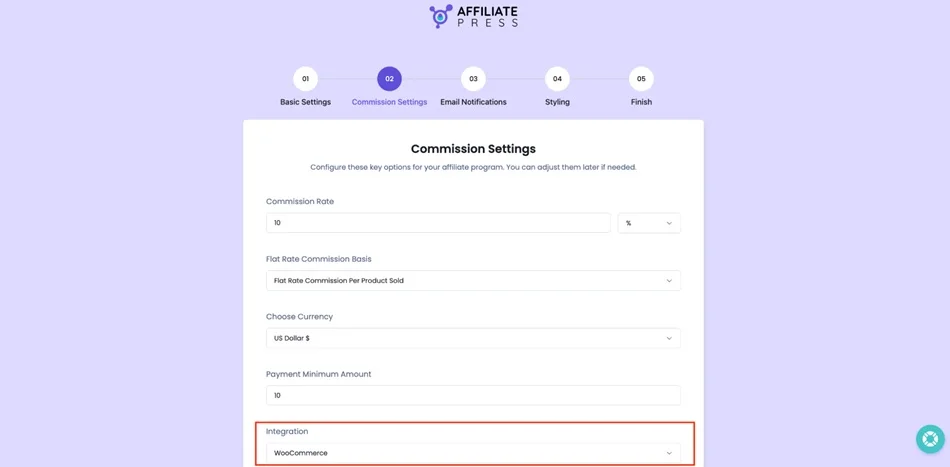
- Customize commissions you’ll be offering to your affiliate partners.
- Default commission type (percentage vs fixed).
- Per product / per order commission.
- Minimum payment amount.
- Commission cycle for automatic payout.
- Optionally, enable only the first order from each customer to be eligible for commission.
- Grace period for refund.
For even deeper customization, you can create affiliate groups with different commission settings for each group (visit the Groups menu).
In the Wizard, if Woo is already activated and running on your WordPress, you can even select it from the list of integrations. It will be instantly connected.
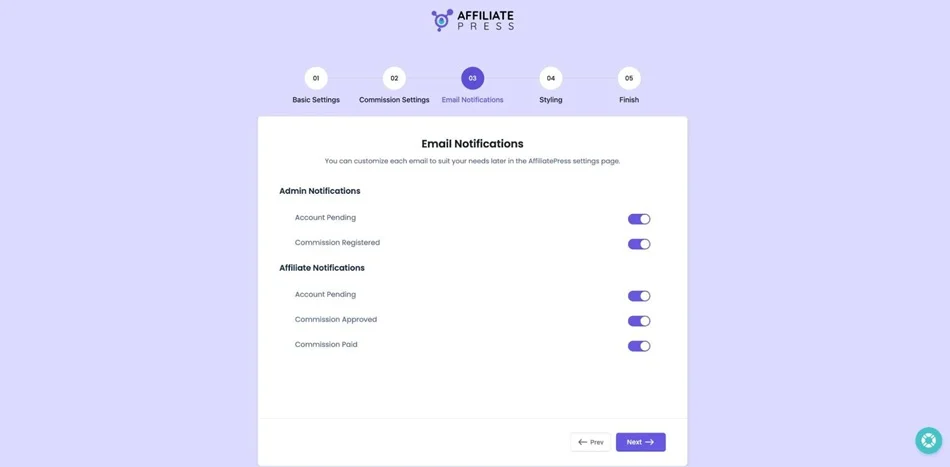
- On the next step of the wizard, enable or disable automated notifications for account creation, approved commissions, etc.
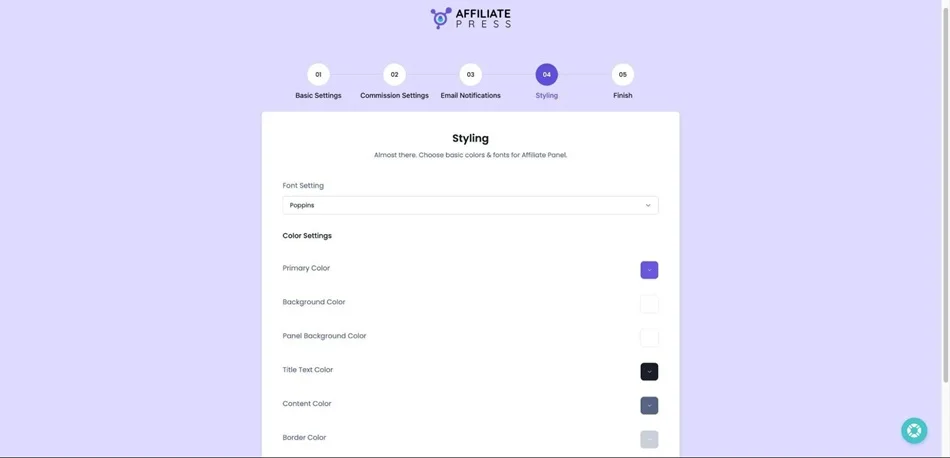
- The wizard also takes care of the styling (design and colors) for the affiliate panel.
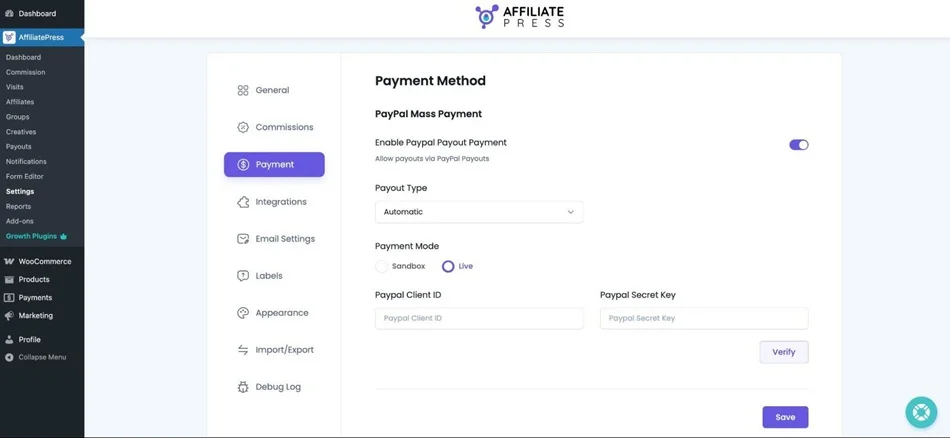
Some of the other crucial settings should be set up again via Settings. For example, you can also go to the Payout section to customize whether you want to pay manually or automatically via PayPal or Stripe to your affiliates.
There are also tons of plugin and dashboard texts and labels that you can fully customize to suit your business context – go to the Labels menu via Settings to change them.
- Add affiliate registration pages to the site using shortcodes you’ll find in the settings. Add pages to navigational menus as usual in WordPress.
Now, when you have your key settings in place, adjust WooCommerce.
Connect AffiliatePress to WooCommerce
As we’ve already briefly mentioned, if WooCommerce is already on your site, and you’ve used the AffiliatePress setup wizard, you may have already connected the two. Otherwise, simply go to AffiliatePress > Settings > Integrations > WooCommerce > Enable.
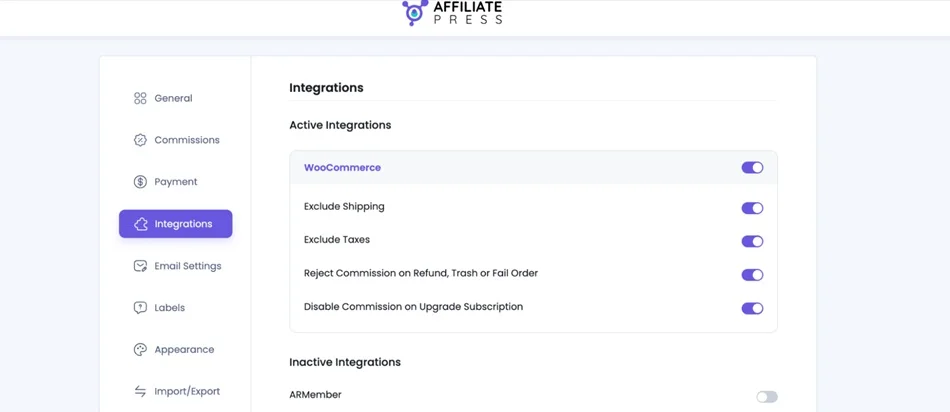
Here, you’ll have extra settings to customize commissions based on your affiliate program expectations.
- Include / exclude WooCommerce shipping fees.
- Include / exclude taxes.
- Enable/disable rejection of commission on refund, trash, or fail order.
- Enable/disable commissions on upgrading subscription.
Moreover, you can use the extra Products Selection AffiliatePress add-on, which makes it easy to narrow down the commissions for specific products.
This helps you select only specific Woo products that can trigger an affiliate sale. If this add-on is enabled, you will see more settings for it. Simply enter products and click “Save”. Only selected products earn commissions; others won’t, even via affiliate links.
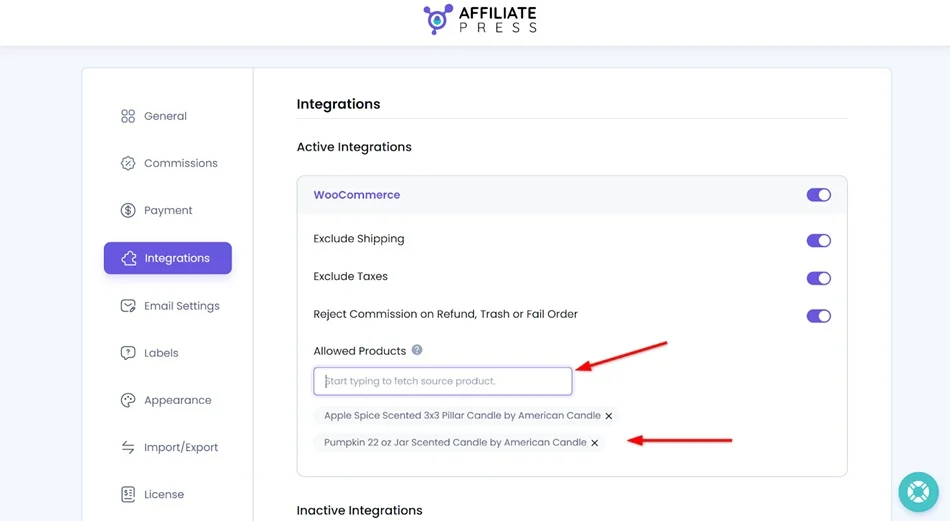
If both are set, Allowed Products override “Disable Commission for All Products” and still earn commissions.
What can you do on the WooCommerce side?
Default commission settings you’ve configured via AffiliatePress and WooCommerce Integration are generated for all of your Woo products.
However, you can disable commissions for specific products – this time right in WooCommerce. All you need to do is to go to individual products > find AffiliatePress settings > check the box that says ‘Disable commissions’.
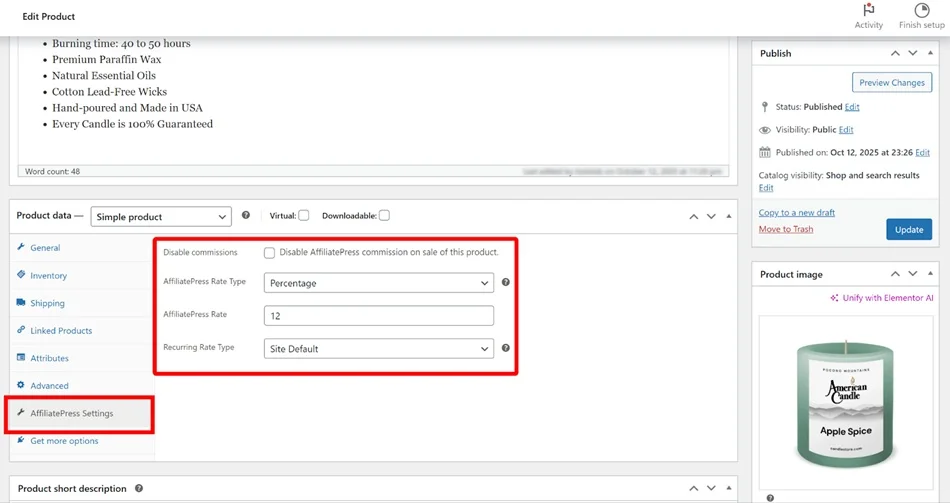
However, the disabled product option doesn’t work when “Commission Basis” is set to “Commission Per Order”.
Now, when the two plugins are connected, you can track affiliate commissions in WooCommerce through the AffiliatePress dashboard!
How Affiliate Tracking Works in AffiliatesPress
Based on your AffiliatePress settings, here is how tracking works.
- Affiliate gets a unique link / QR code / promo code / individual promo page (there are many tracking options available in AffiliatePress).
Normally, an affiliate (partner, influencer, blogger) is given a special URL like you’ve configured via settings, e.g. yourstore.com/?ref=affiliate123
- Customer clicks the link / reads a code / uses a promo code at checkout / lands on the specific promo page.
When someone clicks the link or does some of the actions above, the plugin stores that referral info (e.g. if it’s a link, via a cookie in the browser). Things are much easier to track with very specific promo codes.
- The customer makes a purchase.
If they buy something (right away or later, depending on cookie duration if it’s a URL), the plugin checks: “Was this customer referred by an affiliate?”
- Sale is attributed.
The affiliate gets credit for the sale, and a commission is calculated.
Tracking in AffiliatePress specifically includes and handles:
- Generating affiliate links
- Storing cookies
- Tracking conversions
- Calculating commissions
- Giving affiliates dashboards
- Providing you with analytics on visits
- Tools for automated payouts.
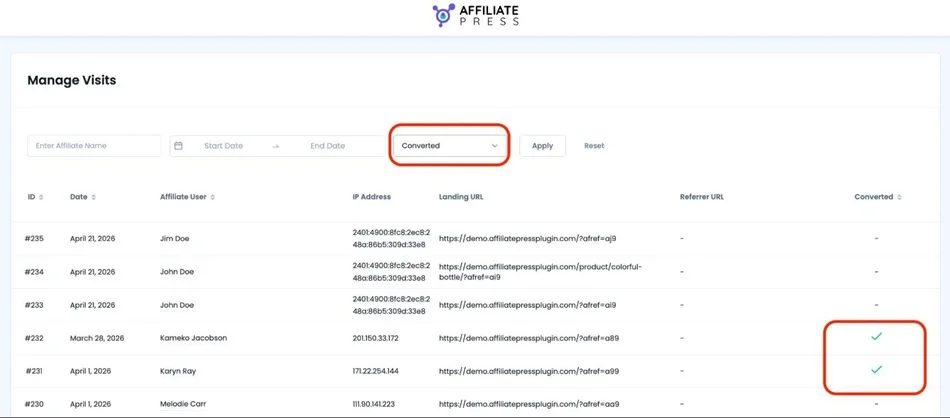
For these actions, you have many tools. For example, use the Visits menu to see who clicked what and when.
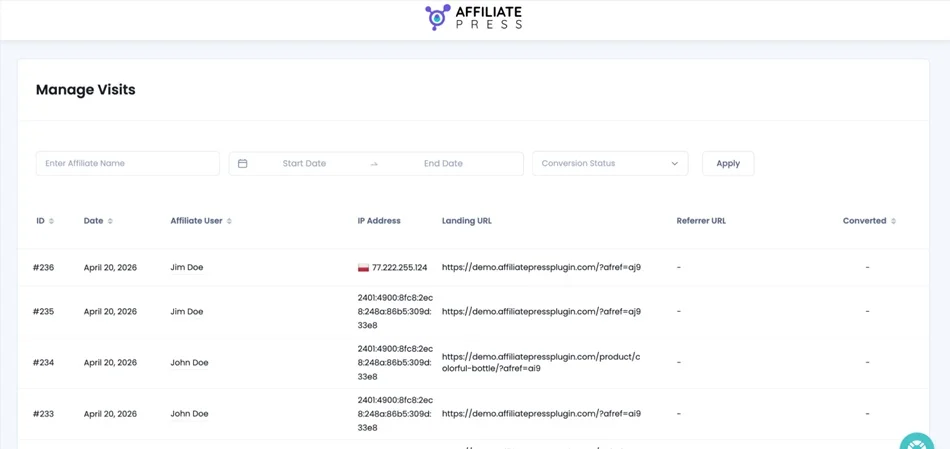
To track WooCommerce conversions through affiliates, simply sort the table by conversions:
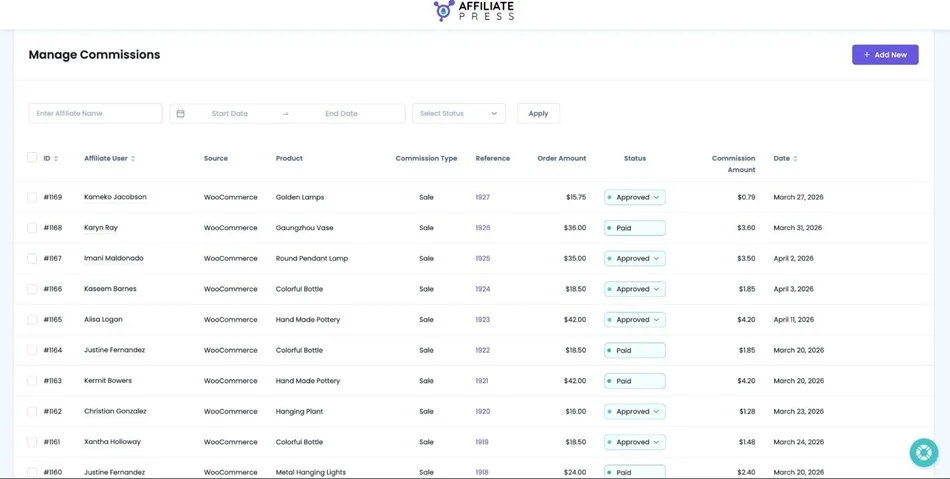
In the Commissions menu, you can track and manually add payouts.
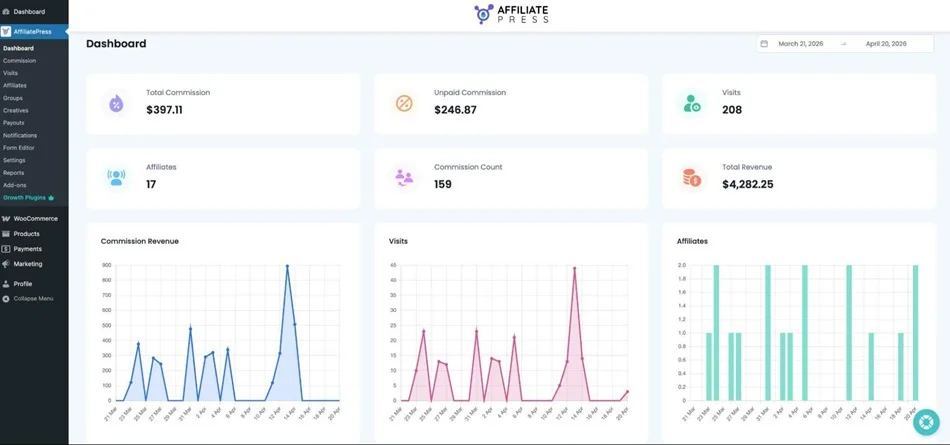
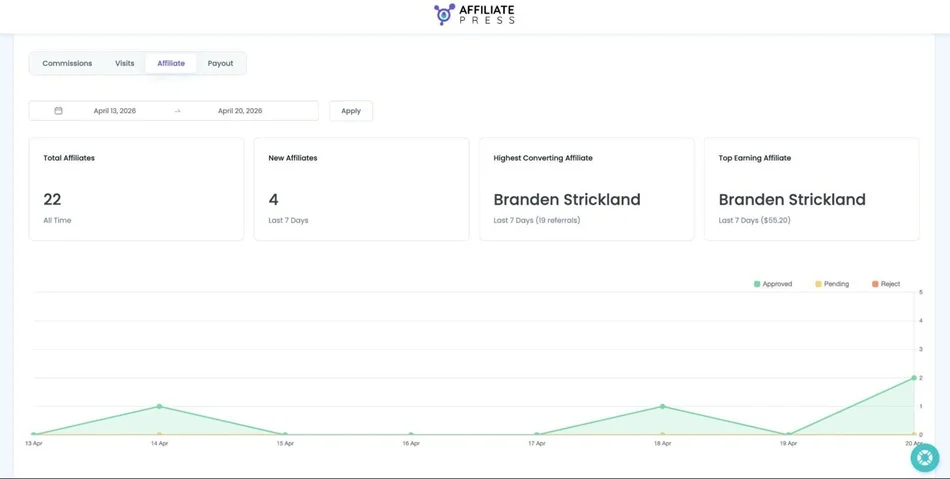
The Reports menu shows you the stats per specific category – affiliates, visits, and payouts.
So, every purchase of your WooCommerce products through affiliate attributes is fully tracked with AffiliatePress, without requiring you to do any manual work on a regular basis. The basic setup and connection is enough!
Concluding: What Does it Take to Set Up Affiliate Tracking in WooCommerce?
Let’s sum up on what it takes to set up affiliate tracking for WooCommerce using AffiliatePress:
- As an affiliate management plugin with support for WooCommerce, AffiliatePress is easily connected to your store.
- In AffiliatePress, you create commission rules, flat or percentage, per order or per product – with many other flexible settings.
- If you use the ‘Commission per product’ option, you can disable the commission for individual products in WooCommerce.
- You can track affiliate sales of your WooCommerce products through affiliate URLs+cookies, dedicated landing pages, QR codes, and promo codes.
- You can easily see all the stats, commissions, visits, and payouts in your AffiliatePress dashboard. Your affiliates can also have personal accounts with helpful content and tracking options.
So, where do you start? AffiliatePress + WooCommerce is a great combo to help you set up an affiliate program and track sales accurately with modern, professional tools.
Related articles: